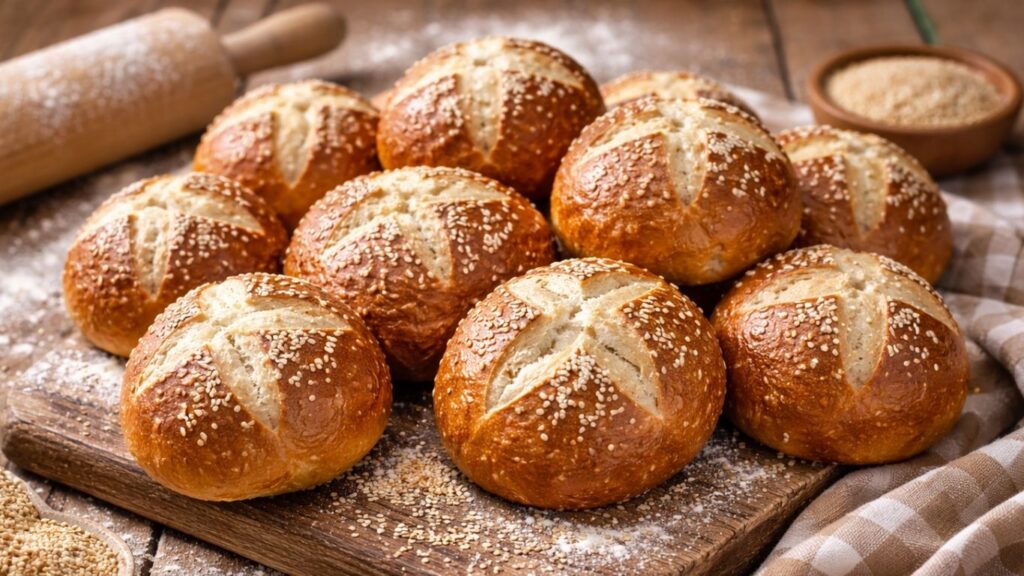
Pretzel buns have something truly special about them – that beautiful deep golden crust, slightly chewy on the outside, and wonderfully soft and fluffy on the inside. These homemade pretzel buns have a rich flavor and signature pretzel finish, making them perfect for burgers, sandwiches, or simply enjoyed warm on their own. If you love baking soft bread at home, be sure to also try my colored burger buns for more delicious ideas.
In this pretzel buns recipe, you’ll create classic pretzel-style buns using simple pantry ingredients and an easy step-by-step method. The dough comes together quickly and is soft, smooth, and easy to work with, giving you perfectly shaped buns every time. If you are new to baking, you can also learn more about the traditional pretzel technique on Wikipedia to understand why the baking soda bath gives pretzel buns their signature crust and flavor.
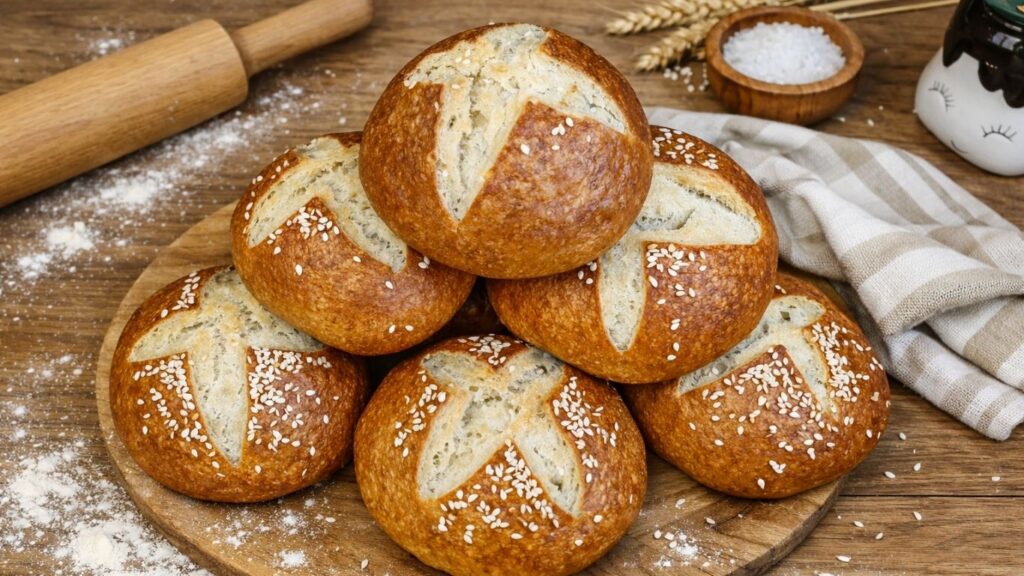
What makes these pretzel buns truly special is their classic baking soda bath before baking, which gives these homemade pretzel buns their authentic pretzel flavor, beautiful golden color, and slightly chewy crust. It may sound like an extra step, but it’s actually very simple and makes a huge difference in the final result of your pretzel buns recipe.
These soft homemade pretzel buns are flavorful and perfect for any occasion, from juicy burgers to gourmet sandwiches or even as a side for soups and salads. Once you try these freshly baked pretzel buns straight out of the oven, you’ll see why they are so loved and absolutely worth making from scratch.
MY LATEST VIDEOS
QUICK INFO
- Prep Time: 15 minutes
- Rest Time: 1 hour
- Cook Time: 20 minutes
- Boiling Time: 30 seconds per bun
- Total Time: 1 hour 35 minutes
- Servings: 8 buns
- Difficulty: Easy
Ingredients You’ll Need
These homemade Pretzel Buns are made with a simple yeast dough and briefly boiled in a baking soda bath before baking, which gives them their signature chewy crust and deep golden color.
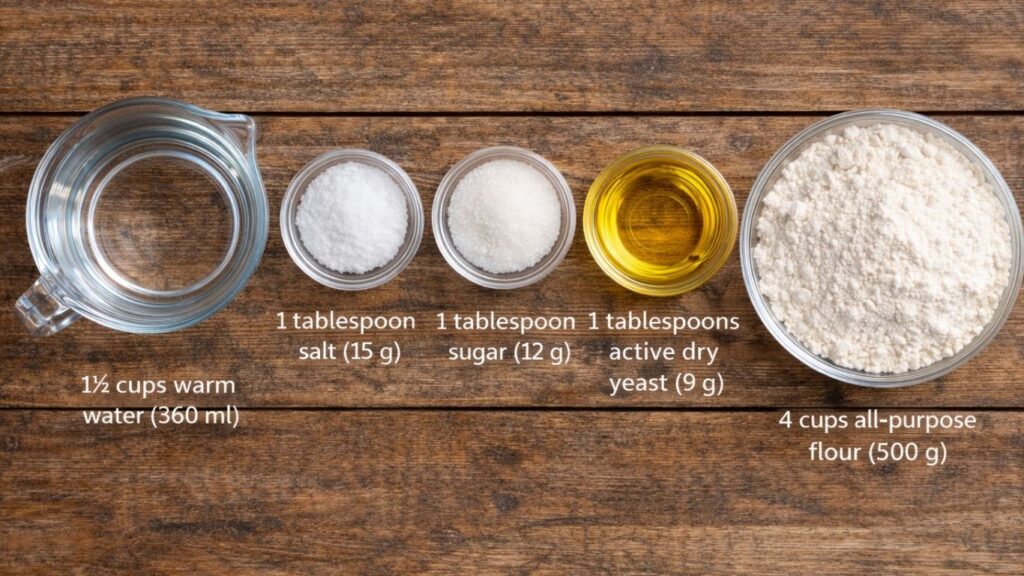
Warm water: Activates the yeast and provides the moisture needed for a soft dough. Active dry yeast: Helps the buns rise and creates a light, fluffy interior. Granulated sugar: Feeds the yeast and helps it activate properly. Salt: Adds flavor to the dough and balances the slight sweetness. Oil: Keeps the dough soft and tender. All-purpose flour: Provides structure while still allowing the buns to stay soft and airy. Baking soda: Added to the boiling water to create the characteristic pretzel flavor, chewy crust, and deep golden-brown color. Sesame seeds: Add a light crunch and a bakery-style finish to the tops of the buns.
HOW TO MAKE PRETZEL BUNS
1. Activate the yeast
Start by pouring the warm water into a bowl. The water should be pleasantly warm to the touch – not hot – so it can gently activate the yeast.
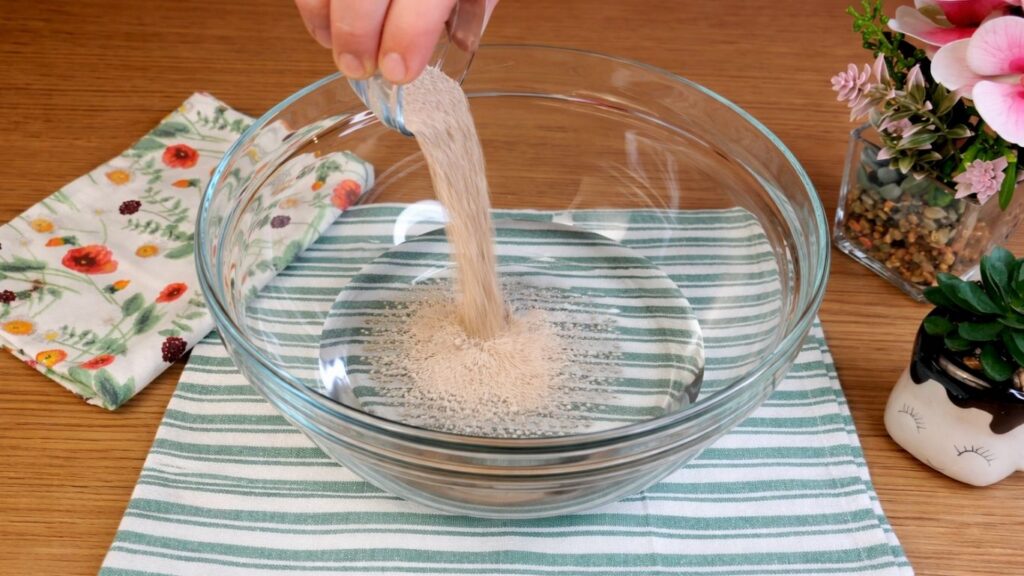
Add the sugar to the water and stir until it dissolves. Then add the active dry yeast and mix gently until the yeast is fully dissolved in the liquid.
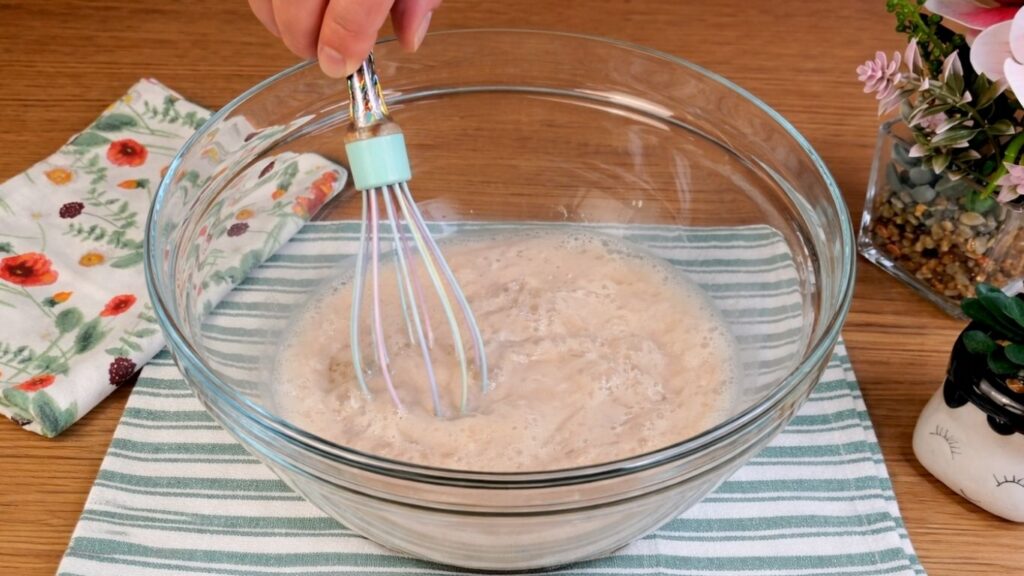
Cover the bowl and let it sit undisturbed for about 5-10 minutes. During this time, the yeast will begin to activate and form a light, foamy layer on the surface. This is a sign that the yeast is alive and ready to work.
This simple step is very important, because properly activated yeast will help your pretzel buns rise beautifully and create that soft, fluffy texture inside.
2. Mixing and kneading the dough
Once the yeast is activated and nice and foamy, it’s time to start forming the dough.
Add the oil to the yeast mixture, then add the salt and mix gently to combine everything. Gradually start adding the sifted flour, one portion at a time, mixing with a spoon or spatula until the dough begins to come together.
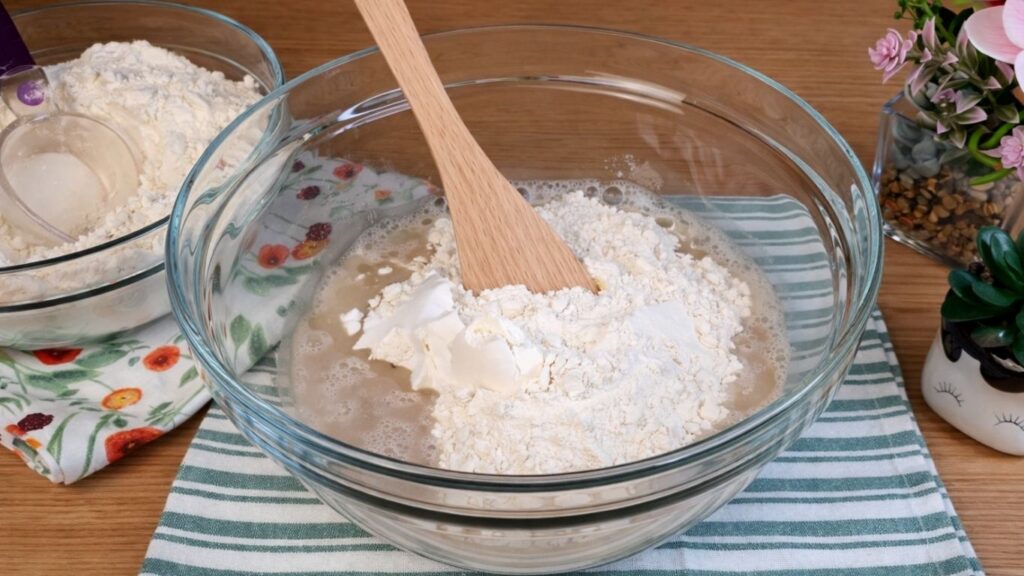
When the dough starts to form, transfer it onto a lightly floured work surface. Using your hands, knead the dough for about 5 minutes, until it becomes smooth, soft, and nicely combined. The dough should feel soft and slightly elastic, but not sticky.
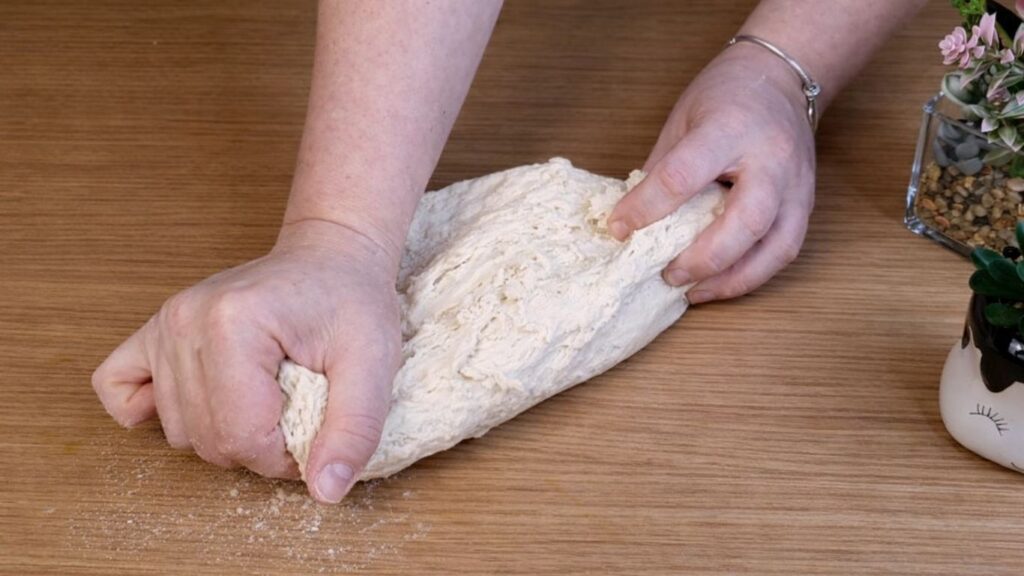
If needed, you can lightly dust the surface with a small amount of flour while kneading, just enough to prevent sticking, but be careful not to add too much so the buns stay soft and light.
Proper kneading helps develop the gluten structure, which gives your pretzel buns their beautiful shape and soft, airy texture after baking.
3. Rising the Dough
Once the dough is smooth and kneaded, shape it into a soft ball and place it into a lightly oiled bowl. Turn the dough once so that all sides are lightly coated with oil. This prevents it from drying out while it rises.
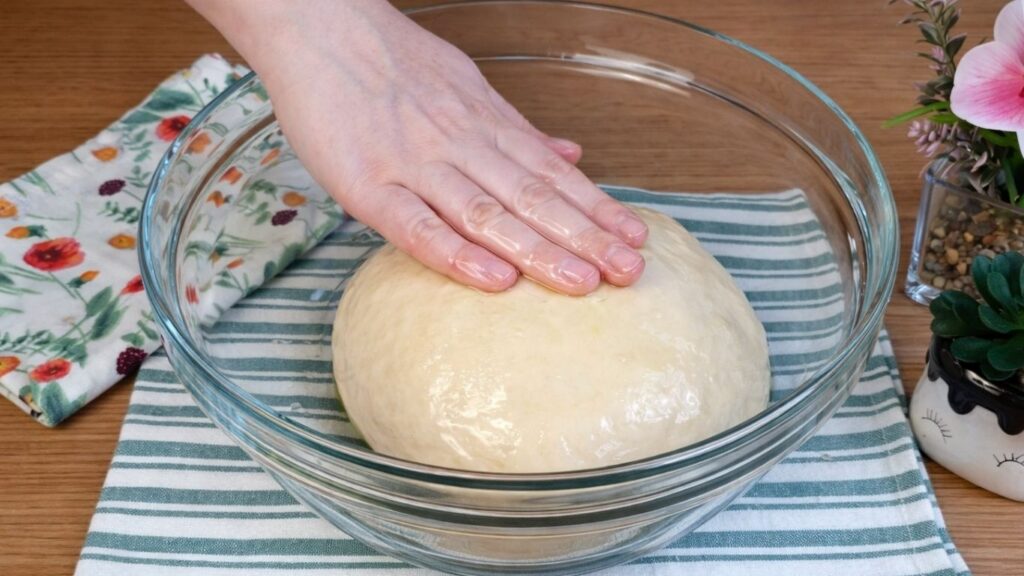
Cover the bowl with a clean kitchen towel or plastic wrap and place it in a warm, draft-free spot. Let the dough rest and rise for about 45-60 minutes, or until it has doubled in size.
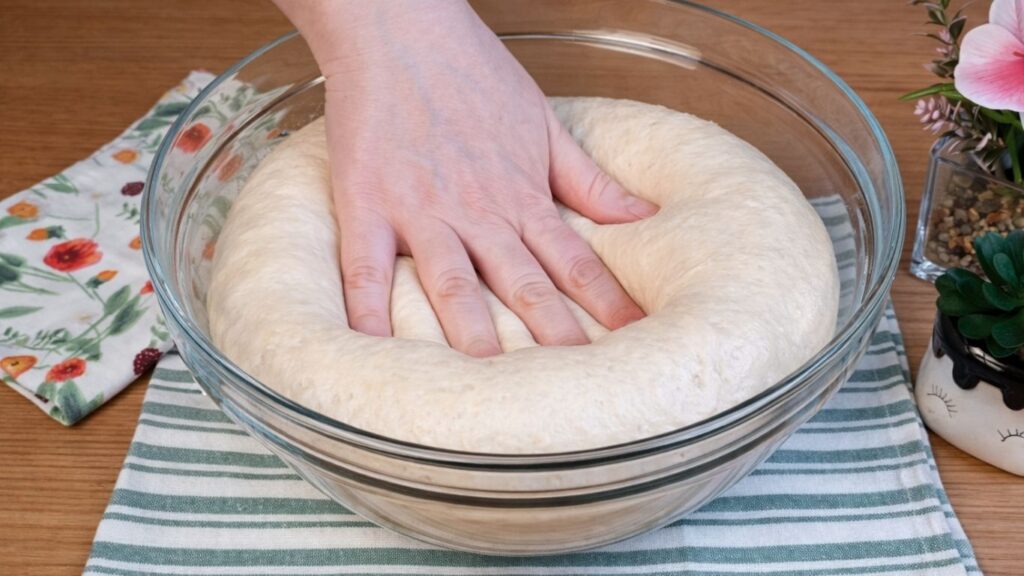
During this time, the yeast will continue to work, creating air bubbles inside the dough. This is what gives your pretzel buns their light, airy texture and soft interior.
Once the dough has risen and looks puffy and full of air, it is ready for the next step – shaping the buns.
4. Shaping the Buns
Once the dough has risen and doubled in size, gently transfer it onto a clean work surface. Lightly press the dough to release excess air, then divide it into 8 equal pieces.
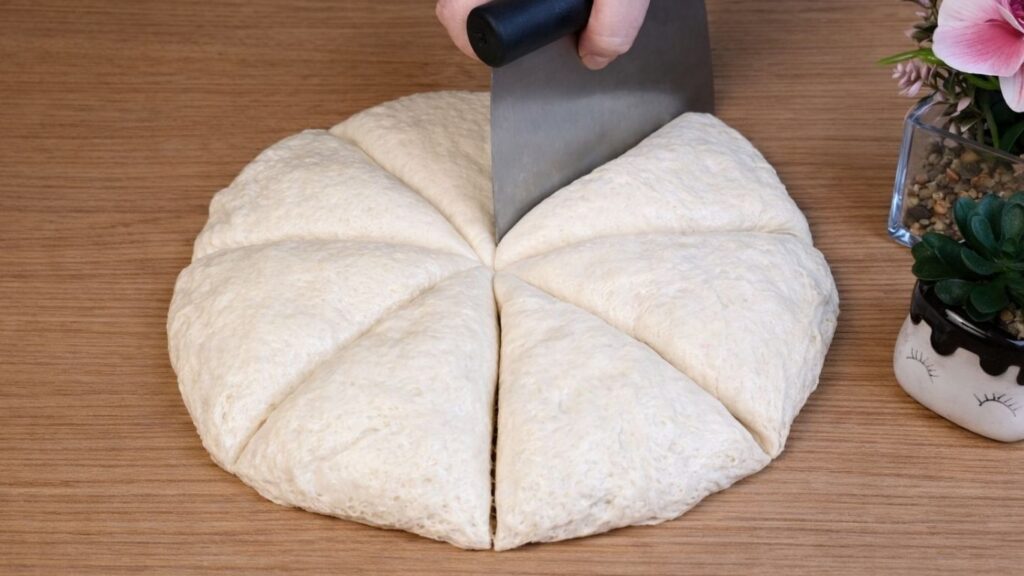
Take each piece of dough and shape it into a smooth ball by folding the edges toward the center and gently rolling it with your hands until the surface becomes soft and tight.
Place the shaped dough balls onto a clean wooden board, leaving a little space between each one so they don’t stick together.
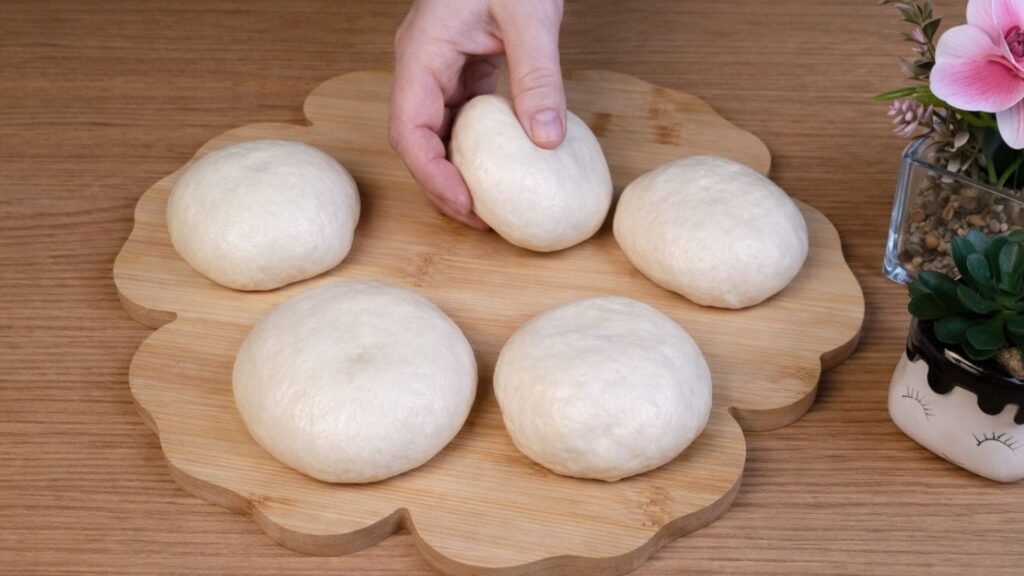
At this stage, your buns are nicely shaped and ready for the next step.
5. Boiling the Dough in Baking Soda Water
Now that the dough balls are shaped, it’s time for the classic pretzel step – the baking soda bath.
In a large pot, bring the water to a boil. Once it starts boiling, carefully add the baking soda. Be cautious, as the water will bubble up when the baking soda is added.
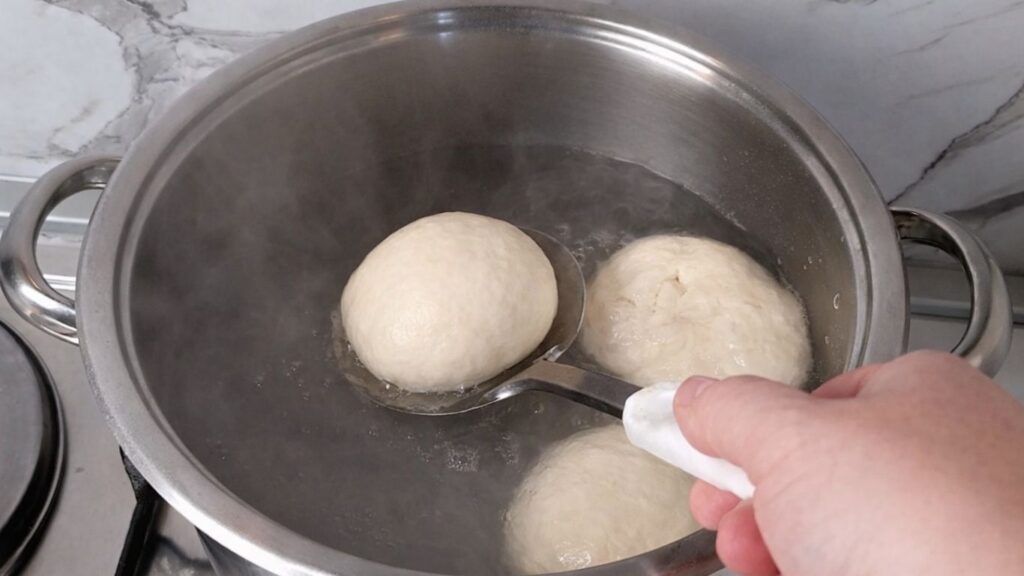
When the water is ready, gently place one dough ball at a time into the boiling water. Let each piece cook for about 1 minute in total, turning it halfway through, so both sides are evenly boiled.
Using a slotted spoon, carefully remove each dough ball from the water, allowing any excess liquid to drip off.
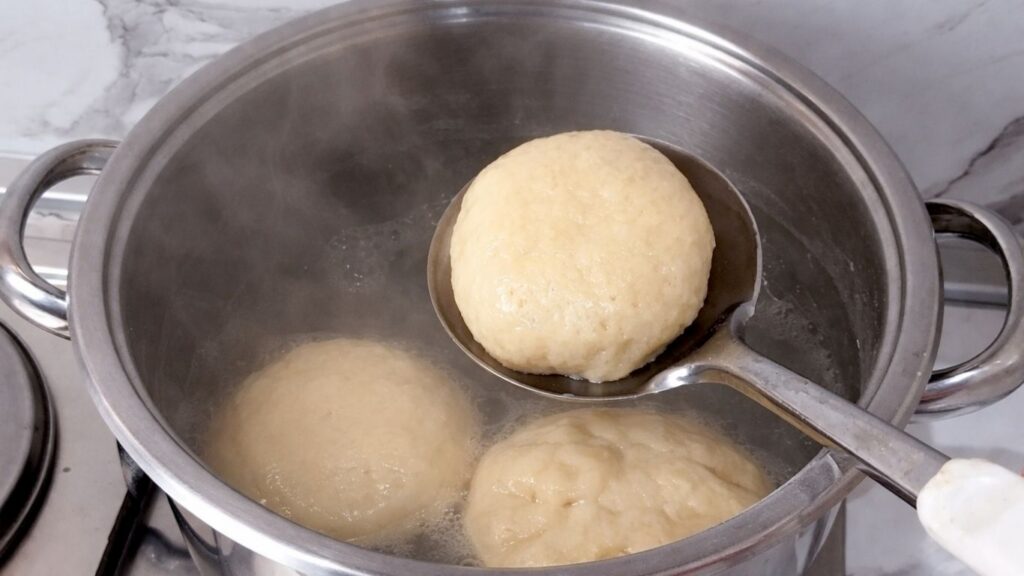
Place the boiled buns onto a baking tray lined with parchment paper, leaving a little space between them.
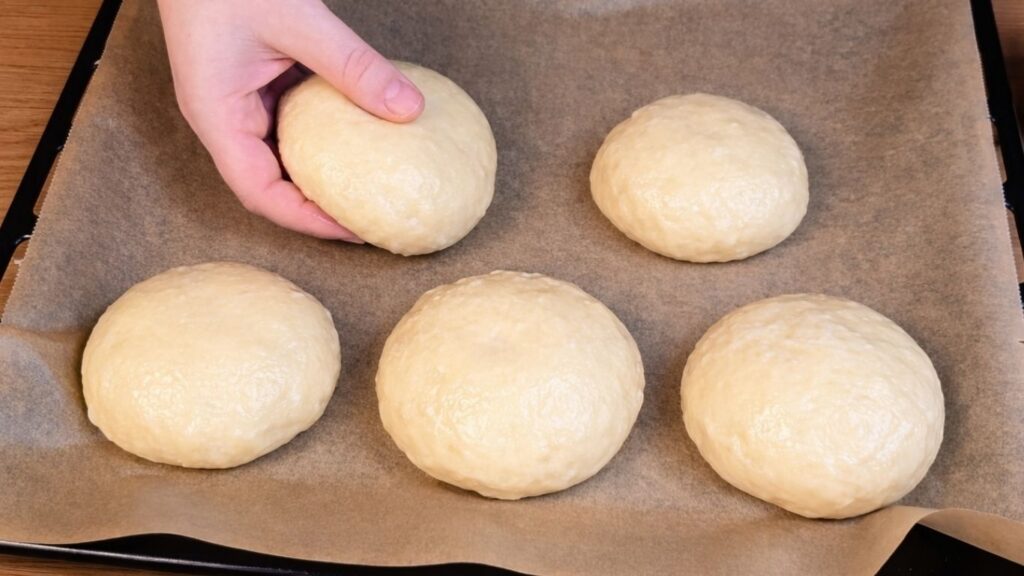
This step is what gives pretzel buns their signature chewy crust, deep golden color, and classic pretzel flavor.
6. Scoring and Topping
Once all the dough balls have been boiled and neatly arranged on the baking tray lined with parchment paper, it’s time to give them their signature pretzel finish.
Gently sprinkle the tops of each bun with sesame seeds, allowing them to lightly stick to the slightly moist surface of the dough. This adds a beautiful look and a delicate crunch after baking.
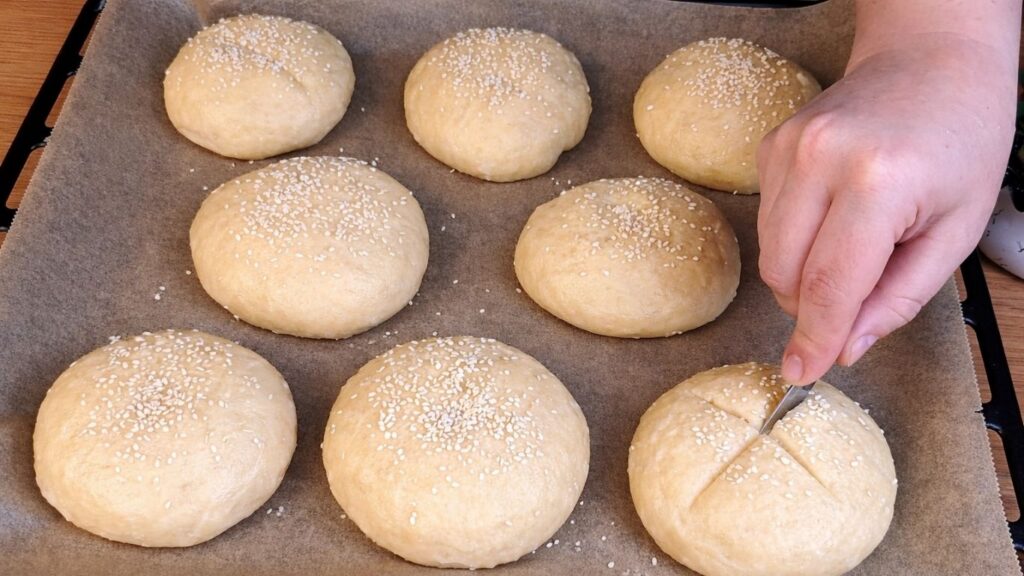
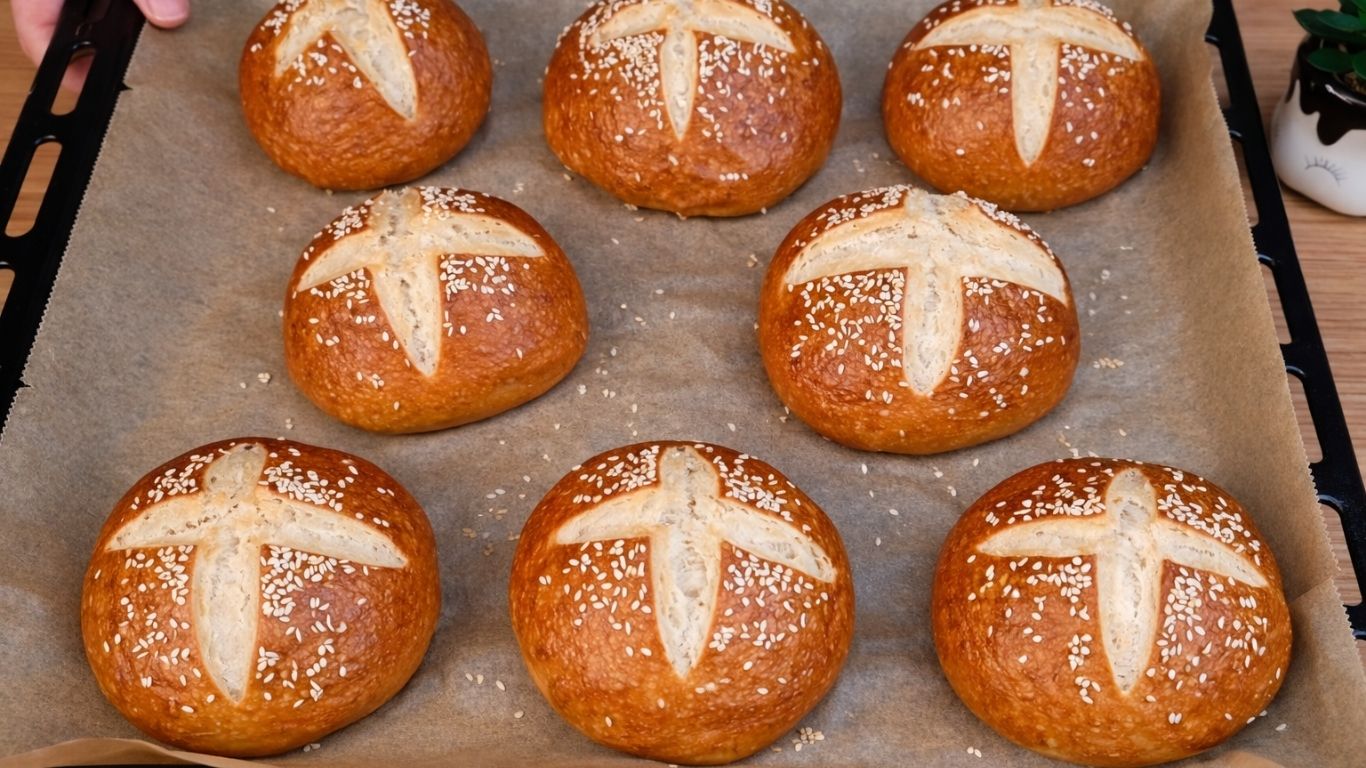
Then, using a sharp knife or a clean blade, carefully make a small cross (X) cut on the top of each dough ball. This step is very important – it allows the buns to expand evenly in the oven and creates that classic, bakery-style pretzel appearance.
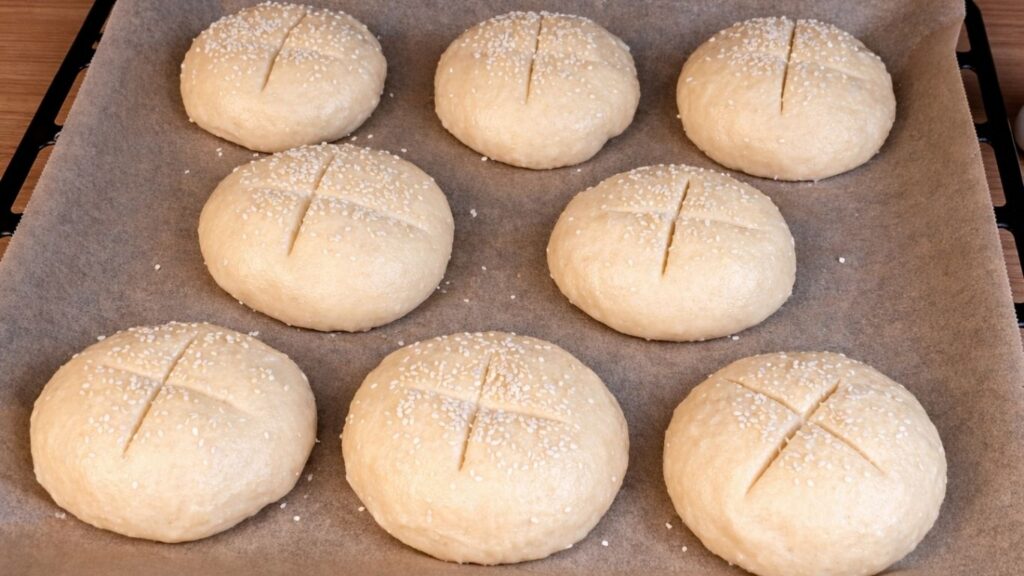
As the buns bake, the cuts will open slightly, revealing a soft, airy interior while the outside turns deep golden with that characteristic pretzel crust.
With this final touch before baking, your pretzel buns will look just as beautiful as they taste – soft on the inside, golden and slightly crisp on the outside, and perfectly shaped.
7. Baking
Once your pretzel buns are shaped, topped, and scored, they are ready to go into the oven.
Preheat your oven to 200°C (390°F) so it’s nice and hot before baking. Place the tray in the middle rack of the oven and bake the buns for about 15–20 minutes, or until they turn a deep golden brown color on the outside.
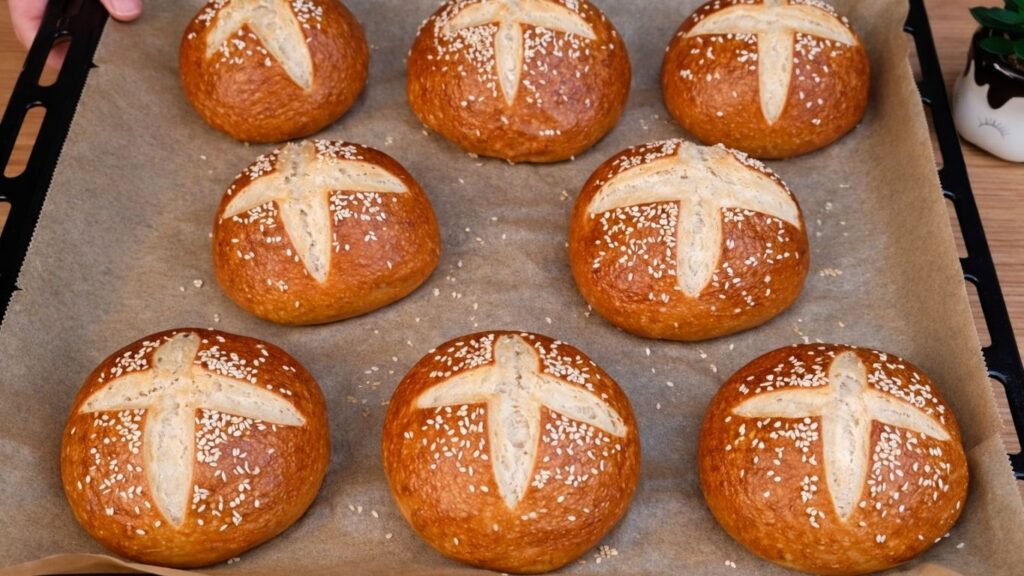
As they bake, your kitchen will fill with that irresistible homemade bread aroma, and the buns will develop their signature pretzel crust – slightly crisp on the outside while staying soft and fluffy on the inside.
Keep an eye on them during the last few minutes of baking to make sure they don’t over-brown. Once they are beautifully golden and baked through, remove them from the oven and let them cool slightly before serving.
8. Storage & Serving
Once the pretzel buns have cooled slightly, they are ready to enjoy.
These buns are best served fresh and slightly warm, when the inside is soft and fluffy and the outside has that beautiful pretzel crust. They are perfect for making homemade burgers, sandwiches, or simply enjoyed on their own.
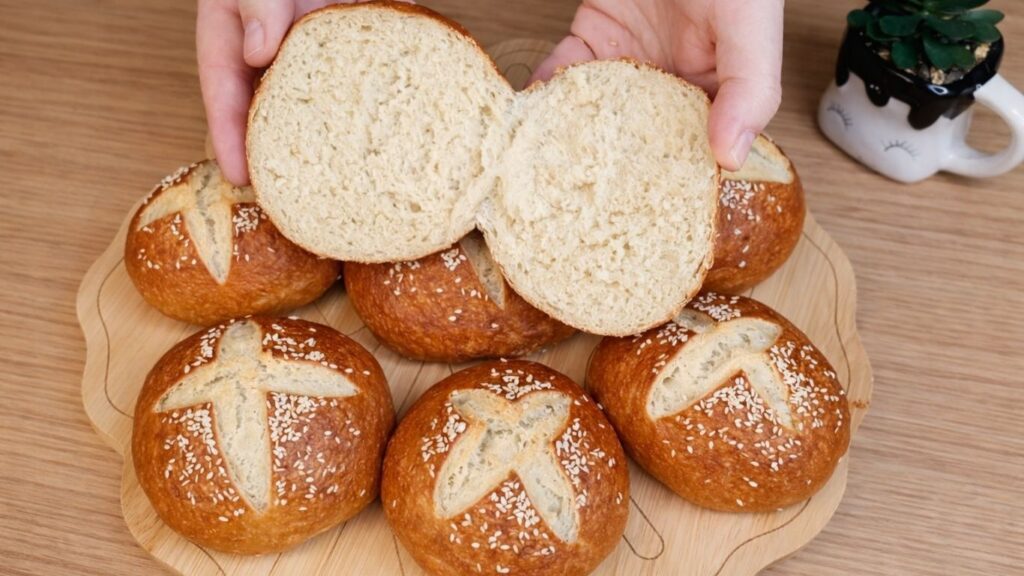
If you have any leftovers, store the buns in an airtight container or a sealed bag at room temperature for up to 2 days. To keep them soft, you can lightly warm them before serving.
For longer storage, the buns can also be frozen. Once completely cooled, place them in a freezer-safe bag and freeze for up to 2 months. When ready to use, let them thaw at room temperature and warm them slightly in the oven for that fresh-baked taste.
Enjoy the perfect balance of a soft, fluffy interior and a lightly crisp, golden pretzel crust homemade pretzel buns that are just as beautiful as they are delicious.
Frequently Asked Questions
Why do pretzel buns need to be boiled in baking soda water?
The baking soda bath is the key step that gives pretzel buns their signature flavor, deep golden color, and slightly chewy crust. The alkaline water changes the surface of the dough, helping it brown beautifully in the oven and creating that classic pretzel taste you can’t achieve with regular bread buns.
What happens if I skip the baking soda bath?
If you skip this step, the buns will still bake, but they will taste and look like regular bread rolls rather than pretzel buns. You will miss that deep golden color, shiny crust, and the unique pretzel flavor that makes these buns so special.
Why do my pretzel buns have a pale color after baking?
A pale color usually means the baking soda bath was too short, the water wasn’t hot enough, or the oven temperature was too low. For the best color, make sure the water is boiling properly, the buns are boiled for about 1 minute, and the oven is fully preheated before baking.
How do I get that classic pretzel crust texture?
The combination of boiling the dough and baking at a high temperature creates the perfect crust. The outside becomes lightly crisp and chewy, while the inside stays soft and fluffy. Brushing the buns lightly after baking can also help keep the crust tender while still maintaining that pretzel finish.
Why do we score the buns before baking?
Scoring the buns allows them to expand evenly in the oven and prevents the crust from tearing in random places. It also creates that beautiful bakery-style look, where the cuts open slightly and reveal the soft interior.
Can I use different toppings instead of sesame seeds?
Yes, you can easily customize the toppings. Coarse salt gives a classic pretzel flavor, while sesame seeds, poppy seeds, or even a mix of seeds add texture and a beautiful finish. You can also leave them plain for a softer, more classic bun.
Watch the full Pretzel Buns video
If you try this recipe, let me know in the comments how it turned out.
And don’t forget to subscribe to my YouTube channel for more delicious homemade recipes!
Nutrition (per 1 bun)
Calories: 230 kcal
Carbohydrates: 40 g
Protein: 6 g
Fat: 4 g
Saturated Fat: 0.5 g
Fiber: 2 g
Sugar: 1 g
Sodium: 430 mg
Conclusion
These homemade Pretzel Buns are soft and fluffy on the inside with a beautifully chewy, golden crust on the outside. The quick baking soda bath gives them that classic pretzel flavor and bakery-style finish that makes them extra special.
They are perfect for burgers, sandwiches, pulled chicken, or simply served warm with butter or your favorite dip. Once you try making pretzel buns at home, you may find yourself reaching for this recipe again whenever you want something a little more special than regular bread rolls.
Serve them slightly warm and enjoy their soft center, chewy crust, and delicious homemade flavor.
Happy baking!

Homemade Pretzel Buns
Ingredients
Equipment
Method
- Activate the yeast: Pour the warm water into a large mixing bowl. Add the sugar and stir until dissolved. Add the active dry yeast and gently mix. Cover and let stand for 5-10 minutes, until foamy.
- Make the dough: Add the oil and salt to the activated yeast mixture. Gradually add the flour, mixing until a soft dough begins to form.
- Knead: Transfer the dough to a lightly floured work surface and knead for about 5 minutes, until smooth, soft, and elastic. Add only a small amount of additional flour if needed.
- First rise: Shape the dough into a ball and place it in a lightly oiled bowl. Cover with plastic wrap or a clean kitchen towel and let rise in a warm place for 45–60 minutes, or until doubled in size.
- Shape the buns: Gently press the risen dough to release excess air. Divide it into 8 equal pieces and shape each piece into a smooth, tight ball.
- Prepare the baking soda bath: Bring 2 liters of water to a boil in a large pot. Carefully add the baking soda. Add it slowly because the water may bubble up.
- Boil the buns: Carefully place the buns into the baking soda bath, working in batches if necessary. Boil each bun for about 1 minute total, turning after 30 seconds.
- Drain: Remove each bun with a slotted spoon, allow the excess water to drain, and place it on a parchment-lined baking sheet.
- Top and score: Sprinkle the tops with sesame seeds. Using a sharp knife or blade, cut a small X into the top of each bun.
- Bake: Bake in a preheated 390°F (200°C) oven for 15–20 minutes, or until the buns are deeply golden brown.
- Cool: Remove from the oven and allow the buns to cool slightly before serving.
Notes
- The water used to activate the yeast should be warm, not hot.
- If the yeast does not become foamy after 5-10 minutes, it may no longer be active.
- Keep the dough soft and avoid adding too much flour.
- Add the baking soda to the boiling water carefully because it can foam quickly.
- Boil each bun for approximately 30 seconds per side.
- Do not skip the baking soda bath-it creates the characteristic pretzel crust, color, and flavor.
- Score the buns after boiling and before baking so they can expand evenly in the oven.
- Baking time may vary slightly depending on your oven.
- Let the buns cool slightly before slicing so the interior can set properly.