📖 Table of Content:
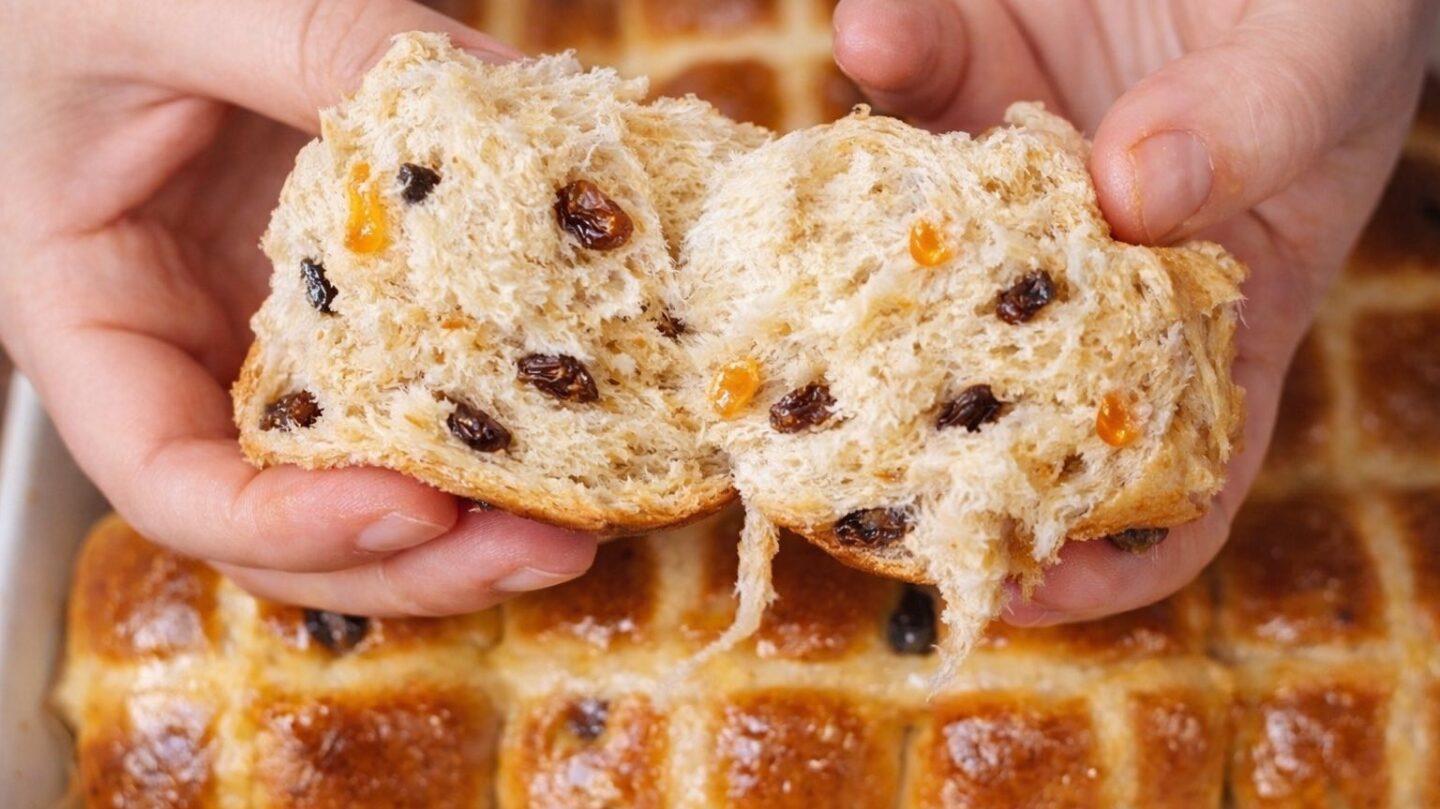
These soft and fluffy hot cross buns are the perfect homemade treat for Easter or any cozy baking day. Made with simple ingredients, warm spices, and a light, airy dough, these hot cross buns are incredibly soft inside with a beautifully golden top. This easy step-by-step recipe will help you create bakery-style hot cross buns at home.
If you love soft, fluffy homemade baking, these hot cross buns will quickly become one of your favorite recipes. They are lightly sweet, filled with warm spices and perfectly soft on the inside. The beautiful cross on top makes them perfect for Easter, but they are just as delicious any time of the year. You can read more about their tradition here: Hot Cross Buns.
What makes them truly special is the incredible aroma that fills your kitchen while they bake – the combination of fresh orange zest, warm cinnamon, and a touch of nutmeg creates the most comforting, bakery-style scent that makes your whole home smell amazing.
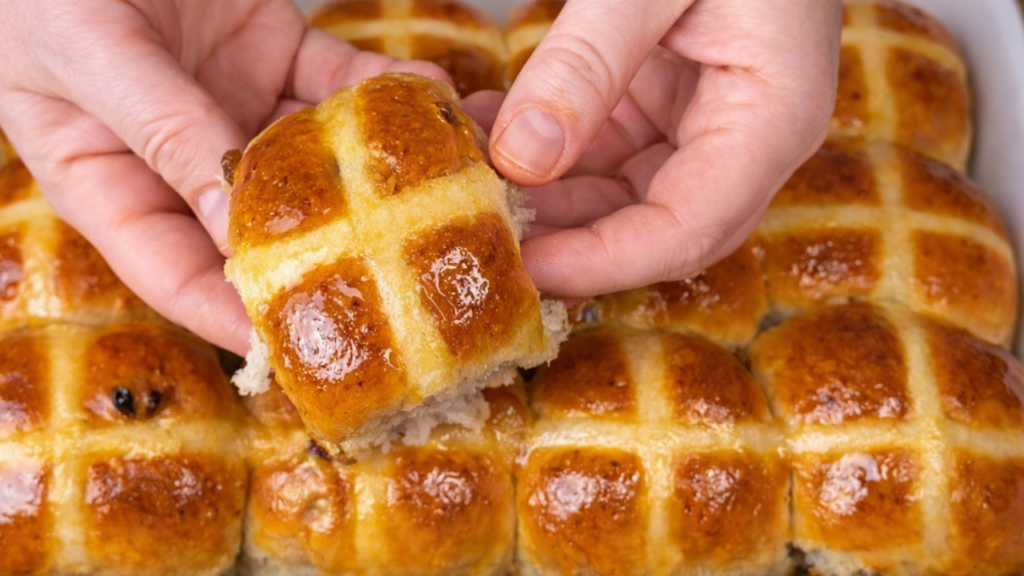
Enjoy them fresh and warm from the oven with a little butter or jam for the ultimate soft and cozy treat. If you enjoy baking soft breads, you can also try my homemade burger buns for another delicious recipe.
Quick Recipe Info
- Prep time: 20 minutes
- Rising time: 1 hour
- Bake time: 30 minutes
- Total time: 1 hour 50 minutes
- Servings: 12 buns
MY LATEST VIDEOS
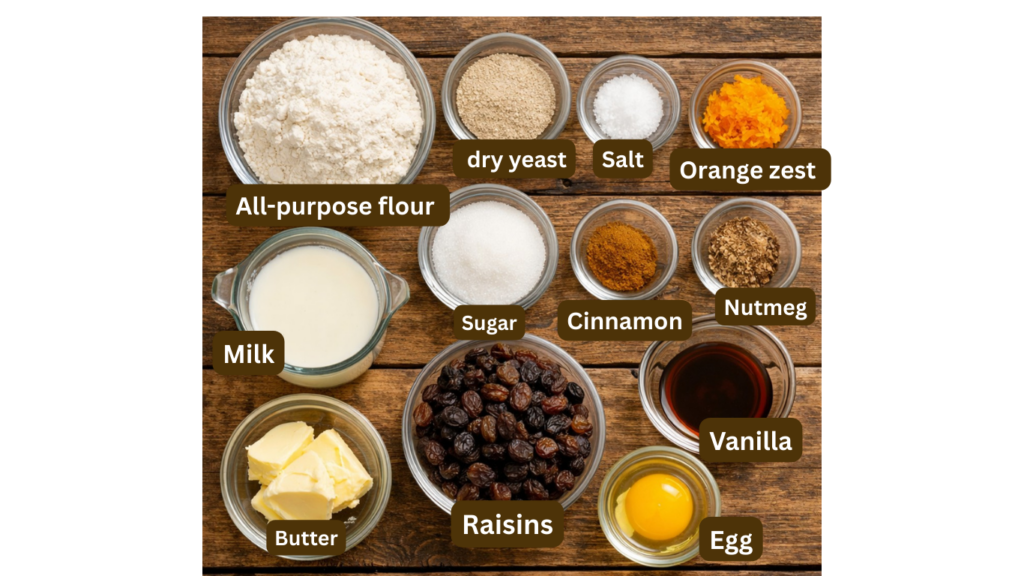
WHAT YOU NEED TO MAKE THIS RECIPE
FLOUR
Flour is one of the most important ingredients when making hot cross buns, so it’s worth giving it a little extra attention. I always recommend sifting the flour first – this helps remove any small lumps that can sometimes form during storage and also makes the dough lighter and smoother.
Sifting also aerates the flour, which helps create that soft, fluffy texture we all love in homemade hot cross buns. Another important tip is not to add all the flour at once. Different flours absorb liquid differently, so it’s best to add it gradually until you get a soft, slightly tacky dough that doesn’t stick too much to your hands.
If you add too much flour, the buns can turn out dense and dry – and we want our hot cross buns light, airy, and pillowy soft.
BUTTER
Butter should be at room temperature for at least 60 minutes before using it when making hot cross buns. Take it out of the fridge in advance so it can soften properly. Softened butter blends much more easily into the dough, helping you achieve a smooth, well-kneaded texture and perfectly soft hot cross buns.
Using butter at the right temperature also gives your buns a beautifully soft, tender, and juicy crumb, making them rich and irresistible.
Milk
Milk should be warm, not hot, so the yeast can properly activate and start working when making hot cross buns. If the milk is too cold, the yeast will be slow and the dough won’t rise well. If it’s too hot, it can kill the yeast completely.
The perfect temperature is lukewarm – just slightly warm to the touch. This helps the dough rise beautifully and gives your hot cross buns that soft, airy texture we all love.
Yeast
Always check the expiration date on your yeast before using it when making hot cross buns, and make sure it hasn’t been sitting open for too long. Yeast is the key to getting your dough to rise properly, so it’s very important that it is fresh and active.
If the yeast is old or inactive, the dough won’t rise as it should, and your hot cross buns can turn out dense instead of soft and fluffy. To be sure it’s working, you can always activate it first in warm milk with a little sugar – it should become foamy after a few minutes.
Good, active yeast is what gives these hot cross buns their beautiful rise, light texture, and soft, airy crumb.
Egg
The egg should be at room temperature before using it when making hot cross buns. This helps it blend more easily into the dough and creates a smooth, even texture.
Cold eggs can slow down the yeast activity and make the dough harder to mix properly. When the egg is at room temperature, it helps the dough rise better and gives your hot cross buns a soft, tender and rich texture with a beautiful golden color.
Raisins
If you notice that your raisins are a bit too dry, it’s best to soak them in hot water for a few minutes, then drain them well before adding them to the dough for hot cross buns.
Dry raisins can absorb moisture from the dough while it bakes, which can make your hot cross buns turn out drier than desired. When the raisins are properly hydrated, they stay soft and juicy, and the dough remains moist, tender, and perfectly soft.
Orange zest
Orange zest adds a beautiful, fresh citrus aroma that makes these buns extra special. However, if you’re using non-organic oranges, it’s important to prepare them properly before zesting.
The peel of conventionally grown oranges can sometimes have wax, pesticides, or residue on the surface. To make it safe to use, simply soak the orange in salted water for a few minutes, then rinse it thoroughly under clean running water and gently dry it. This helps remove surface impurities so you can safely enjoy the natural flavor.
Always zest only the thin outer orange layer, avoiding the white pith underneath, as it can taste bitter. Properly prepared zest will give your buns a fresh, fragrant, bakery-style aroma that pairs perfectly with cinnamon and nutmeg.
For the dough:
- 325 g (2 ½ cups) all-purpose flour
- 150 ml(⅔ cup) lukewarm milk
- 50 g (¼ cup) sugar
- 2 tablespoons active dry yeast (≈ 18 g)
- ½ teaspoon ground cinnamon
- freshly grated nutmeg to taste (about ½ teaspoon)
- ¾ teaspoon salt
- 1 egg
- 50 g (3 ½ tablespoons) butter softened
- 1 teaspoon vanilla extract
- 3/4 cup raisins (120 g)
- zest of ½ orange
For the crosses:
- 1/2 cup flour (60 g)
- 1/2 cup water (120 ml)
For the glaze:
- 2 tbsp apricot jam (40 g)
- 1 tbsp water (15 ml)
HOW TO MAKE HOT CROSS BUNS
Instructions
1. Prepare the dry ingredients
In a large bowl, combine the flour, yeast, salt, sugar, raisins, orange zest, cinnamon, and nutmeg. Gently mix all the dry ingredients together until everything is evenly distributed. This step helps ensure that the spices, zest, and raisins are spread throughout the dough, so every bite is full of warm flavor and aroma.
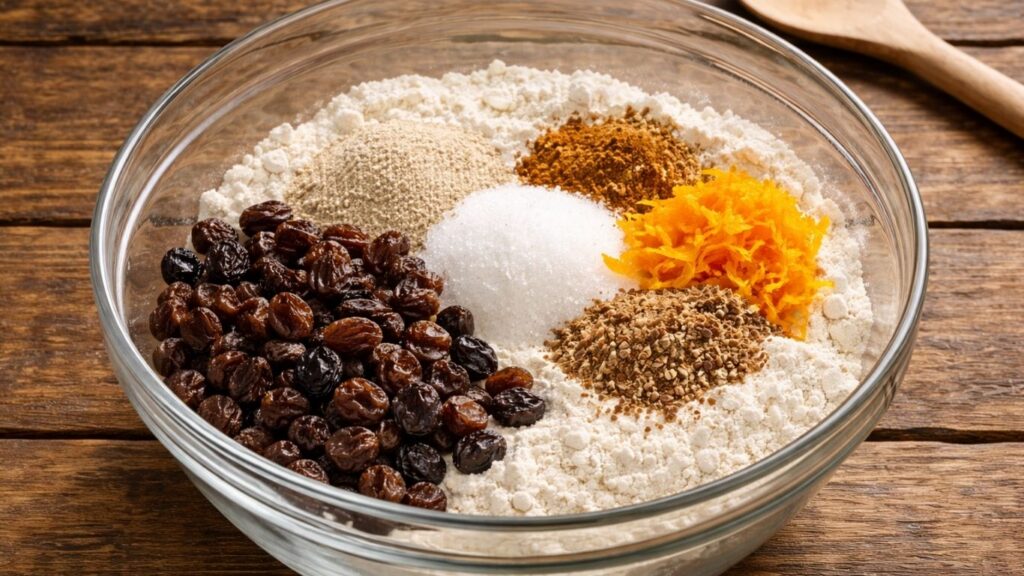
Take a moment to break up any small clumps of yeast or flour as you mix, and make sure the raisins are evenly coated with flour – this will help prevent them from sinking and keep them nicely distributed in the buns.
Once everything is well combined, your dry mixture is ready for the next step.
2. Mix the wet ingredients
In a separate bowl, whisk together the warm milk, eggs, and vanilla until the mixture is smooth and fully combined. The milk should be gently warm, not hot, so it helps activate the yeast and blends nicely with the eggs.
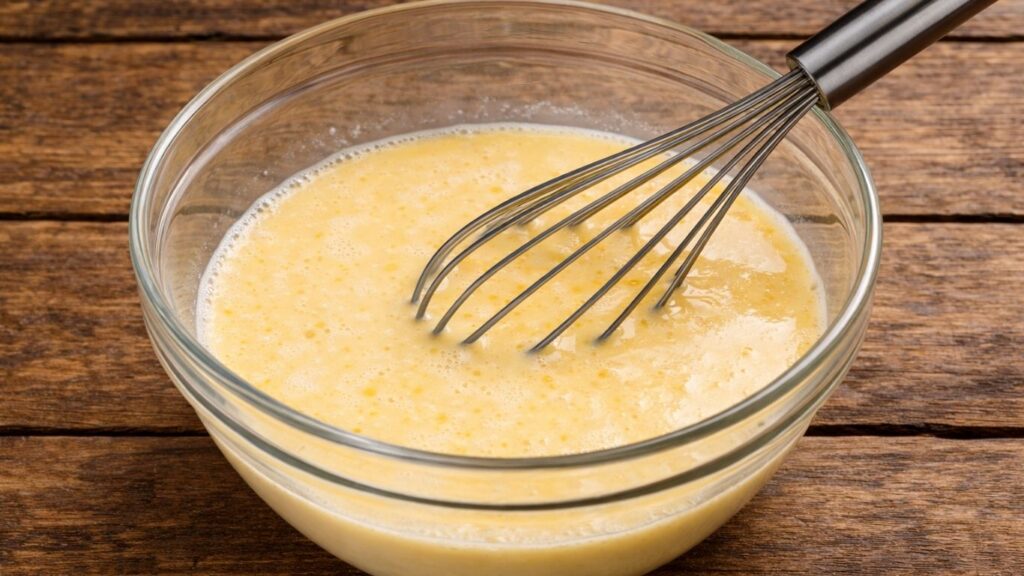
Whisk everything well until you get a light, uniform mixture with no streaks of egg remaining. This step ensures that all the wet ingredients are evenly combined before adding them to the dry mixture, which helps create a soft, smooth, and well-balanced dough.
3. Make the dough
Pour the wet ingredients into the bowl with the dry ingredients. Using a wooden spoon or your hands, gently mix everything together until the dough starts to come together into a soft, slightly sticky mass.

Once the dough forms, transfer it to a lightly floured surface and begin kneading. Knead the dough for about 8–10 minutes, until it becomes smooth, soft, and slightly elastic. It should feel soft to the touch and only lightly tacky, but not overly sticky.
If needed, sprinkle in a little extra flour while kneading, but be careful not to add too much – we want the dough to stay soft so the buns turn out light, fluffy, and tender
4. First rise
Place the dough into a lightly oiled bowl, turning it once so it is lightly coated on all sides. Cover the bowl with plastic wrap or a clean kitchen towel to prevent the dough from drying out.
Let the dough rest and rise in a warm, draft-free place until it doubles in size. If your kitchen is cool, you can gently warm your oven for a minute or two, then turn it off and place the bowl inside – this creates a cozy, warm environment that helps the yeast work and the dough rise beautifully.
Proper proofing will give you soft, light, and fluffy buns with a perfect airy texture.
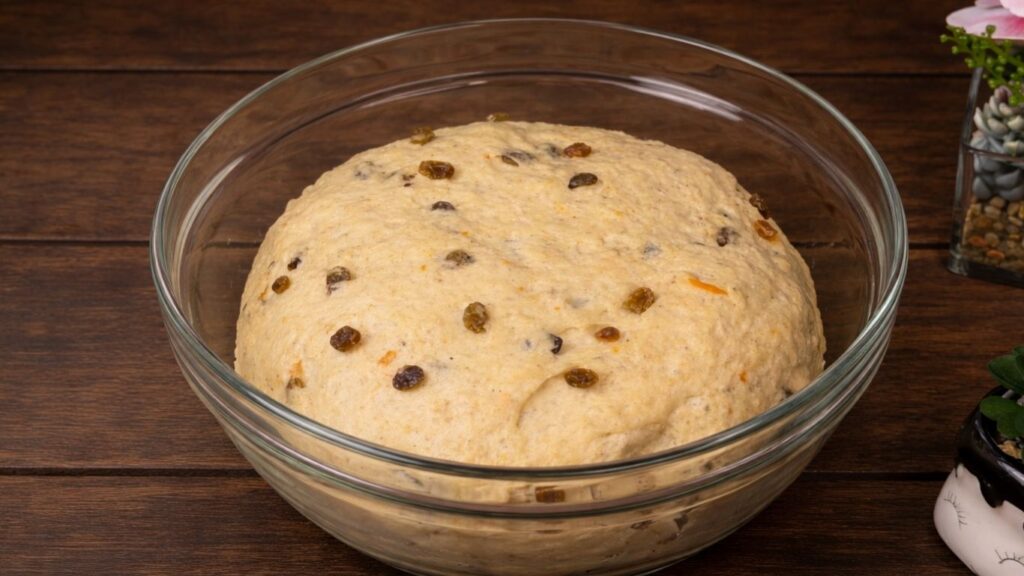
5. Let the dough rise
Leave the dough to rise in a warm place for about 1 hour, or until it has doubled in size. The exact time can vary slightly depending on the warmth of your kitchen, so focus on the look and feel of the dough rather than the clock.
When it’s ready, the dough should appear light and puffy, and if you gently press it with your finger, the indentation should slowly spring back. This means the yeast has done its job and the dough is perfectly risen and ready for shaping.
Proper rising at this stage is key to getting soft, airy, and beautifully fluffy buns.
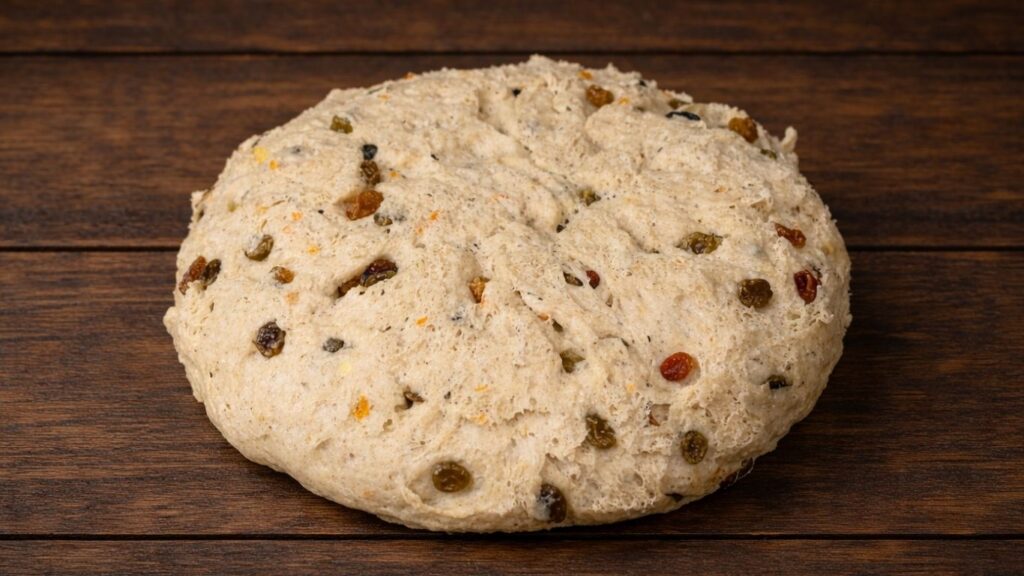
6. Divide the dough
Once the dough has doubled in size, gently transfer it onto a lightly floured surface. Lightly press the dough with your hands to release some of the air bubbles, then shape it into a rough ball so it’s easier to divide.
Using a knife or dough scraper, divide the dough into 12 equal portions. If you want perfectly even buns, you can weigh the dough and divide it evenly so each piece is the same size.
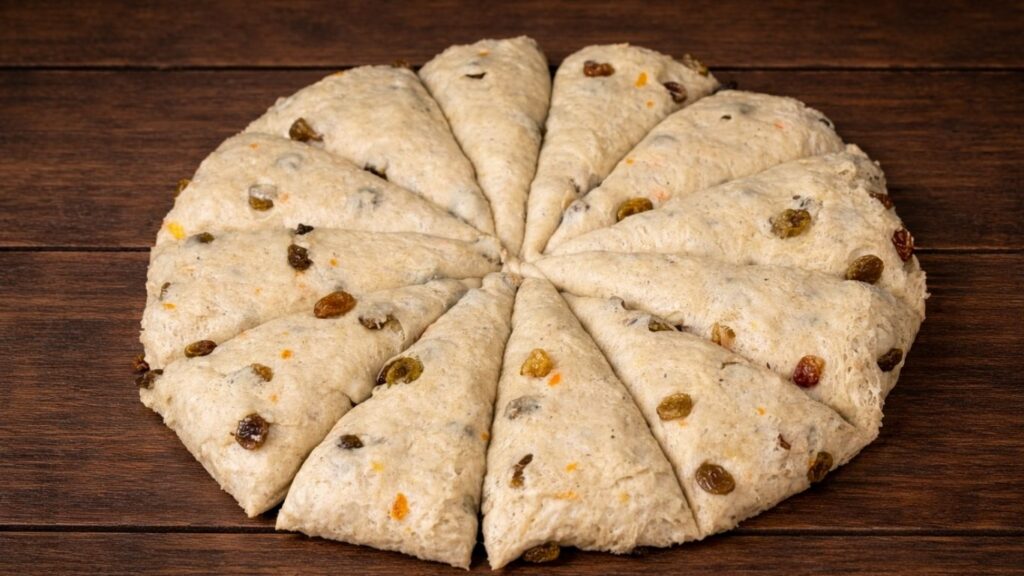
Keeping the portions equal will help all the buns bake evenly and rise beautifully, giving you a tray of soft, uniform, bakery-style buns
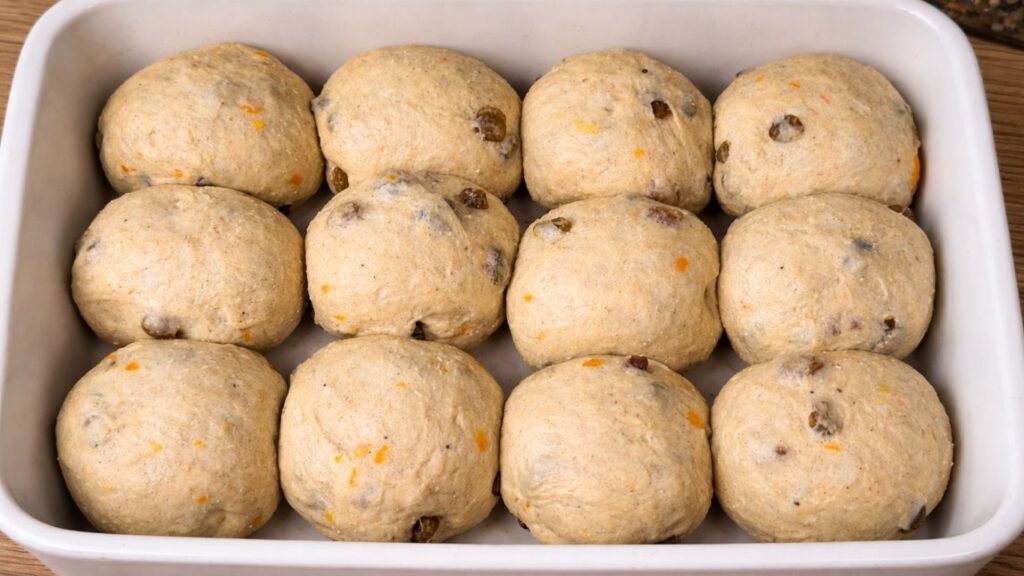
7. Shape the buns
Shape each portion into a smooth ball by gently tucking the edges of the dough underneath and rolling it lightly on the work surface until the top becomes smooth and tight. This step helps create a nice, even shape and a soft, fluffy interior.
Place the shaped buns onto a baking tray lined with parchment paper, leaving a little space between each bun so they have room to rise and expand. Arrange them neatly in rows for an even, beautiful bake.
Once shaped, the buns should look smooth, round, and evenly sized – ready for their final rise before baking. Let them rest for another 20 minutes so they can rise beautifully and become soft and airy before going into the oven.
8. Prepare the crosses
In a small bowl, mix together the flour and water until you get a smooth, lump-free paste. The consistency should be thick enough to hold its shape, but still soft enough to pipe easily.
Transfer the mixture into a piping bag (or a small plastic bag with the tip snipped off). Carefully pipe a cross on top of each bun, going in one direction across the row, then the other, so each bun gets a neat, classic cross.
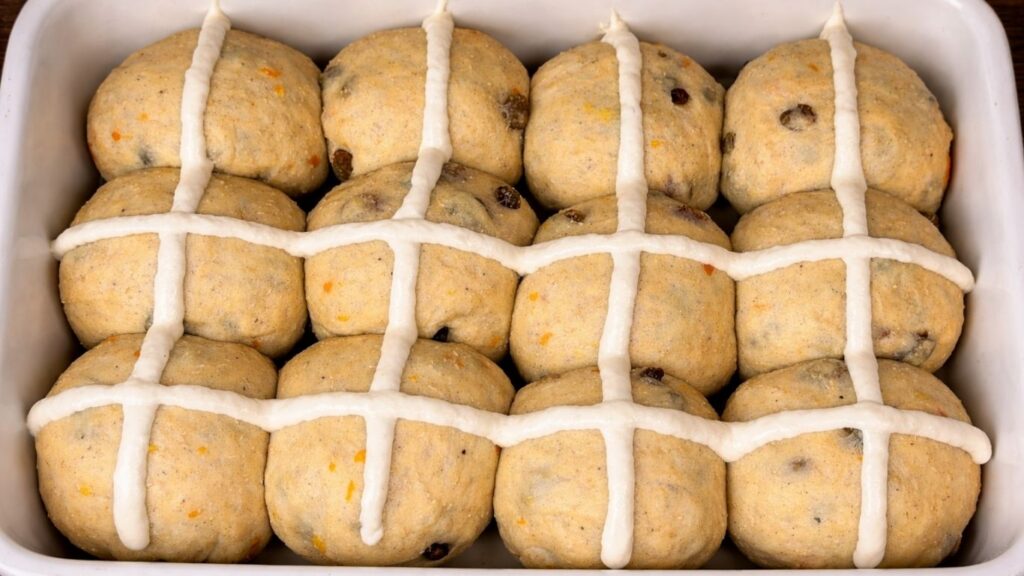
Take your time with this step – the cross gives the buns their traditional hot cross buns look and makes them extra beautiful once baked.
9. Bake the buns
Bake the buns in a preheated oven at 180°C (350°F) for about 25-30 minutes, or until they turn a beautiful golden brown on top. As they bake, your kitchen will fill with the warm aroma of spices and fresh bread, which is always the best sign that they’re almost ready.
Keep an eye on them towards the end of baking – the tops should be nicely golden, and the bottoms lightly browned. If needed, you can rotate the tray halfway through baking to ensure even color.
Once baked, the buns should look soft, lightly crisp on the outside, and perfectly fluffy inside.
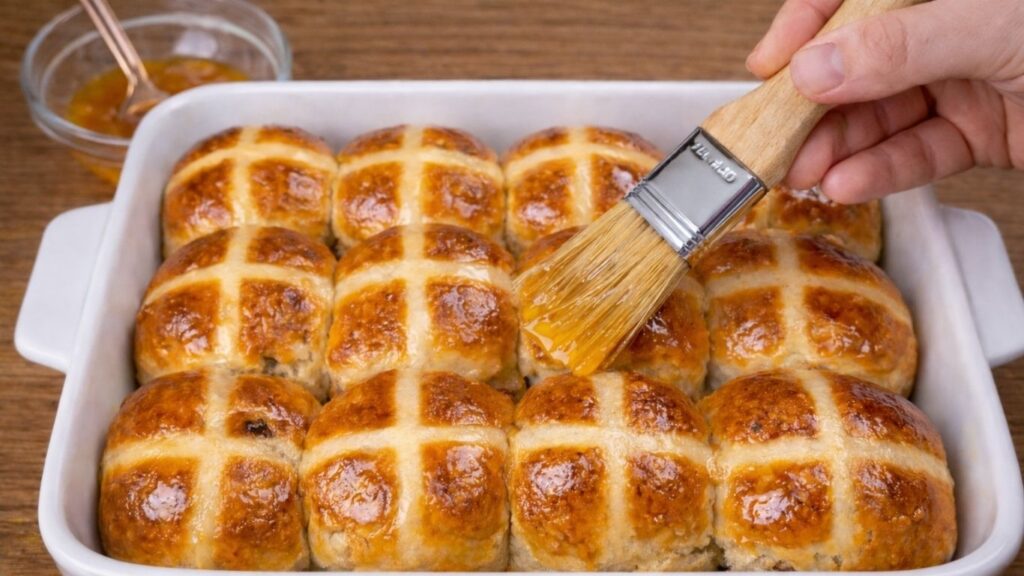
10. Glaze the buns
In a small bowl, mix the apricot jam with a little water until you get a smooth, glossy glaze. I love using my homemade apricot jam, which gives the buns an extra rich, natural flavor and beautiful shine.
While the buns are still warm from the oven, gently brush the glaze over the top of each bun. This step gives them that classic soft, shiny finish and adds a light touch of sweetness that pairs perfectly with the warm spices and citrus aroma.
Let the glaze set for a few minutes, then your buns are ready to enjoy – soft, fragrant, and absolutely irresistible.
11. Storage & Serving Tips – Hot Cross Buns
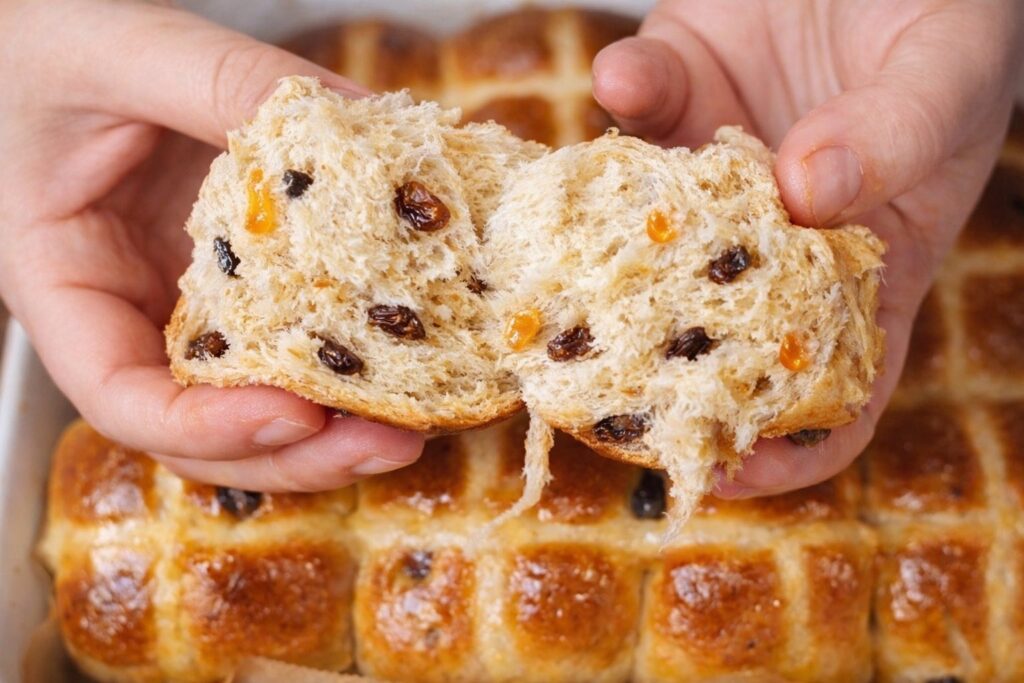
These soft and fluffy hot cross buns are best enjoyed fresh, while they are still slightly warm and fragrant with spices.
You can store them in a sealed bag or airtight container at room temperature for up to 2–3 days, where they will stay soft and tender.
If you would like to keep them fresh for longer, store them in the refrigerator for up to 5-7 days in a sealed bag.
Before serving, simply warm them slightly in the oven or microwave for a few seconds. This will bring back their beautiful softness, light texture, and that fresh homemade aroma.
For longer storage, you can also freeze the buns, then thaw and warm them gently before serving.
Enjoy these soft and fluffy Hot Cross Buns, fresh, fragrant and perfectly spiced – a beautiful treat for Easter and special family moments.
They are wonderful served warm with a little butter, a touch of jam or simply on their own with a cup of tea or coffee. These buns are made to be shared and enjoyed with family and loved ones.
If you try this recipe, I would truly love to hear from you.
Leave a comment below, share your experience and feel free to ask any questions – I’m always here to help.
Frequently Asked Questions – Hot Cross Buns
Why didn’t my hot cross buns rise?
This usually happens if the yeast is inactive, the liquid was too hot or the dough was left in a cold place. Always let the dough rise in a warm, draft-free environment.
How do I store hot cross buns?
Store them in an airtight container at room temperature for up to 2-3 days, or refrigerate for up to 5-7 days. Warm slightly before serving for best texture.
Can I make hot cross buns ahead of time?
Yes, you can prepare the dough the day before and let it rise slowly in the refrigerator. The next day, shape and bake as usual.
How do I know when the dough has risen enough?
The dough should double in size and look light and puffy. When gently pressed, it should slowly spring back.
Why are my hot cross buns not soft and fluffy?
This usually happens if too much flour is added or the dough hasn’t risen long enough. Keep the dough soft and allow it to fully double before baking.
Watch the full Hot Cross Buns Video
Watch how to make these soft & fluffy homemade Hot Cross Buns step by step.
They are lightly spiced, filled with juicy raisins and finished with a beautiful glossy glaze – perfect for Easter baking and family gatherings.
If you love baking soft and fluffy bread at home, be sure to check out my pretzel buns and chocolate swirl buns – they are just as soft, airy, and perfect for everyday baking.
- pretzel bunshttps://ingakitchenstory.com/?p=174
- chocolate swirl buns https://ingakitchenstory.com/?p=58
Nutrition (per bun):
- Calories: 210 kcal
- Carbohydrates: 35 g
- Protein: 5 g
- Fat: 5 g
- Sugar: 8 g
- Fiber: 2 g
- Sodium: 150 mg