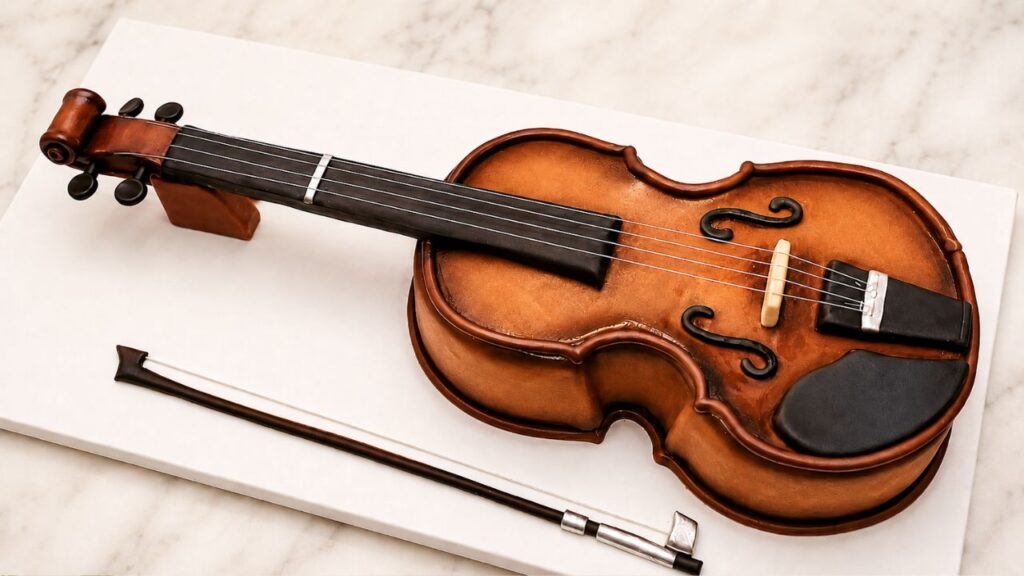
Creating a violin cake is a thrilling 3D project where every single detail matters. Unlike a standard cake, a hyper-realistic instrument requires meticulous planning, precise carving, a flawless fondant covering, and realistic shading to truly bring it to life.
For me, this project was pure art. From sculpting the body to crafting the detailed strings, the bow, and painting the rich wood grain, every step was essential in transforming sugar into a stunning musical masterpiece.
While 3D cakes demand extra time and patience, the final reveal is always worth it. Whether you are baking for a music lover or looking for your next big challenge, this violin cake is the ultimate inspiration for high-end cake design
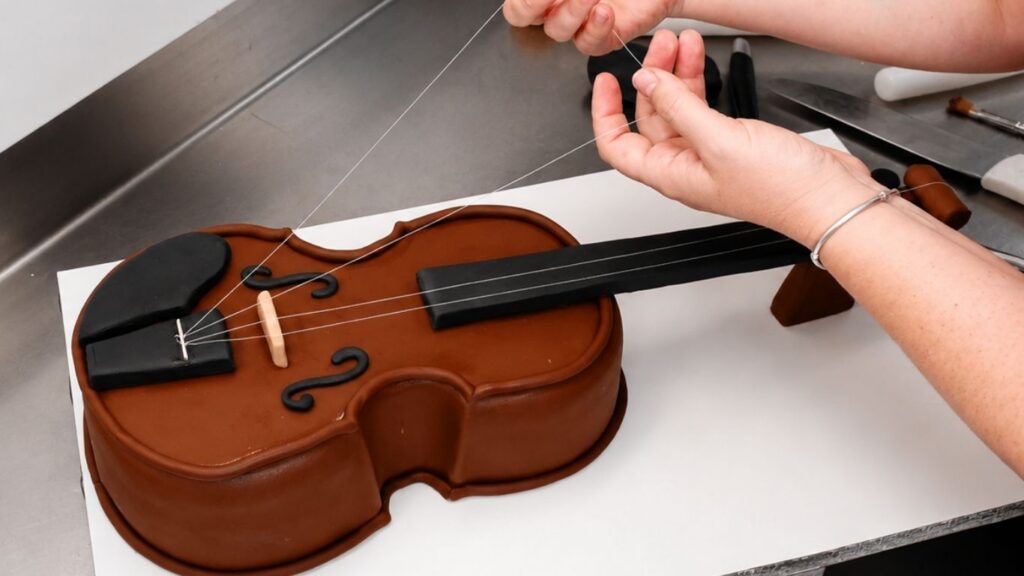
This violin cake was built step by step, from carving the cake body to covering it with buttercream and fondant. The raised edges, neck, tuning pegs, detailed strings, bow, and final airbrush shading all worked together to achieve a highly realistic instrument look.
In this blog post, I will walk you through how this 3D violin cake came together and share the essential decorating steps that made the final design look incredibly detailed and lifelike. (And if you love high-end, creative designs, make sure to check out my step-by-step 3-tier wedding cake tutorial as well!)
Watch the Full Violin Cake Tutorial
Watch the full violin cake tutorial below and see how this realistic 3D cake was carved, covered with fondant, decorated with edible details, and finished with airbrush shading.
Quick Info
- Cake Type: 3D realistic violin cake
- Main Technique: Cake carving, fondant covering, and airbrush shading
- Difficulty: Advanced
- Best For: Music lovers, birthdays, special celebrations, and custom cake designs
- Decorating Time: Several hours, depending on the details
- Main Materials: Cake layers, buttercream, fondant, non-edible detailed strings, airbrush color, and cake decorating tools
- Style: Realistic 3D fondant cake design
What Makes This Violin Cake Special
What makes this violin cake special is the seamless combination of structural planning, precise shaping, and realistic details. This is not just a standard dessert decorated with music-themed toppers-it is meticulously designed to replicate a real violin, from the classic body contours to the neck, strings, bow, and rich wood-effect finish.
Every single element adds to the hyper-realistic look. The carved cake base establishes the authentic instrument shape, the fondant creates a flawless canvas, and the fine details-like the raised edges, tuning pegs, bridge, and custom strings-bring the entire piece to life. Finally, the airbrush shading adds incredible depth, giving the cake its warm, polished wooden appearance.
This type of cake is perfect when you want a centerpiece that is truly unique, elegant, and memorable. While it demands much more time and skill than a regular decorated cake, the final reaction from everyone who sees it makes it absolutely worth the effort.
Tools and Materials I Used
For this violin cake, I used rich chocolate cake layers paired with a stable chocolate ganache for the inside. The layers were baked in a medium rectangular pan-approximately 30 x 22 cm (12 x 9 inches)-and then cut and carved using a printed violin template adjusted to the exact size of my cake.
To create a smooth and stable base for the fondant, I covered the outside of the cake with two layers of buttercream. After the buttercream was chilled and smoothed, I covered the cake with brown fondant to start building the realistic violin look.
To finish the design, I used fondant tools, a rolling pin, a sharp knife, small cutters, modeling tools, a sturdy cake board, non-edible decorative strings, and an airbrush. The final airbrush shading was key to creating the wood-effect finish, making the violin cake look incredibly realistic and detailed.
Step-by-Step Decorating Process
Carving the Violin Shape
I baked and filled the cake a day in advance, allowing it to chill thoroughly overnight. The next day, I placed the cake directly onto the final cake board where the finished violin cake would stay. Once a 3D structural cake is carved and decorated, moving it becomes incredibly risky, so it is always best to build it right on its final display board.
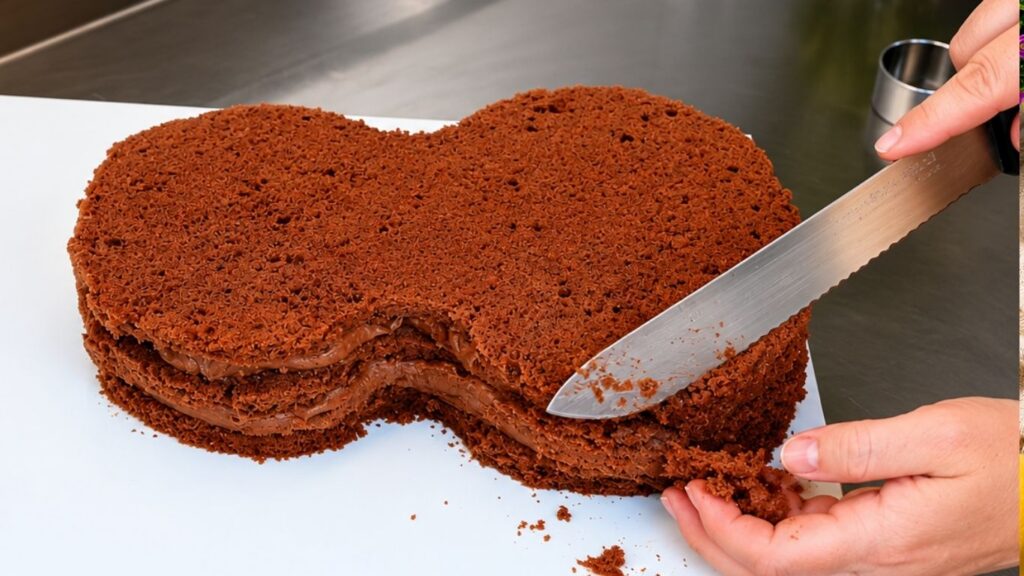
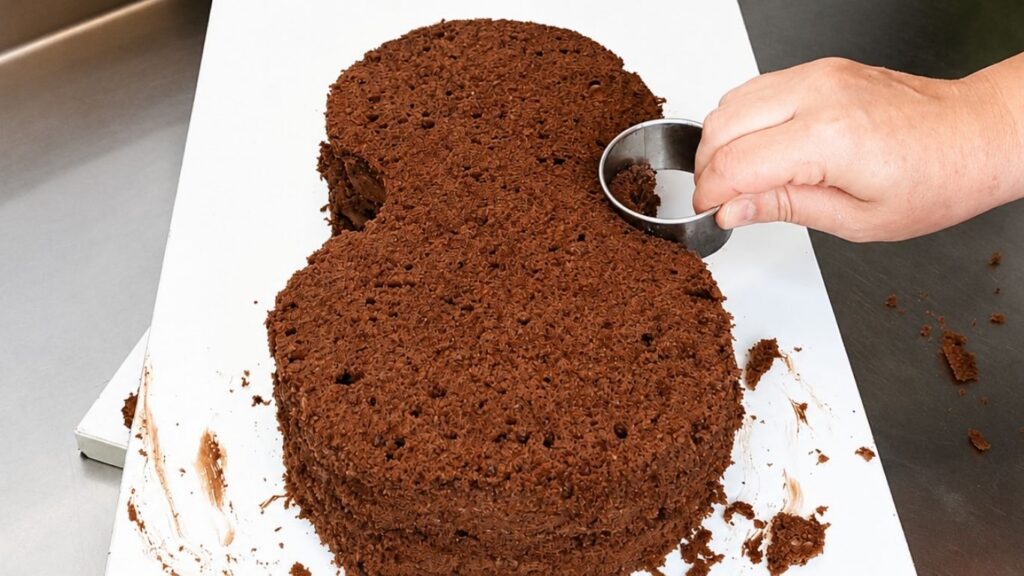
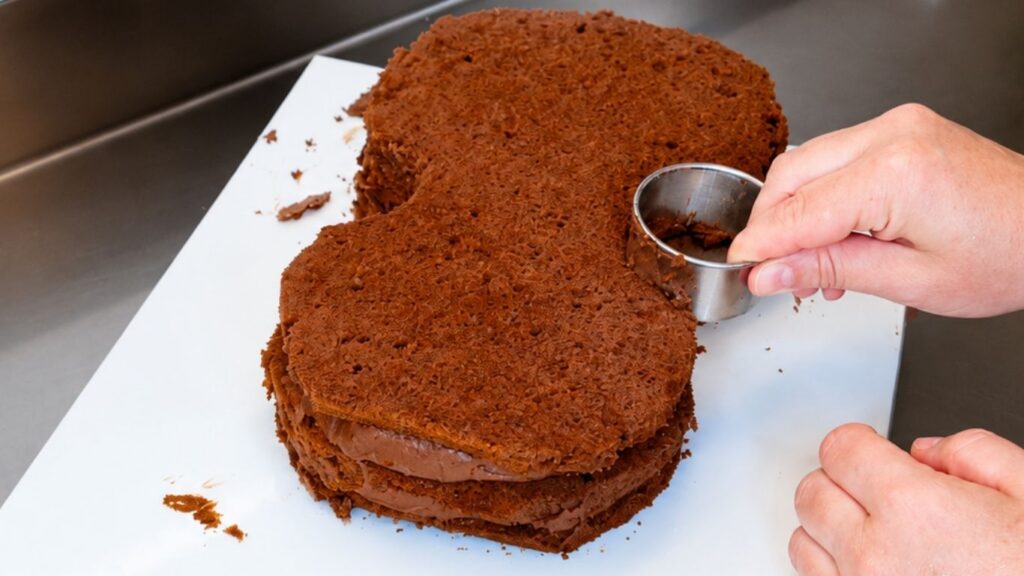
To achieve the precise instrument silhouette, I used a simple violin template that I found online. After printing the template to match the exact size I wanted for my project, I placed it over the chilled cake and carefully carved around the edges to create the basic violin cake body shape. This template method is fantastic because you can easily scale it up or down to customize any cake size you choose.
Adding the First Buttercream Layer
After carving the basic violin shape, I covered the cake with the first layer of buttercream. This initial layer acts as a crumb coat, helping seal in any loose cake crumbs while creating a stable base for the next step.
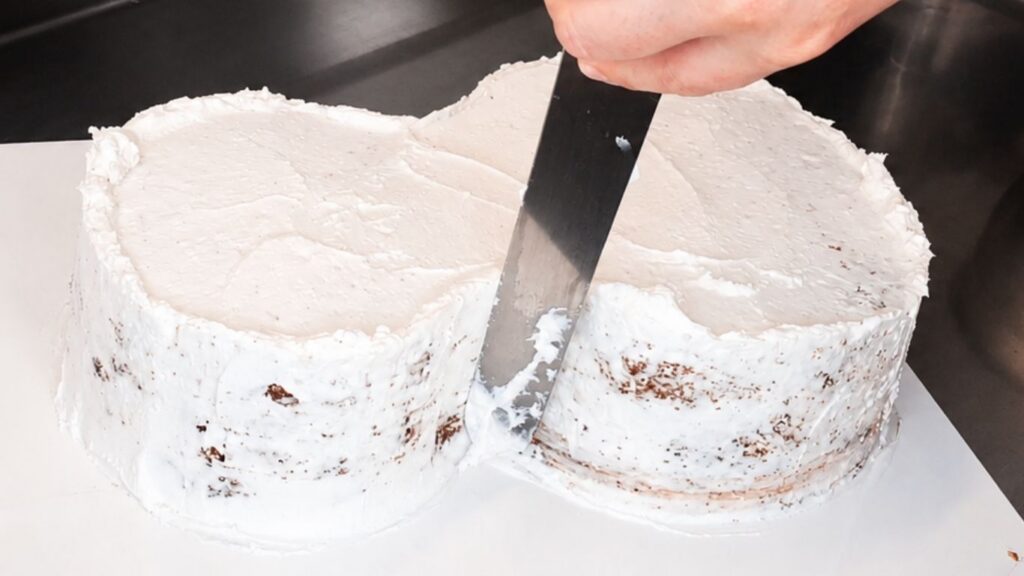
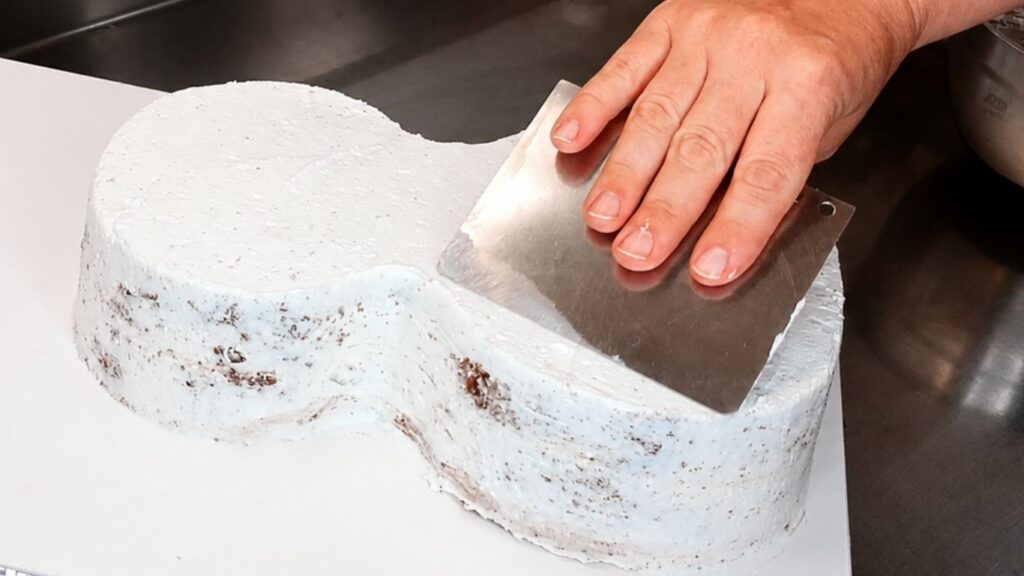
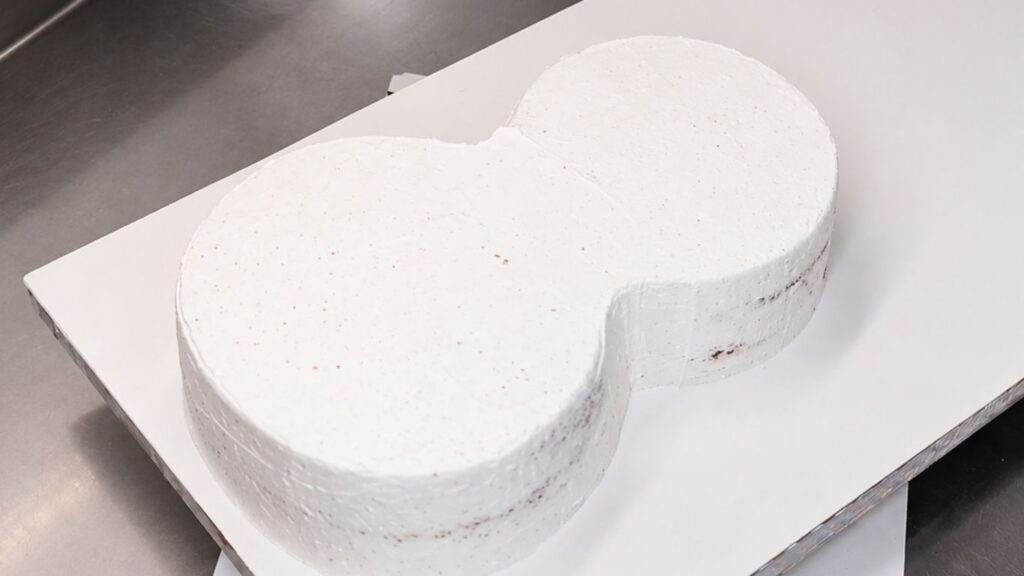
Next, I placed the cake in the refrigerator for about 15–20 minutes until the buttercream was completely firm. The exact chilling time can depend on your refrigerator, but I always recommend adding the second layer only when the first coat feels firm, dry, and perfectly set to the touch.
Covering the Cake with Fondant
To cover the violin cake, I used a pre-colored brown fondant, but I mixed in a small amount of white fondant to achieve a softer, lighter brown shade. Of course, you can also use plain white fondant and color it yourself using gel food coloring. If you need a reliable base recipe, you can find the exact one I have been using for years right here in my homemade fondant recipe.
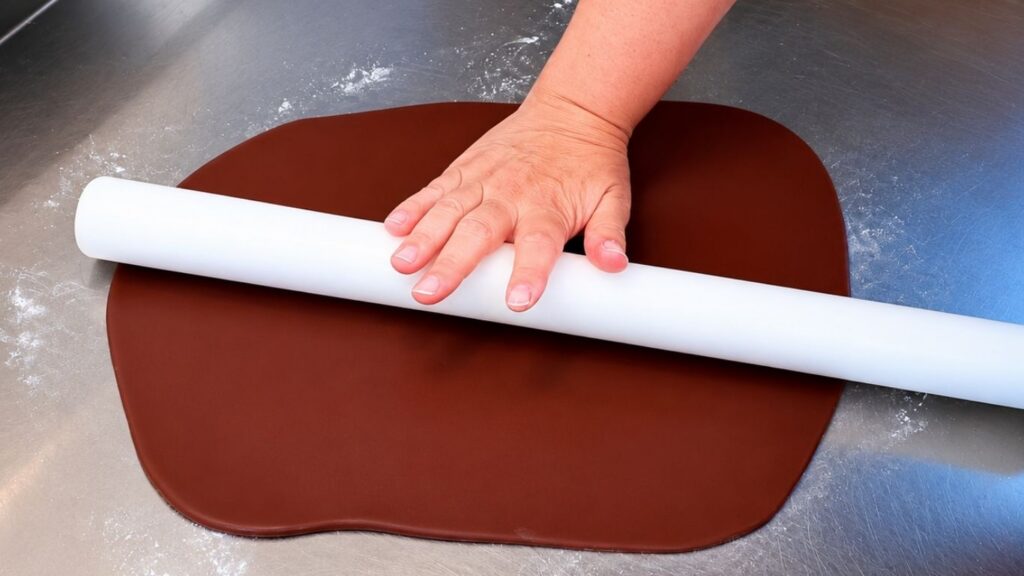
Before rolling out the fondant, I lightly dusted my clean work surface with powdered sugar. Then, I rolled the fondant out with a rolling pin, ensuring it was slightly larger than the cake itself. Having this extra coverage is essential-it allows you to drape the fondant over the entire violin shape smoothly without stretching or tearing it.
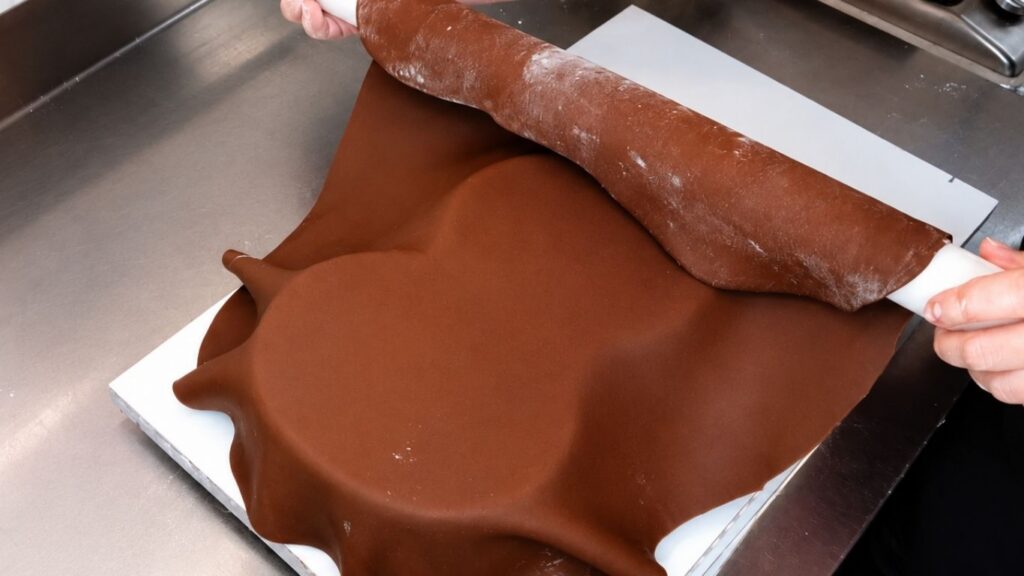
Once the fondant was placed over the cake, I gently smoothed it over the top and sides, then neatly trimmed away the excess around the base. For the intricate curved indentations on the sides of the violin, I used a small Wilton rolling pin to help press and shape the fondant neatly into those tight areas.
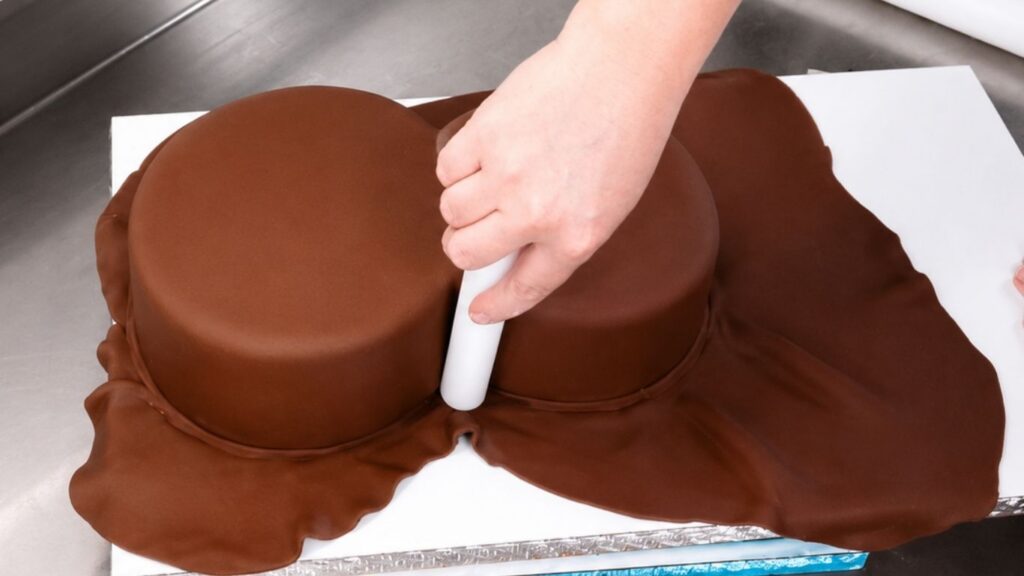
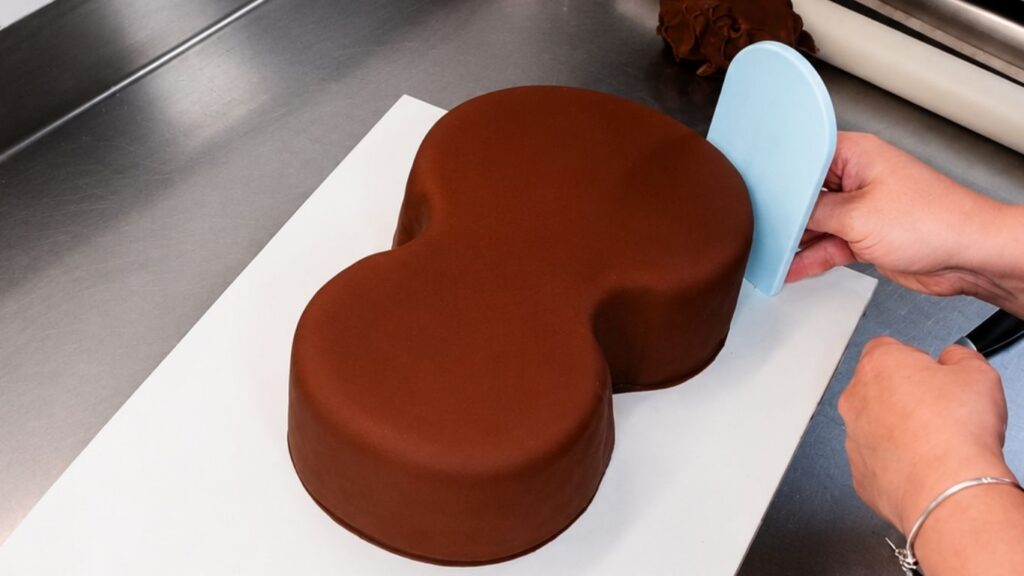
This step is always easier to understand when you see it in action, so make sure to watch the violin cake video at the beginning of this post. In the video, you can clearly see my exact technique for rolling, placing, smoothing, and shaping the fondant over the carved edges.
Adding the Violin Details
Once the fondant was perfectly smoothed, I started adding the specific details that truly turn a basic cake shape into an authentic instrument design. First, I rolled out thin strips of fondant to create the raised edges around the top and bottom perimeter of the violin body. These small raised borders are a game-changer-they add immediate depth and make the silhouette look incredibly close to a real violin.
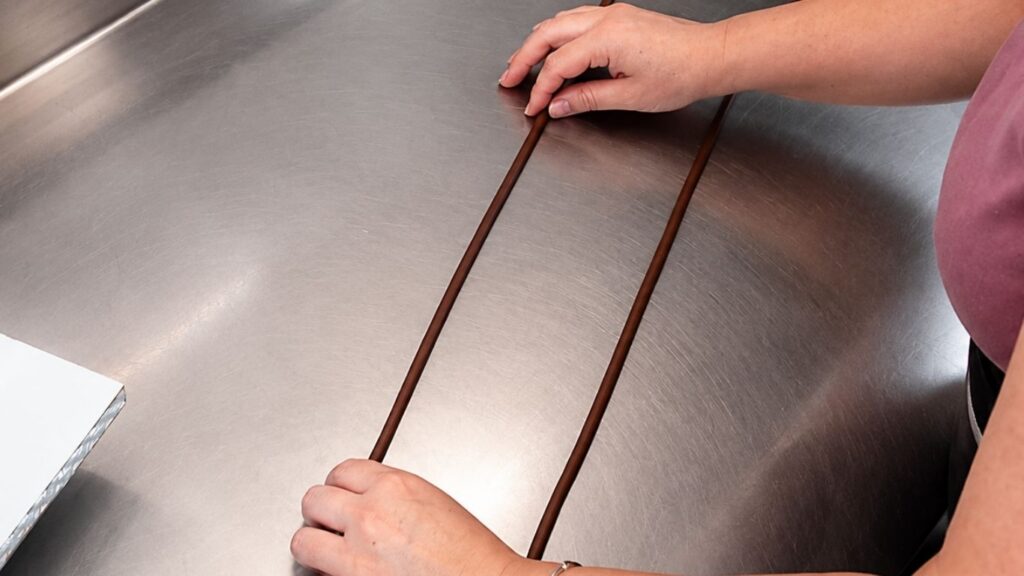
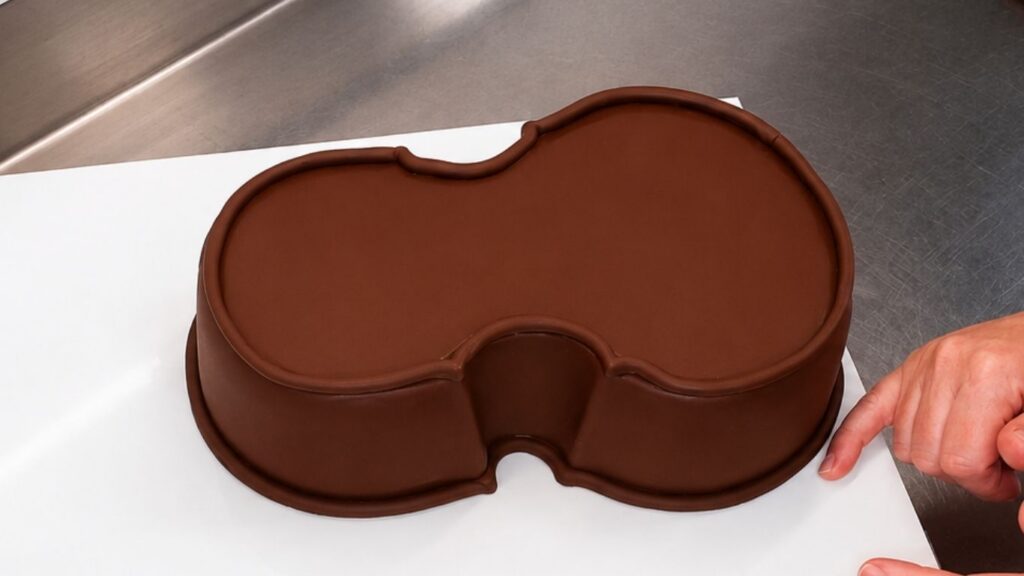
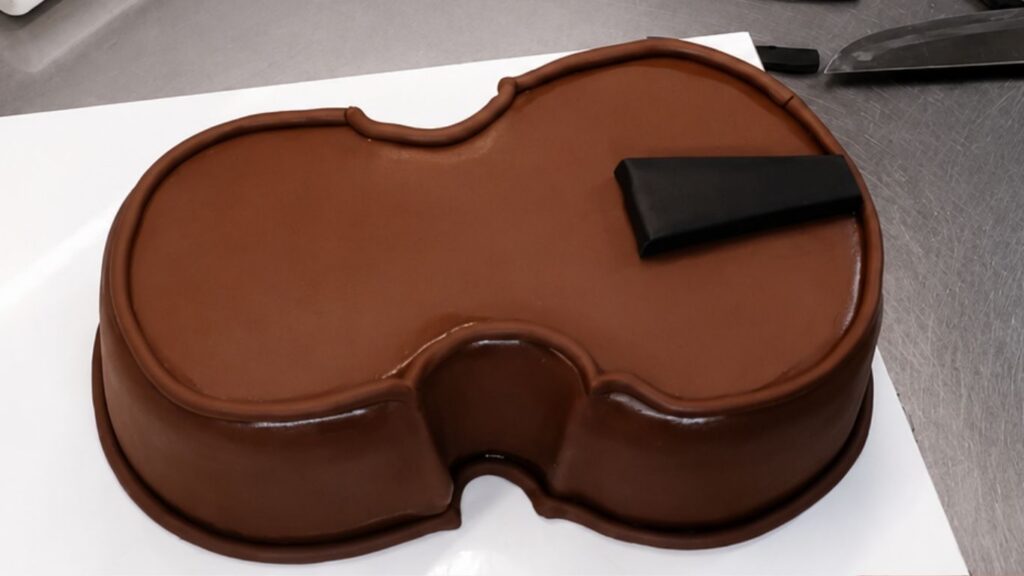
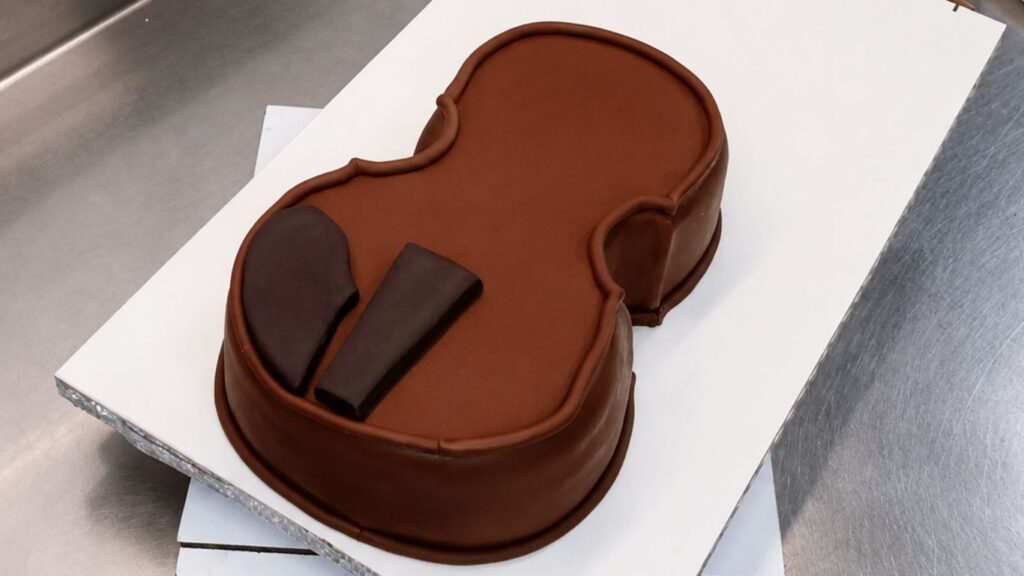
After the borders were secure, I focused on the main anatomy of the instrument. I crafted the tailpiece (the part where the strings attach) and then shaped the chin rest. These components were sculpted entirely from fondant and carefully positioned on the body of the cake.
Making the Neck, Scroll, Tuning Pegs, and Bridge
Before crafting the neck of the violin, I measured the height of the cake body. I then created a small support piece using the same brown fondant as the main body. This support helped the violin neck sit at the correct angle and stay securely in place. (You can see exactly how I positioned this support in the video at the beginning of this post!)
Next, I measured the available space on the cake board to ensure the neck would be perfectly proportioned to the rest of the violin cake. I rolled out the main neck using black fondant, leaving about 10-12 cm (4-5 inches) at the top for the curved scroll detail. To make the long neck structurally strong, I inserted two wooden dowels through the black fondant, then carefully attached the brown, hand-carved scroll piece to the top.
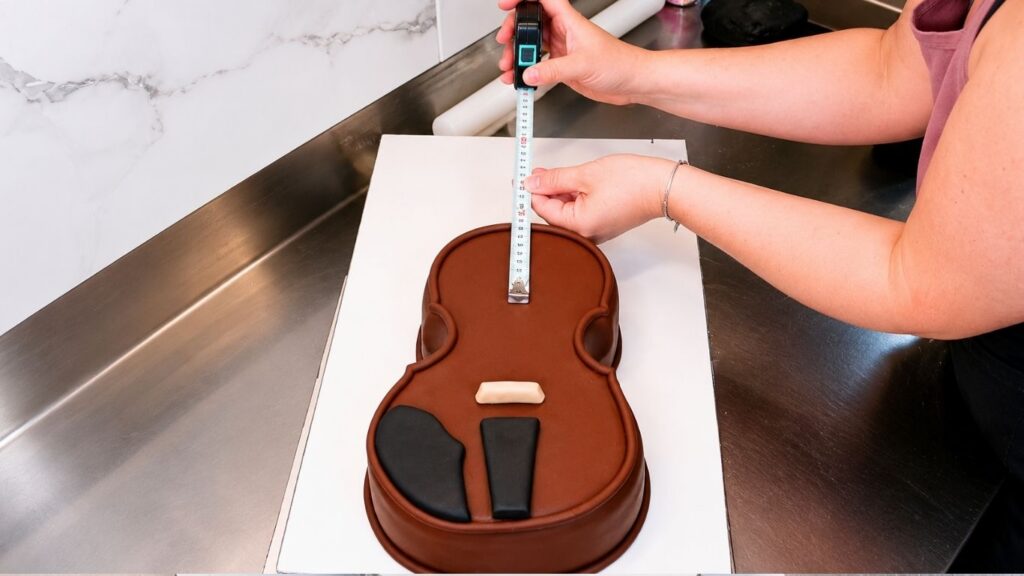
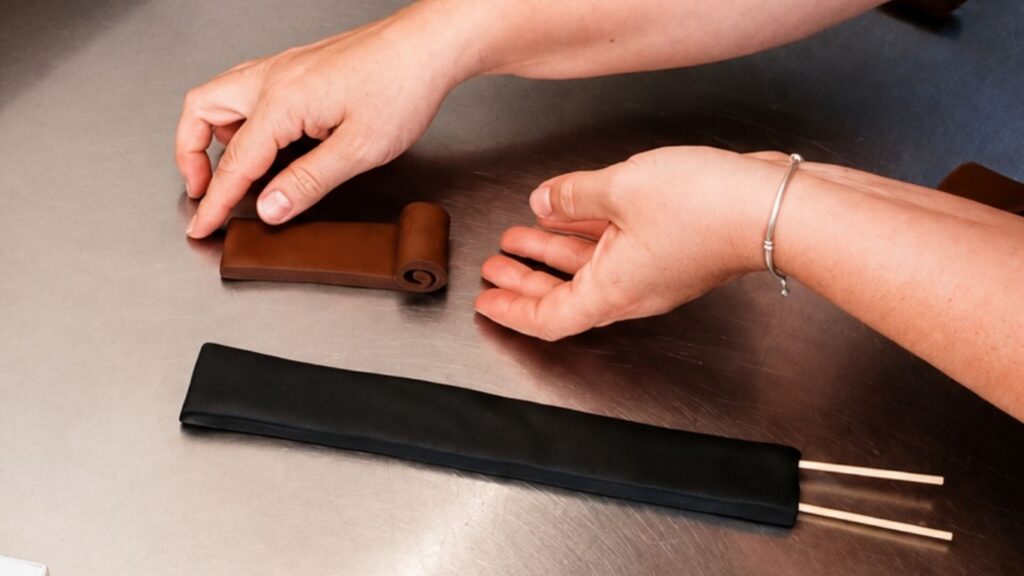
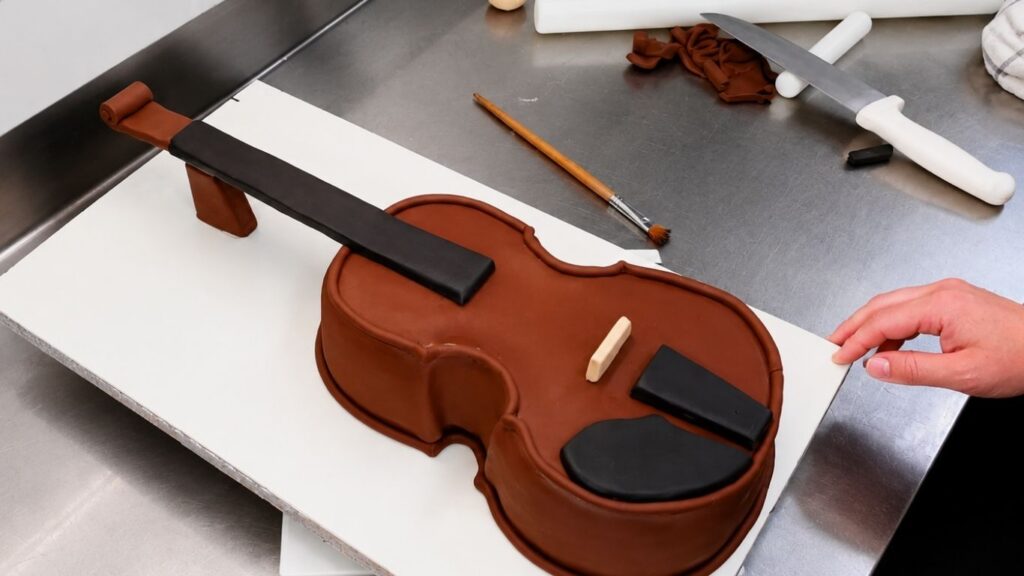
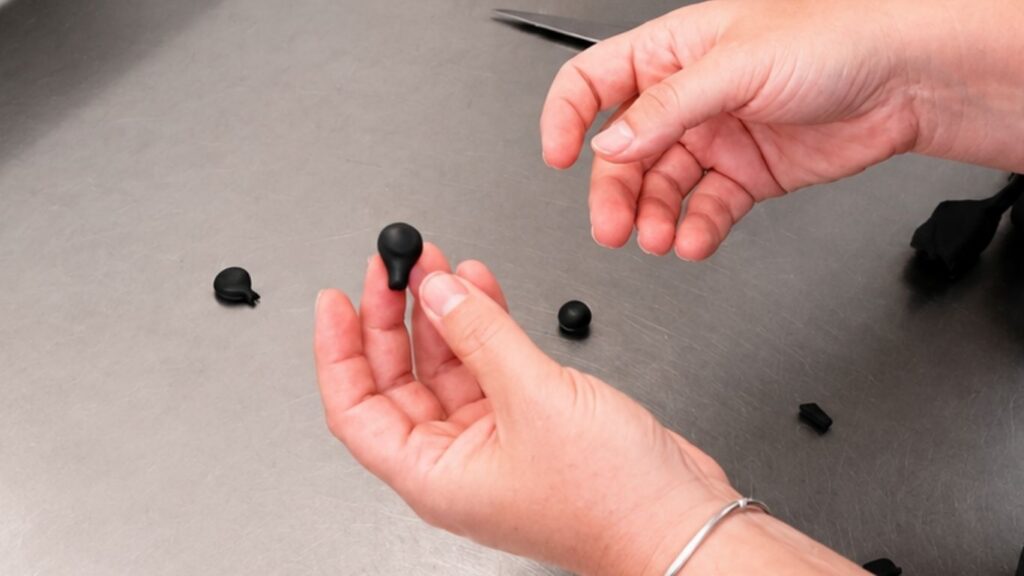
Once the neck assembly was ready, I attached it to the violin cake, lining it up precisely with the center of the body. To finish the headstock, I molded small pieces of black fondant into tuning pegs—the little knobs used to tighten strings on a real instrument. I secured these pegs into the brown scroll area using toothpicks so they wouldn’t budge.
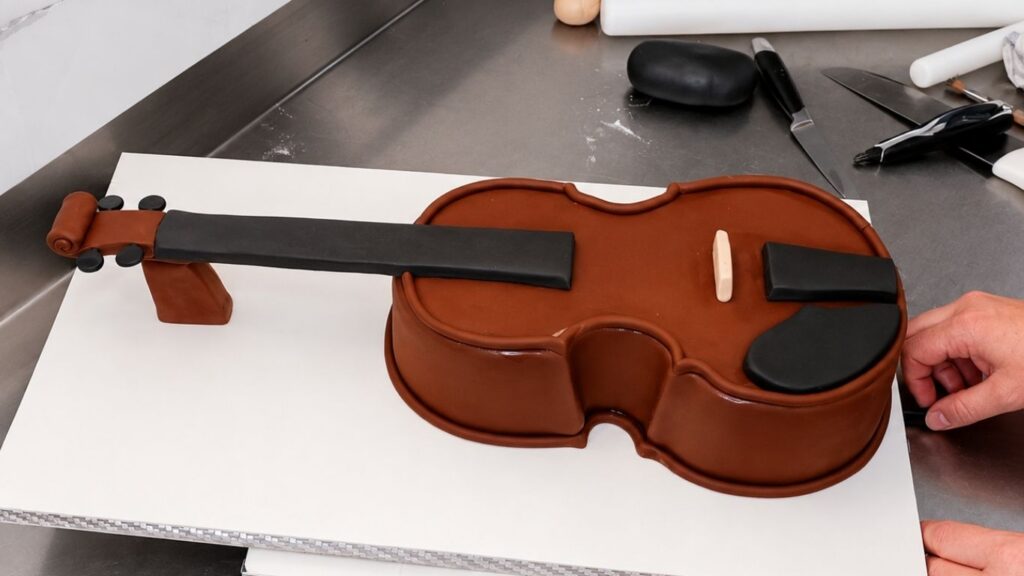
Finally, I crafted and positioned the bridge. This is the small upright piece that sits on the violin body to lift the strings and carry them across toward the neck. Adding the bridge is a huge milestone for the realistic look, as it visually connects the body, neck, and strings, making the violin cake look much more complete and lifelike.
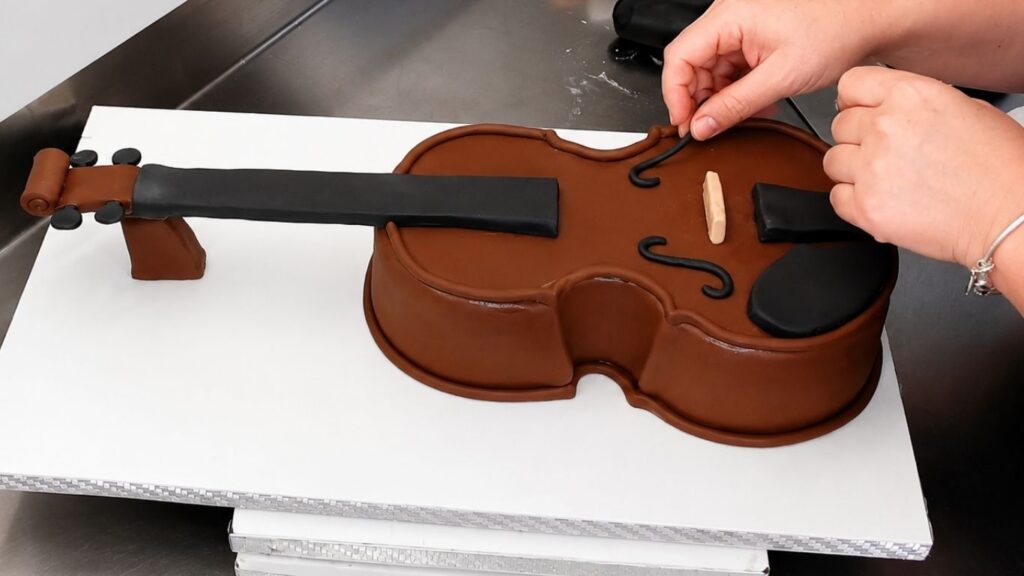
Adding the Strings
For the strings, I used a fine white thread instead of fondant. I chose thread because fondant strings simply cannot achieve that ultra-thin, hyper-realistic instrument look, nor can they be pulled taut enough without snapping. Using thread instantly elevated the design, making it look much closer to a real, playable instrument.
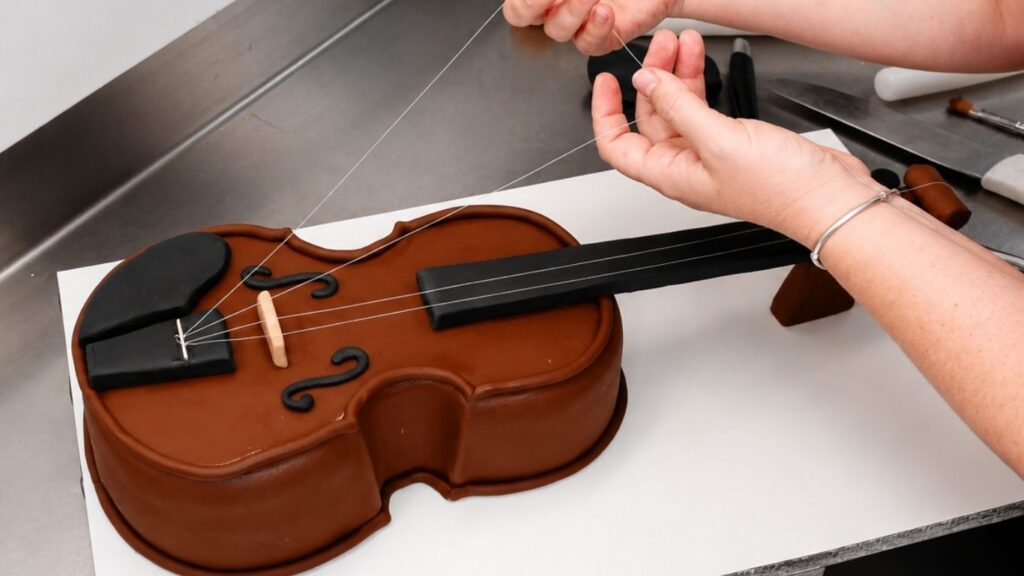
To attach the strings at the headstock, I tied the thread around half of a toothpick and inserted it securely where the strings needed to begin. I then concealed that attachment point with a thin strip of brown fondant to keep the finish clean and seamless.
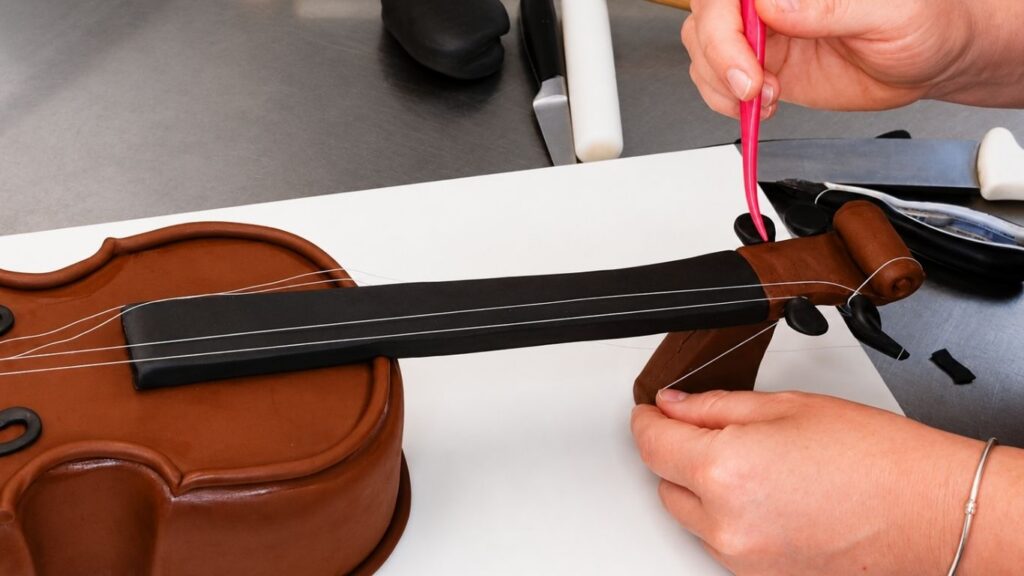
Along the center of the violin neck, I brushed a small amount of edible glue and gently pressed the strings down to ensure they stayed perfectly aligned. I also added another small accent piece of fondant over that transition area to hold the strings neatly in position.
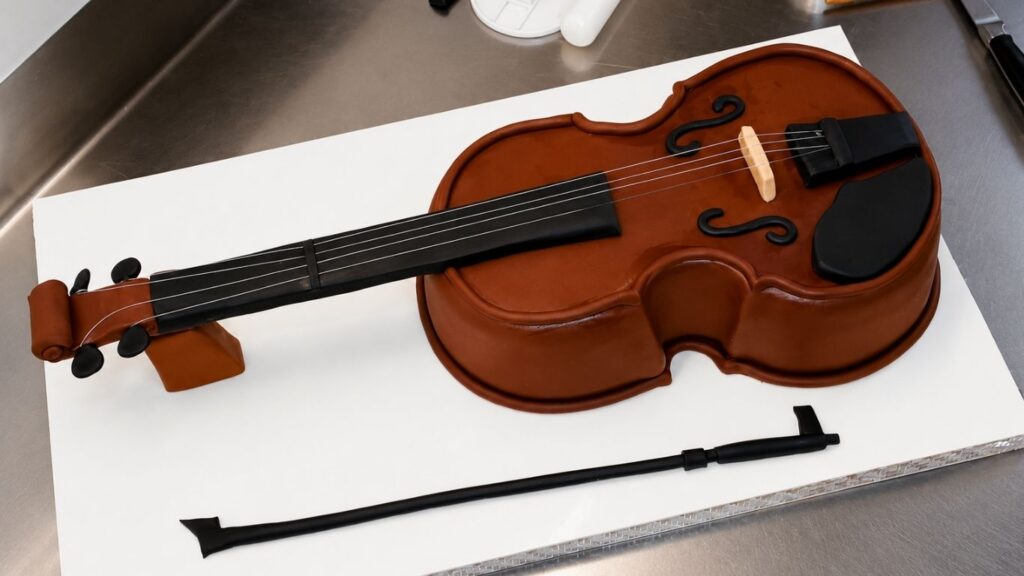
Next, I guided the strings down across the bridge and toward the tailpiece at the bottom of the violin cake. I carefully wrapped and secured the threads around the tailpiece so they remained perfectly parallel and tensioned. This step made an incredible difference in the final reveal, pulling all the separate elements together.
To complete the realistic instrument design, I also made the violin bow from fondant. This part was a little difficult to photograph step by step, but you can see the full process clearly in the video at the beginning of this post. I added thread to the bow as well, which helped create a more realistic violin bow effect.
⚠️ Important Note: Since I used standard thread for the strings, they are purely decorative and must be removed before cutting and serving the violin cake.
Painting and Airbrush Shading
For the metallic painted details, I mixed silver luster dust with a high-proof alcohol to create a smooth, edible metallic paint. Using a fine-tip detail brush, I carefully painted the metal brackets on the tailpiece, as well as the mechanical details on the violin bow. These silver accents helped define the smaller elements and gave the entire piece a polished, high-end finish.
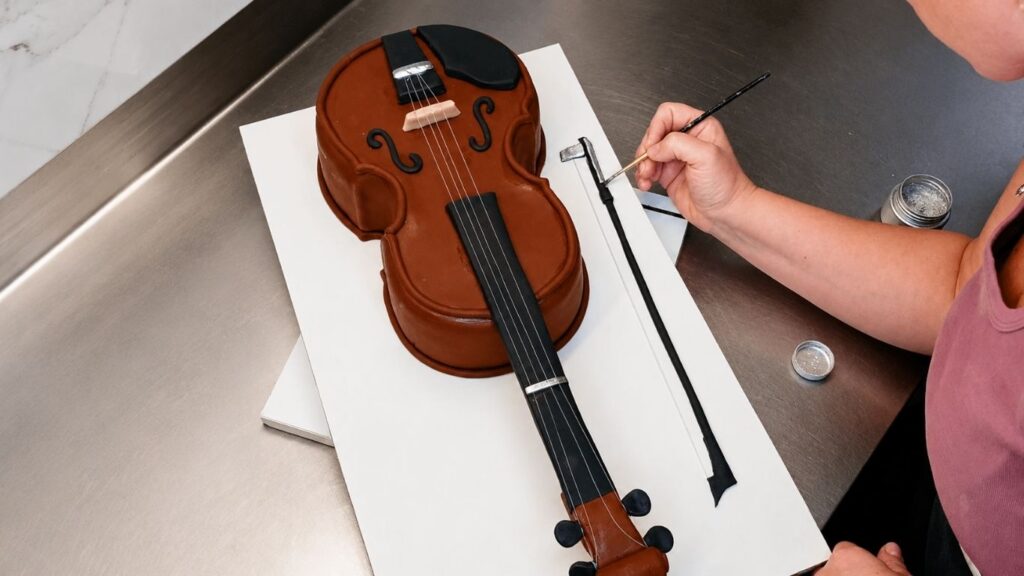
Once the hand-painted accents were complete, I moved on to the airbrush shading. This is truly the magical step that brings the violin cake to life. I used my airbrush to softly shade all the areas that naturally require more depth, focusing heavily on the outer edges, the distinct C-bouts (curved side sections), and the joints where the pieces connect.
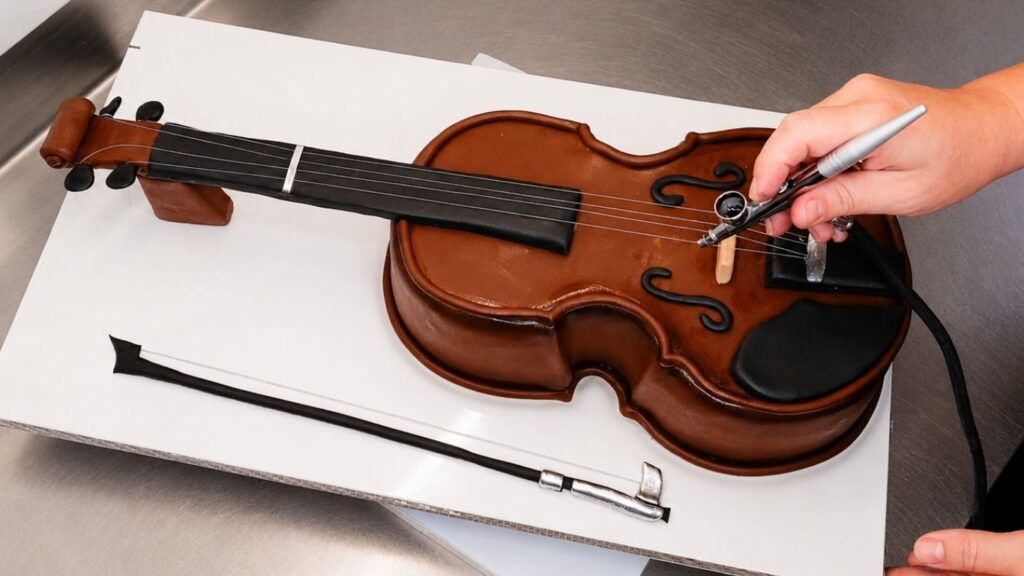
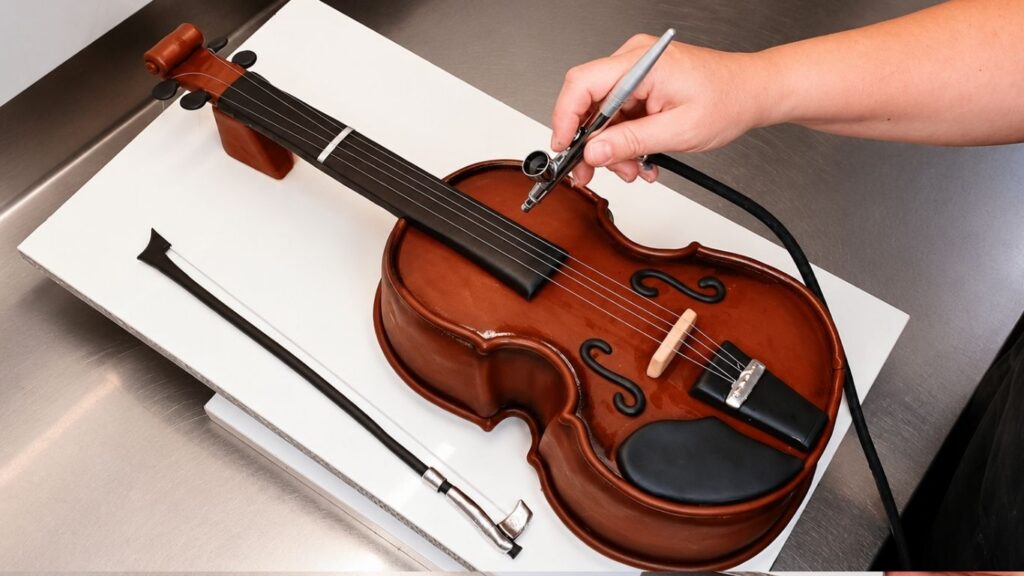
I also airbrushed along the raised borders and connection points to add dramatic dimension, which makes the fondant details pop. This multi-layered shading gave the violin cake a rich, authentic depth and perfectly replicated that glossy, varnished wood-effect finish.
The Final Look
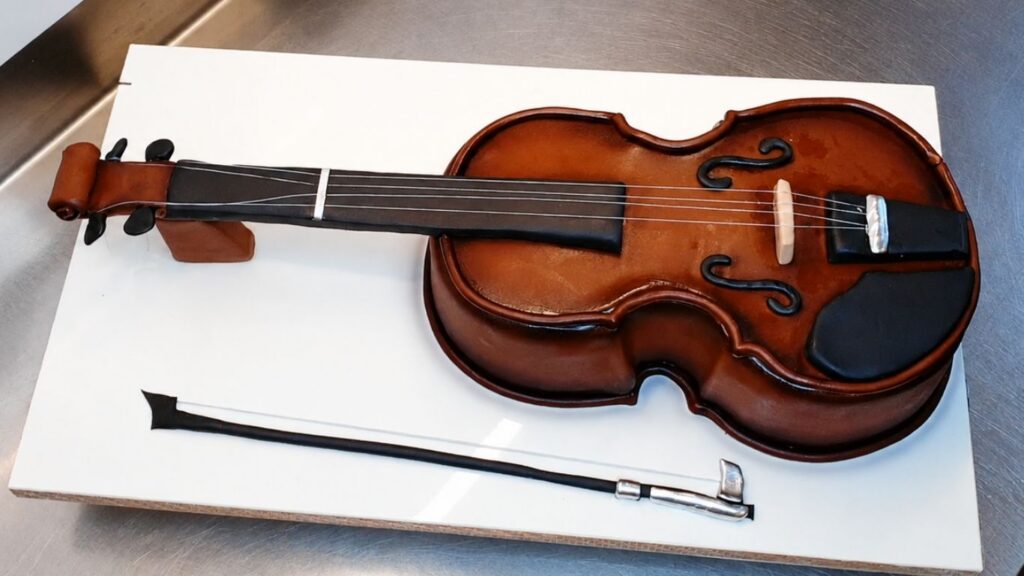
After the silver accents dried and the airbrush shading was complete, the violin cake finally came together in all its glory. The carved cake base, smooth fondant canvas, taut decorative strings, sleek bow, and shaded wood-grain finish all worked in harmony to create a breathtaking, hyper-realistic 3D instrument design.
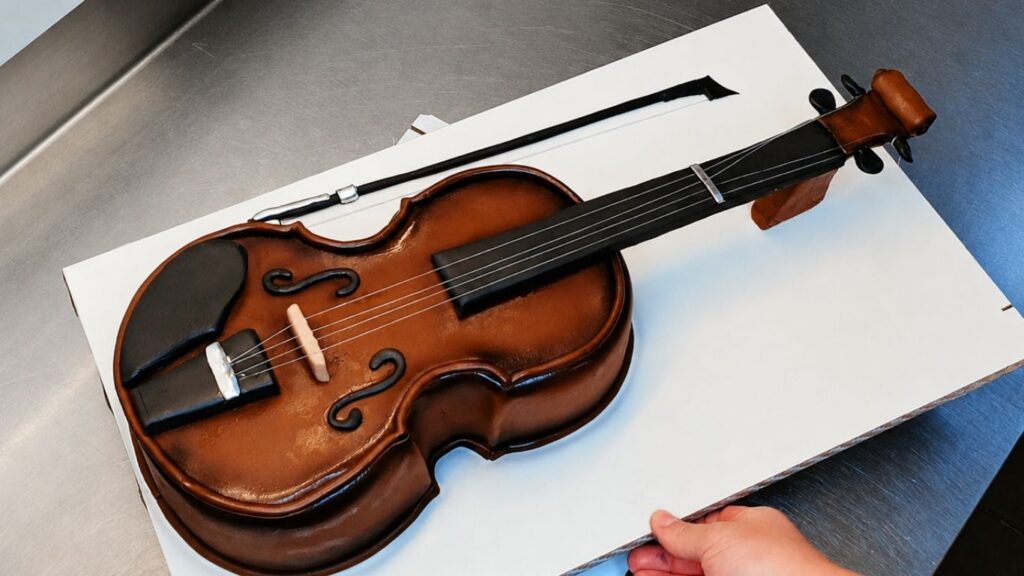
This final step is always the most exciting and rewarding part of making a structural cake. After hours of focus, you finally get to see every single meticulous detail snap into place. The cake is no longer just separate pieces of fondant and sugar decoration-it transforms into a unified, lifelike centerpiece ready for the celebration.
Frequently Asked Questions (FAQ)
Can I make this violin cake in a different size?
Yes, you can easily make this violin cake in any size that works for you. The template method is highly customizable; simply print and scale your violin template to match your specific cake pans, final display board, and the overall size you want to achieve.
What kind of cake is best for a 3D violin cake?
A dense, stable cake works best for structural 3D designs. I used rich chocolate cake layers paired with a firm chocolate ganache filling because they hold their shape beautifully during the carving process. For the best results, always fill your cake and let it chill thoroughly overnight before you begin cutting and shaping it.
Why did you use two layers of buttercream?
Using two layers of buttercream-a process that includes a crumb coat-creates an incredibly smooth, flawless base for the fondant. The first thin layer seals in all loose cake crumbs, while the second layer perfectly smooths out the contours of the violin cake. Always chill the first layer until it feels firm and dry to the touch before applying the second coat.
Can I use homemade fondant for this violin cake?
Absolutely! You can use either high-quality store-bought fondant or a reliable homemade version. For this project, I used a pre-colored brown fondant and kneaded in a small amount of white fondant to soften the shade. Whichever you choose, ensure the fondant is pliable, rolls out smoothly, and does not tear easily when draped over sharp, carved edges.
Are the strings on the violin cake edible?
No, the strings are purely decorative and must be removed before cutting and serving the cake. I chose a fine white thread because fondant strings simply cannot achieve that ultra-thin, hyper-realistic instrument look without snapping or sagging.
Do I need an airbrush to make this cake?
While you can technically finish the cake without one, an airbrush is highly recommended for achieving that authentic, varnished wood-effect finish. The airbrush allows you to build soft gradient shading around the edges, curves, and seams, which adds incredible visual depth and brings the violin cake to life.
Is this violin cake beginner-friendly?
This violin cake is an advanced cake decorating project since it involves precise hand-carving, fondant draping, structural internal support, delicate string work, and airbrushing. However, if you are looking to challenge yourself, take your time and follow the steps one by one-it is an incredibly rewarding project to try!
Conclusion
Making this violin cake was a deeply detailed and rewarding 3D cake decorating project, and every single step was absolutely worth it. From precisely carving the cake layers into the perfect instrument silhouette to adding the meticulous fondant details, decorative strings, sleek bow, hand-painted silver accents, and rich airbrush shading—each element played a vital role in bringing this hyper-realistic design to life.
What I love most about advanced structural projects like this is witnessing the gradual transformation; watching simple cake layers and ganache slowly turn into a unique, memorable masterpiece. It requires a lot of patience, strategic planning, and close attention to detail, but the final result is a breathtaking centerpiece that is perfect for any music lover or special celebration.
I hope this violin cake inspires you to push your creative boundaries, try your own realistic 3D cake designs, and truly enjoy the rewarding process of sugar artistry from start to finish!
Happy Baking!
Leave a Reply