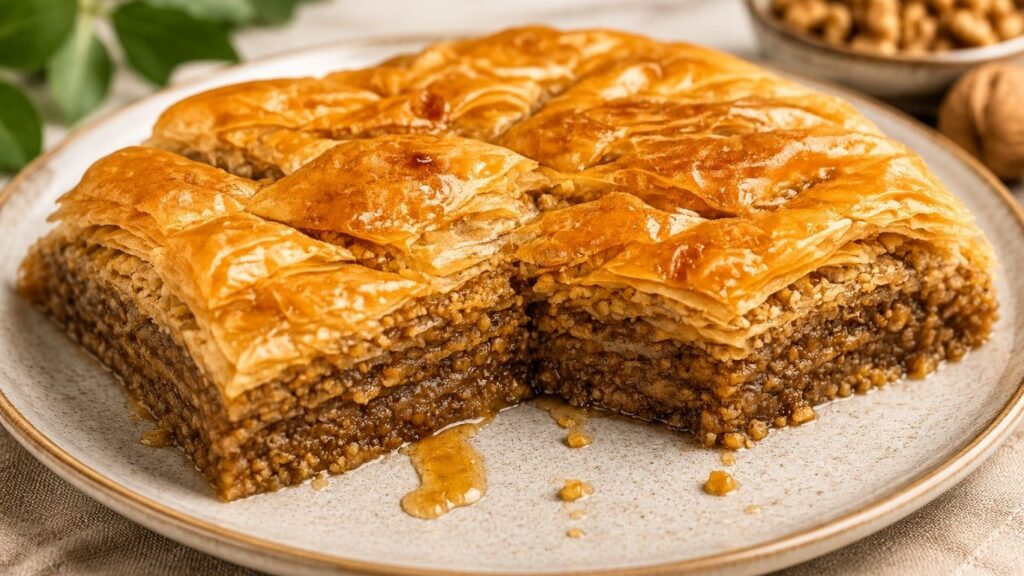
If you love crispy golden layers, a rich walnut filling, and a sweet syrup that soaks into every single bite, this homemade baklava recipe is for you! Made with flaky phyllo dough, melted butter, and a rich nut filling, it is the ultimate treat for holidays, family gatherings, or special occasions.
But what makes this version truly impressive is one secret ingredient in the walnut filling that takes the flavor to a whole new level.
If you have ever been intimidated by making baklava at home, don’t worry. This step-by-step guide will show you exactly how to get that perfect balance-a beautifully crisp, flaky top with an incredibly juicy, sweet inside.
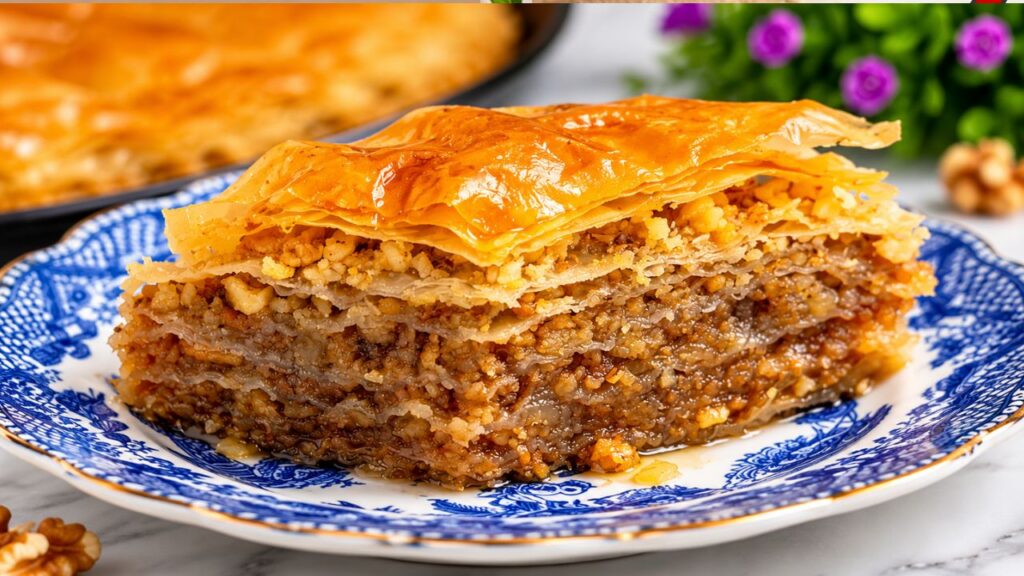
Baklava is one of those desserts that looks incredibly fancy, but with the right steps, it’s surprisingly easy to master at home. This baklava recipe features delicate, buttery phyllo layers, a rich walnut filling, and a sweet syrup that creates that signature crispy-yet-juicy texture in every bite..
If you enjoy classic homemade treats like my Strawberry Sponge Cake, you’re going to love adding this baklava to your baking repertoire. It’s perfect for holidays, family gatherings, or whenever you want to impress your guests with a truly authentic dessert.
Watch the Full Video
Watch the full video to see exactly how this baklava recipe is made from start to finish, including how to prepare the homemade pastry crumbs, layer the phyllo dough, cut the baklava, and pour the hot syrup over the golden baked layers.
Baklava Recipe Overview
To help you plan your baking session, here is a quick summary of what you will need for this recipe:
- Prep Time: 35 minutes
- Baking Time: 1 hour and 15 minutes (15 mins for crumbs + 1 hour for baklava)
- Total Time: About 1 hour and 50 minutes
- Difficulty: Medium
- Best Served: Cooled completely or the next day
- Main Ingredients: Phyllo dough, walnuts, butter, sugar syrup, and homemade pastry crumbs
Tips for the Perfect Baklava
Achieving those beautifully crisp layers and a juicy interior is easy when you follow a few professional baker’s secrets. Here are my top tips for making the best homemade baklava recipe:
Use Fresh or Completely Thawed Phyllo Dough: For the best results, I recommend using fresh packaged phyllo dough for this baklava recipe. If you can only find frozen phyllo, make sure to thaw it completely in the refrigerator overnight. Fresh or properly thawed phyllo is much easier to work with, layers beautifully, and bakes up incredibly flaky.
Grind the Walnuts Two Ways: For the ultimate texture, grind half of the walnuts a little coarser and the other half very finely. This combination gives the walnut filling a rich flavor and a better mouthfeel in every single bite.
Do Not Skip the Pastry Crumbs: These homemade pastry crumbs are the absolute secret ingredient in this baklava recipe! They make the walnut filling extra special and give the dessert a unique texture. You can watch the full step-by-step process for making these crumbs in the video tutorial at the end of this blog post.
Cut the Baklava Before Baking: Always slice your baklava into pieces before it goes into the oven. Trying to cut baked, crispy phyllo will cause it to shatter. Slicing it beforehand makes serving a breeze and allows the syrup to soak evenly between every single layer.
The Golden Rule for Syrup: To keep the top layers beautifully crisp while ensuring the inside stays juicy, follow the hot-on-hot method. Pour your hot syrup over the hot baklava straight out of the oven. This exact contrast is what keeps the pastry from getting soggy while allowing it to absorb all the sweetness.
Let It Cool Completely Before Serving: After pouring the syrup, let the baklava sit until it cools completely. This gives the delicate layers enough time to fully absorb the sweetness, making every piece of this baklava recipe rich and full of flavor.
Ingredients for This Baklava Recipe
For the Baklava Layers:
- Phyllo Dough: 1 pound (500g) fresh or completely thawed phyllo sheets
- Walnuts: 6 cups (700g) ground walnuts, divided and ground two ways (half coarse, half fine)
- Butter: 1 ¾ sticks / 14 tablespoons (200g) unsalted butter, melted
For the Homemade Pastry Crumbs (Secret Ingredient):
- All-Purpose Flour: 1 to 1 ½ cups
- Butter: 3 ½ tablespoons (50g) unsalted butter
- Egg: 1 large egg
For the Sweet Sugar Syrup:
- Sugar: 5 cups (1 kg) granulated sugar
- Water: 3 ⅓ cups (800 ml) water
- Lemon: 1 whole lemon, sliced or juiced
- Vanilla Sugar: 2 teaspoons (1 packet) vanilla sugar
How to Make Baklava Step by Step
Step 1: Make the Homemade Pastry Crumbs
First, prepare the homemade pastry crumbs. This is the absolute secret ingredient that makes this best baklava recipe so special. I love to make and bake these pastry crumbs directly in the same baking pan I use for the homemade baklava. For me, an authentic baklava recipe always tastes best when baked in an old, thin baking pan—the flavor and texture are simply unmatched in any modern pan!
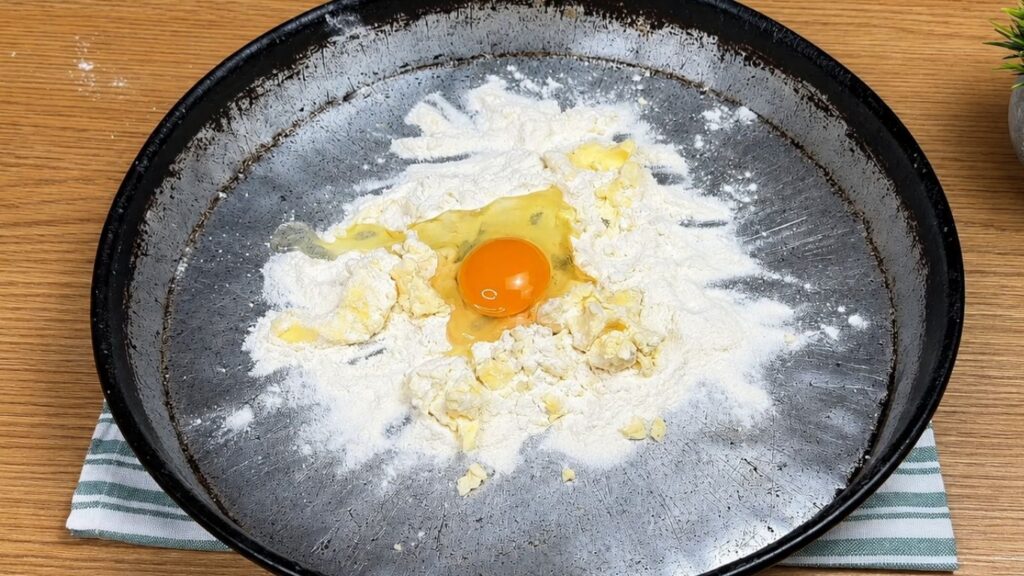
- Combine the Ingredients: Add 1 cup of all-purpose flour directly into your baking pan. Grate 3 ½ tablespoons (50g) of cold butter over the flour. Grating the butter helps it mix evenly with the flour and egg, making the crumbs lighter and easier to form. Add 1 large egg.
- Form the Crumbs: Use your hands to combine everything together. Rub the mixture gently between your palms until small, distinct crumbs begin to form. The mixture should not be sticky; the crumbs should fall easily from your hands.
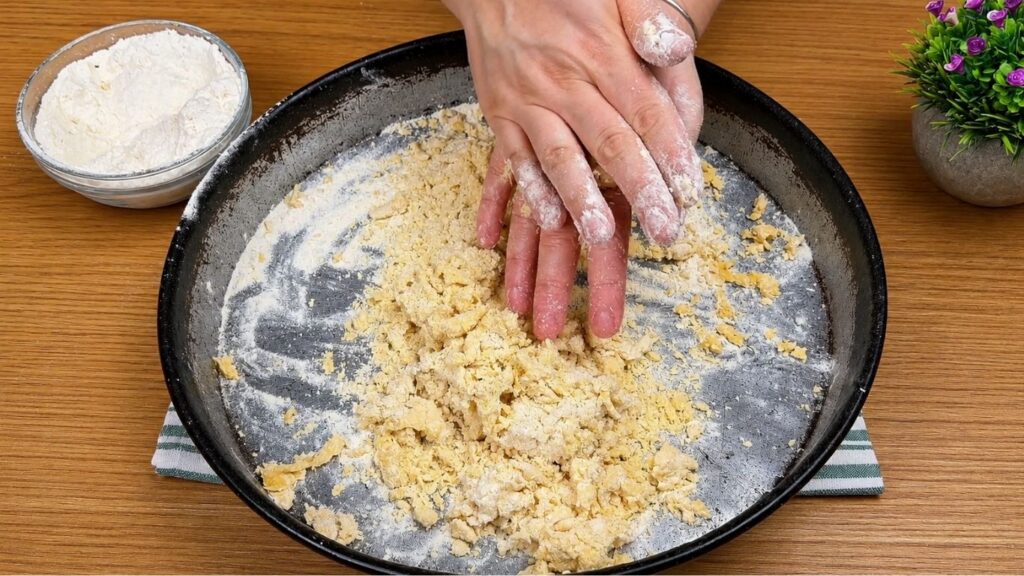
- Adjust the Texture if Needed: The exact amount of flour can depend on the size of your egg. I typically use a large egg, but if your crumbs feel a bit too wet or sticky, simply add a little more flour-one tablespoon at a time-until you reach that perfectly crumbly texture.
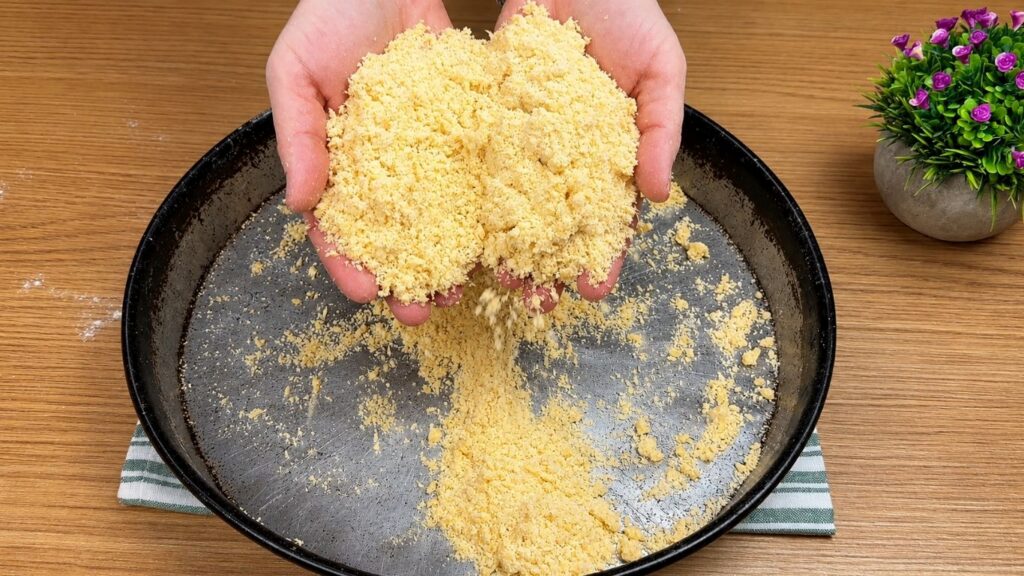
- Bake Until Golden: Once the crumbs are ready, spread them evenly across the bottom of the baking pan. Place the pan in a preheated oven at 400°F (200°C) and bake for about 15 minutes until they turn golden brown.
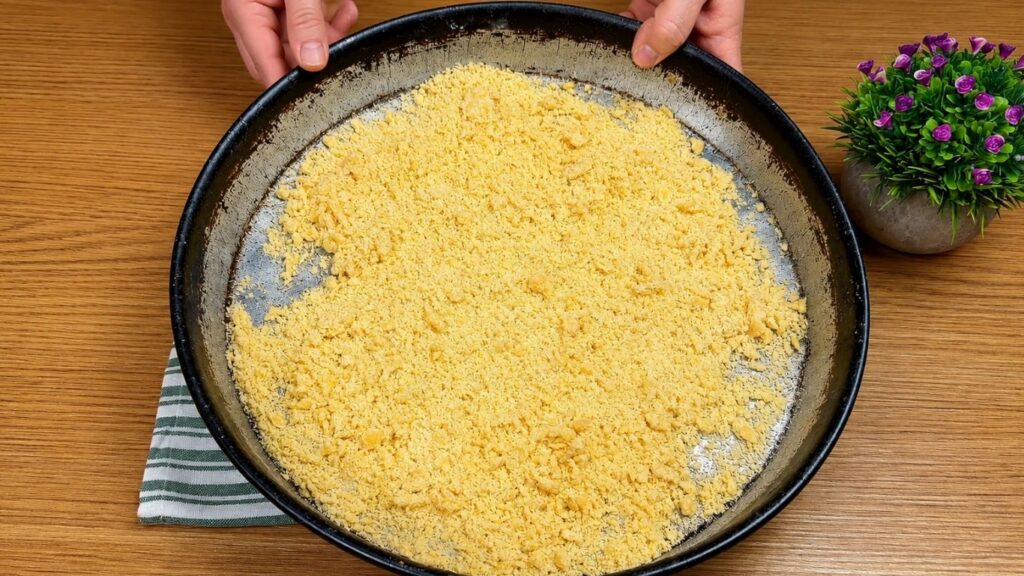
- Stir Frequently: While they are baking, check on them often and stir with a wooden spoon so they bake evenly and do not burn. The pastry crumbs are ready when they are dry, loose, and beautifully golden brown. Remove them from the pan and let them cool.
Step 2: Prepare the Walnuts
While the pastry crumbs are baking, you can learn how to make baklava filling with the ultimate texture. For this authentic baklava recipe, I like to split the walnuts and prep them into two distinctly different textures.
- Chop Half Coarsely: Take the half of the walnuts (3 cups / 350g) and pulse them so they are a bit coarser. These larger pieces will add a wonderful crunch, a nice bite, and a deeper, toasted nutty flavor to the filling.
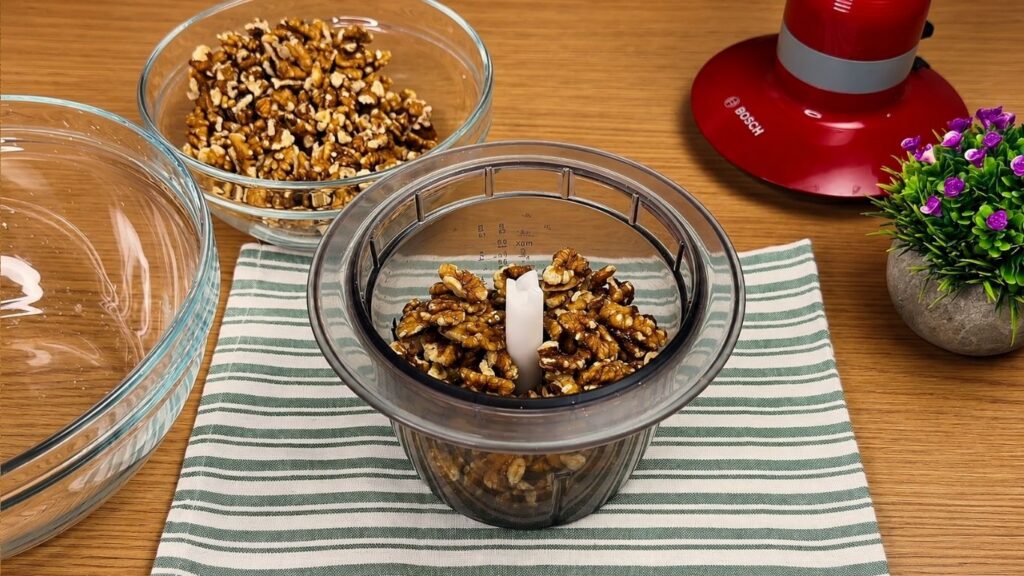
- Grind Half Finely: Take remaining half of your walnuts (3 cups / 350g) and grind them very finely using a nut grinder or food processor. These finely ground walnuts will blend perfectly with the syrup, making the filling incredibly soft, rich, and juicy.
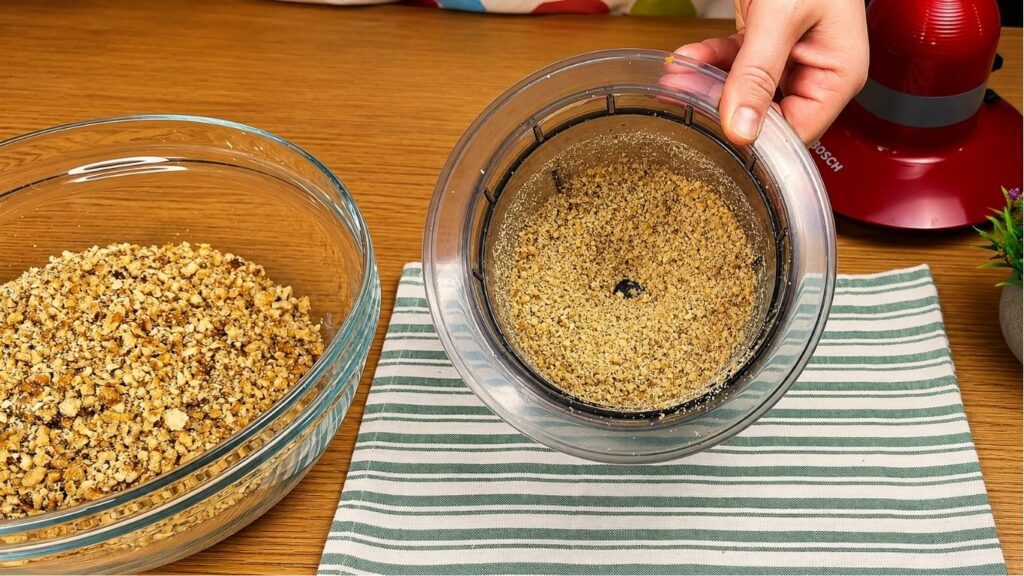
- Mix Together: Combine both textures in a large bowl. By mixing them together, every single piece of baklava will achieve the perfect balance between crispy phyllo layers, sweet syrup, and a textured walnut filling.
Baker’s Tip: If you are using a food processor for this step, pulse the walnuts carefully and in small batches. Be careful not to over-process them, or they will release their oils and turn into a paste. You want them dry, loose, and perfectly textured!
Step 3: Mix the Walnut Filling & Melt the Butter
When the pastry crumbs are baked and golden brown, remove them from the oven and let them cool slightly. They do not need to be completely cold, but they should not be too hot when you mix them with the walnuts.
- Combine the Filling: Add the cooled pastry crumbs to your bowl of ground walnuts.
- Add a Touch of Sugar: Take one small handful of granulated sugar from the total amount listed in the recipe and add it to the walnut mixture. Mix everything together with a spoon until the walnuts, sugar, and pastry crumbs are evenly combined.
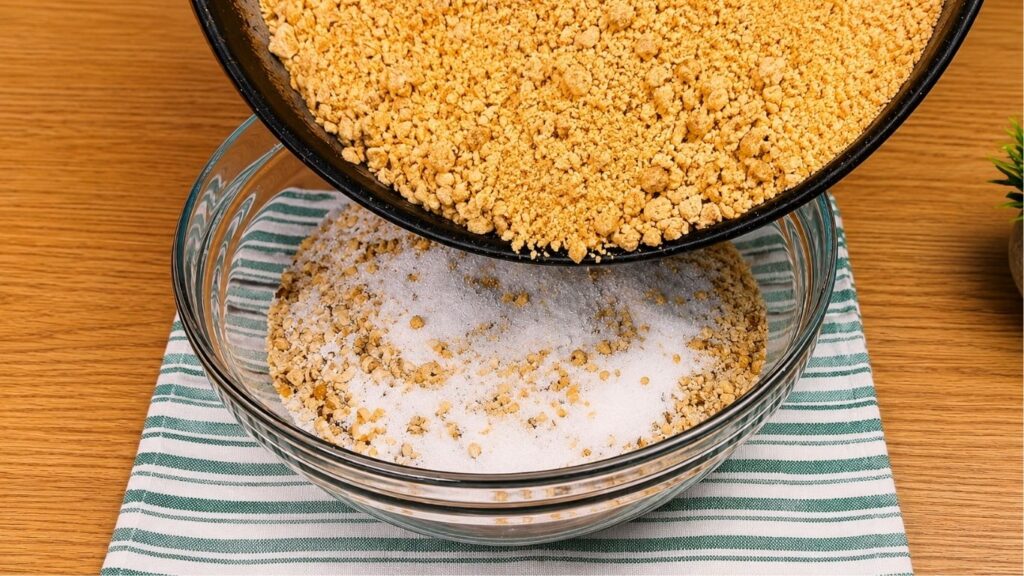
- Melt the Butter: Place 1 ¾ sticks / 14 tablespoons (200g) of unsalted butter in a small saucepan and melt it gently over low heat. The butter should be fully liquid and warm, but be careful not to let it brown or burn.
This unique combination is what makes this the best baklava recipe. The walnuts provide that classic rich, nutty flavor, while the homemade pastry crumbs lock in the texture and help make every single bite of this homemade baklava taste full, light, and delicious.
Once your butter is melted and the walnut filling is ready, it is time to start layering and assembling!
Step 4: Layer and Assemble the Baklava
Before you begin, brush the bottom and sides of a 12.5-inch, 32 cm, round baking pan with a little bit of the melted butter.
- The Base Layers: Place your first sheet of phyllo dough into the pan and lightly brush it with melted butter. Add a second sheet of phyllo on top and brush it with butter. Place a third sheet of phyllo, brush it with butter, and then sprinkle about 3 handfuls of the walnut filling evenly over the surface.
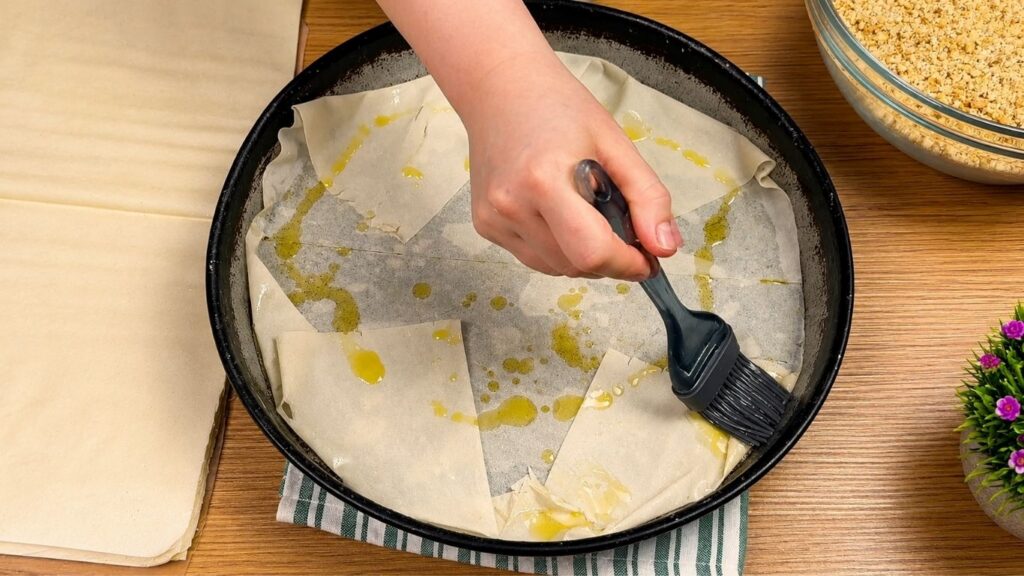
- The Layering Routine: Continue building the baklava using this exact rhythm: 3 sheets of phyllo dough (brushing each individual sheet with melted butter), followed by a layer of walnut filling. Repeat this process until you have used all of your phyllo sheets and filling. Depending on your pan size, you can add 2 to 3 handfuls of filling per layer.
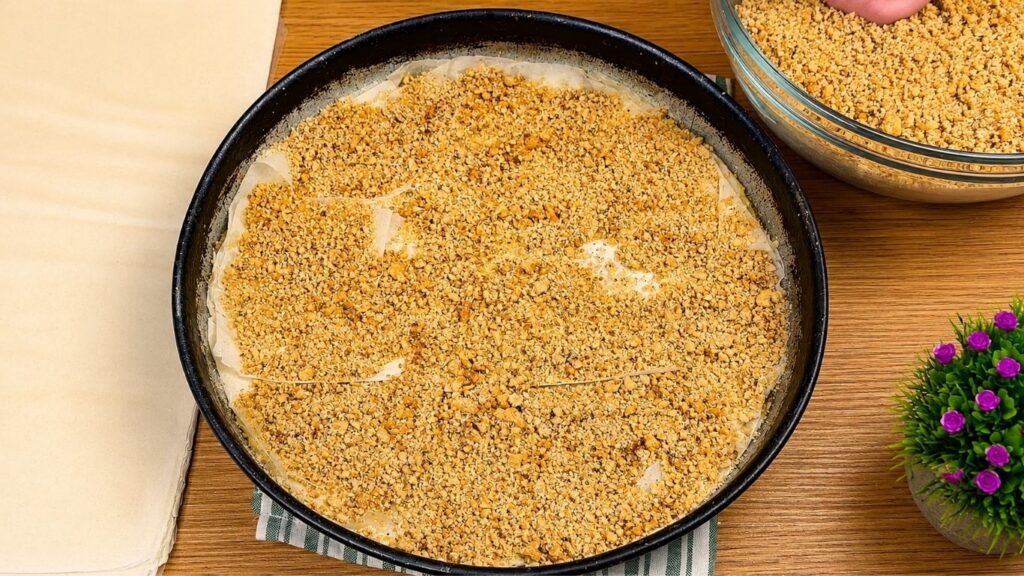
- No-Waste Tip (Use the Torn Pieces): Do not throw away any trimmed or torn pieces of phyllo dough! I love to use every single scrap. Simply tuck the extra or broken pieces between two full sheets of phyllo, folding them where needed to fill any empty spots. This actually creates more texture and beautiful hidden layers.
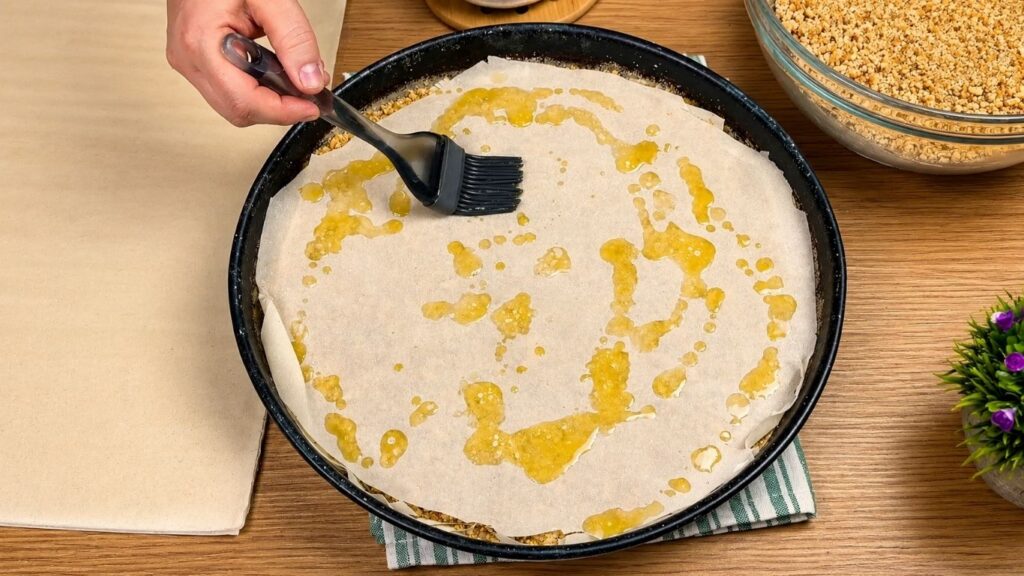
- The Top Layers: Save 4 of your best, full sheets of phyllo dough for the very top of the baklava. Layer them one by one, brushing each sheet generously with melted butter. This creates that iconic, beautifully crispy, and flaky golden finish.
- Slice Before Baking: Slice the baklava into your desired pattern (diamonds or squares) before it goes into the oven. Slicing through baked, crunchy phyllo is nearly impossible without shattering it. The cutting pattern is easiest to understand by looking at my step-by-step photos below, or even better, by watching the full video tutorial at the end of this blog post.
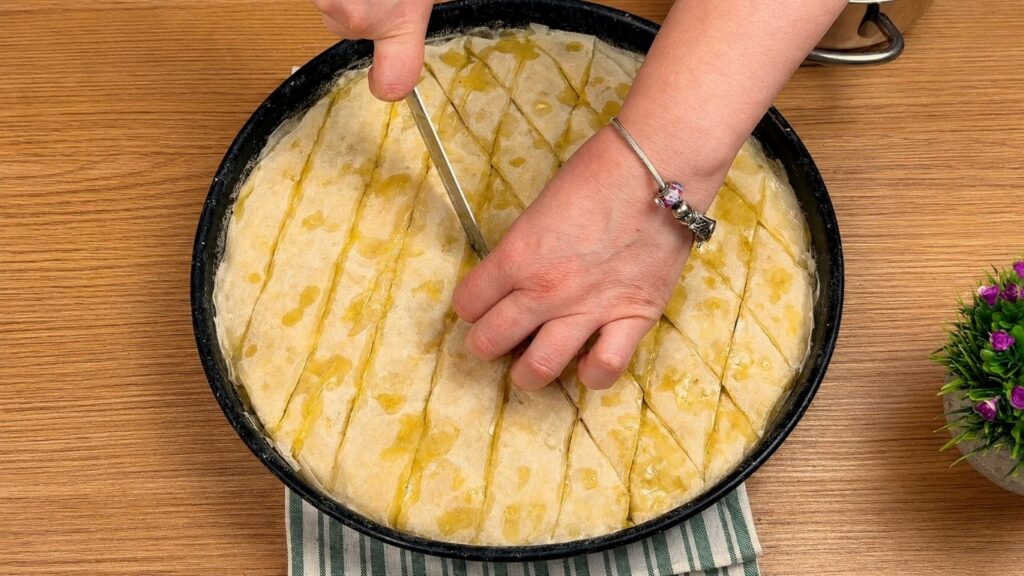
- Bake to Perfection: Once cut, lower your oven temperature to 350°F (175°C). Place the baklava inside and bake for about 1 hour until the layers are beautifully puffed, deeply golden, and incredibly crispy throughout.
Step 5: Make the Sugar Syrup & Pour
While your baklava is in the oven baking to a golden crisp, it is time to prepare the sweet sugar syrup.
- Combine the Ingredients: In a large saucepan, combine 5 cups (1 kg) of granulated sugar, 3 ⅓ cups (800 ml) of water, 2 teaspoons (1 packet) of vanilla sugar, and 1 whole lemon sliced into rounds.
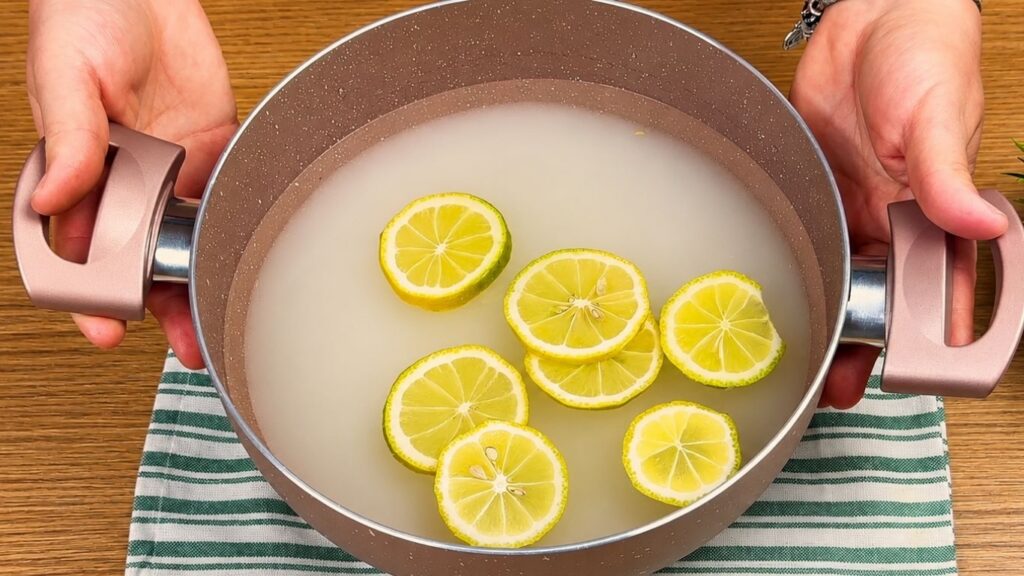
- Bring to a Boil: Place the saucepan over medium-high heat and bring the mixture to a boil.
- Stir to Prevent Burning: Make sure to stir the syrup a few times while it is heating up. Sometimes the sugar can settle at the bottom of the pan, and if it isn’t stirred, it can catch and burn slightly.
- Simmer Gently: Once the syrup reaches a full boil, reduce the heat to the lowest setting. Let it gently simmer on low so the syrup stays warm and ready while the baklava finishes baking.
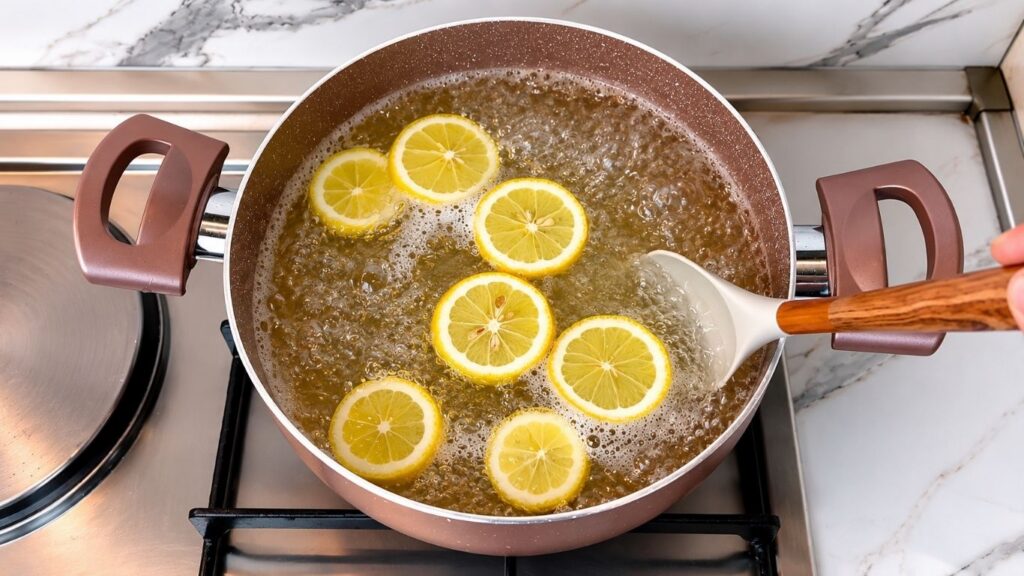
- The Hot-on-Hot Pour (The Ultimate Crunch Secret): As soon as your baklava comes out of the oven golden and bubbling, immediately pour the hot syrup evenly over the hot baklava.
The Secret to the Perfect Crunch: You will hear a beautiful, loud sizzle! While many standard recipes use cold syrup to keep things from getting soggy, this “hot-on-hot” method is the exact secret to this recipe. Thanks to the unique texture of our homemade pastry crumbs, they will not get soft or mushy. Instead, they absorb the sweet syrup but stay incredibly crispy inside, giving you that perfect contrast of a juicy interior and a spectacular crunch in every single bite! Allow the baklava to cool completely before serving.
Step 6: Pour the Syrup Over the Baklava
- Pour Slowly: When the baklava is fully baked and has a beautiful golden color, remove it from the oven. Slowly pour the hot syrup over the hot baklava, making sure to cover every piece and every cut line. Take your time with this step so the syrup can soak evenly into all the crispy layers of this baklava recipe.
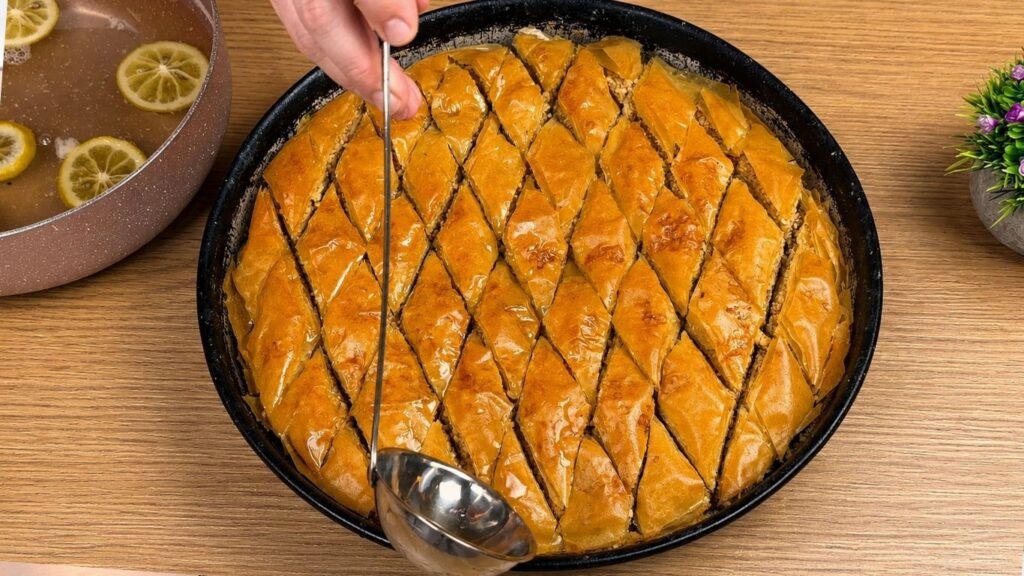
- Let It Absorb: Continue pouring until you use all of the syrup. At first, it may look like a lot, but the baklava will slowly absorb it as it rests. This is what gives the baklava its perfect juicy texture while keeping the top layers deliciously crisp.
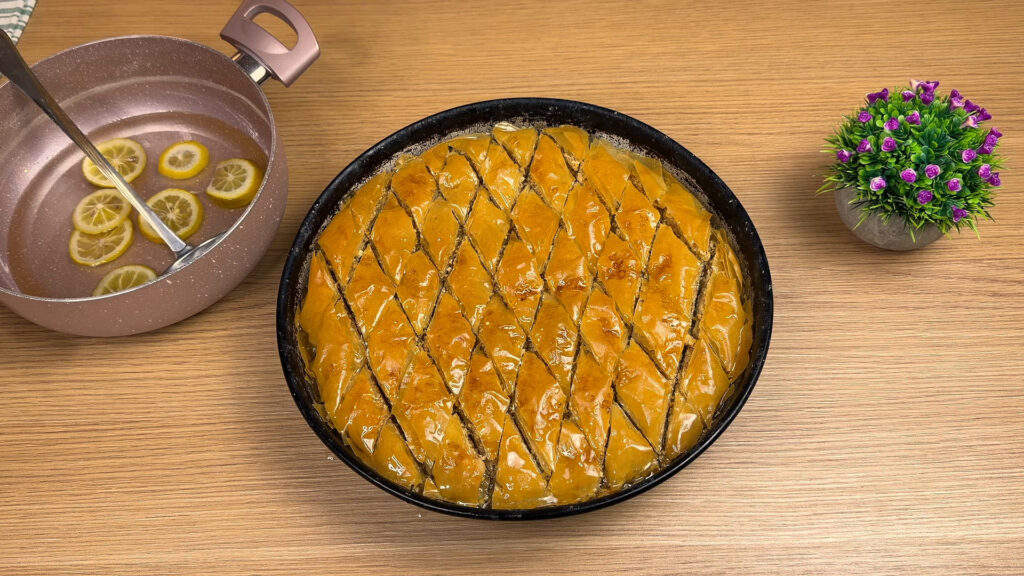
- Cool and Serve: Set the baklava aside and let it cool completely before serving. Once it has cooled and absorbed the syrup, cut along the same lines again if needed, serve, and enjoy the rich, sweet, crispy, and juicy flavor of homemade baklava recipe.
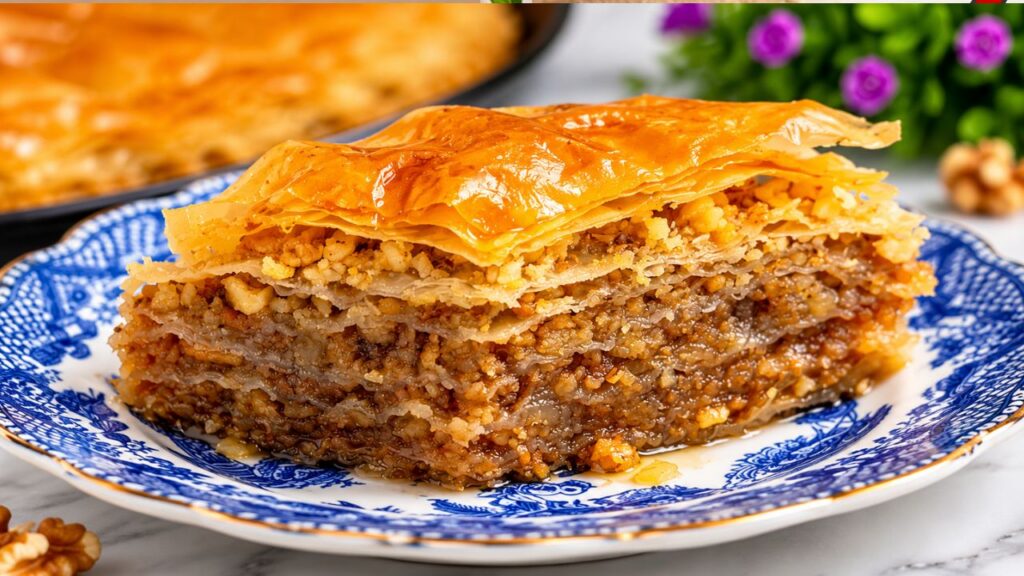
How to Store and Freeze Baklava
Baklava stores very well, and the flavor of this baklava recipe is often even better the next day after the syrup has fully soaked into the layers. Once the baklava has cooled completely, cover the baking pan with plastic wrap or aluminum foil, or transfer the pieces to an airtight container.
You can keep baklava at room temperature for 3 to 4 days. If your kitchen is very warm, store it in the refrigerator for up to 1 week. For the best texture, let refrigerated baklava sit at room temperature for a little while before serving.
Baklava can also be frozen. Place the cooled pieces in an airtight freezer-safe container, separating the layers with parchment paper if needed. Freeze this delicious baklava for up to 2 months. When you are ready to serve, thaw the baklava in the refrigerator or at room temperature. The texture may be a little softer after freezing, but it will still be sweet, juicy, and delicious.
Frequently Asked Questions
Can I use frozen phyllo dough for this baklava recipe?
Yes, you can use frozen phyllo dough if that is what you have available, but I highly prefer fresh packaged phyllo dough for this baklava recipe. Fresh phyllo is much easier to work with and gives the final dessert a beautiful crispy texture. If you must use frozen phyllo, just make sure it is completely thawed in the refrigerator before you start baking.
Why do you use homemade pastry crumbs in the walnut filling?
The homemade pastry crumbs, also known as tirit, are the absolute secret ingredient in this baklava recipe. While most recipes only use nuts, these crumbs absorb the sweet syrup beautifully while remaining incredibly crunchy inside. This ensures your filling never gets soft or mushy, giving the baklava a richer, fuller, and more traditional texture.
Do I need to cut baklava before baking?
Yes, baklava must always be cut before baking. Once the phyllo dough is baked and crispy, it is nearly impossible to cut cleanly without shattering the delicate top layers. Cutting it beforehand also ensures that the sweet sugar syrup can easily soak deep into every single piece.
Do you pour hot syrup over hot baklava?
For this specific baklava recipe, yes! I pour hot syrup over hot baked baklava straight out of the oven. This “hot-on-hot” method helps the syrup soak beautifully into the lower layers and gives the baklava a wonderfully juicy inside while keeping the top layers spectacularly crisp.
How long should baklava rest before serving?
Baklava should rest until it cools down completely to room temperature. This gives the sweet syrup enough time to absorb evenly into all the layers. In fact, the overall flavor of this baklava recipe is even better after a few hours or the next day.
How do I keep baklava crispy?
Always let the baklava cool completely before covering it. Storing it loosely covered at room temperature for the first few days will help keep the top layers nicely crisp. Covering it tightly while it is still warm will trap steam and make the pastry soggy.
Can I make baklava ahead of time?
Yes, this baklava recipe is a fantastic make-ahead dessert. You can easily make it a day or two before serving. The flavor actually improves over time because the syrup has more time to completely soak into the layers and meld with the walnut filling.
Can I use other nuts instead of walnuts?
Yes, you can easily use pistachios, almonds, or a mix of your favorite nuts. However, walnuts are what give this traditional baklava recipe its classic rich flavor, deep aroma, and authentic homemade taste
Nutrition Per Serving
Nutrition information is approximate and calculated for 1 piece of baklava, based on 30 servings from this recipe.
Calories: 414 kcal
Carbohydrates: 50 g
Protein: 6 g
Fat: 23 g
Saturated Fat: 7 g
Sugar: 34 g
Fiber: 2 g
Sodium: 120 mg
This baklava recipe is a rich dessert made with phyllo dough, walnuts, butter, and syrup, so it is best served in small pieces. The exact nutrition may vary depending on the brand of phyllo dough, the amount of syrup absorbed, and the size of each piece.
Conclusion
This baklava recipe is the perfect dessert when you want something crispy, juicy, sweet, and full of homemade flavor. The golden phyllo layers, rich walnut filling, buttery pastry crumbs, and warm syrup come together to create a baklava that tastes special in every bite.
It takes a little time to prepare, but every step is simple and worth it. Once the baklava cools and the syrup soaks into the layers, you get the perfect balance of crispy top layers and a sweet, juicy center. Serve it for holidays, family gatherings, or any special occasion when you want a dessert everyone will remember.
Happy Baking!
Leave a Reply