📖 Table of Content:
Welcome to my kitchen, where magic happens one swirl at a time! Today, I’m thrilled to share with you the ultimate buttercream recipe that has become the foundation of every single cake I create. This isn’t just any frosting – it’s the secret weapon behind all my beautiful cake designs, from delicate piping details to smooth, flawless finishes.
Whether you’re a home baker looking to elevate your cake game or a professional pastry chef perfecting your craft, this American buttercream recipe will transform your baking experience. The beauty of this frosting lies in its simplicity: just a few quality ingredients create the most luxurious, creamy texture that spreads like a dream and holds its shape beautifully.

In this guide, I’ll walk you through every step to create the perfect buttercream recipe – smooth, creamy, and absolutely gorgeous. This versatile frosting works beautifully on its own or paired with other decorative elements. If you love working with different cake decorating techniques, you might also enjoy my homemade fondant recipe for a polished, professional finish.
One of the best things about mastering buttercream is that it opens endless possibilities for cake design. From simple elegance to intricate details, this frosting is your artistic canvas. For more inspiration on professional cake decorating techniques, check out this comprehensive guide to cake frosting.
Let’s dive in and discover why this recipe has become my signature frosting!
MY LATEST VIDEOS
QUICK RECIPE INFO
- Prep Time: 5 minutes
- Mixing Time: 10 minutes
- Total Time: 15 minutes
- Yield: Makes approximately 6 cups (1.5 kg / 3.3 lbs)
- Difficulty Level: Easy
- Best For:
- Cake frosting and decorating
- Piping designs and details
- Fondant base preparation
- Professional cake coverage
- Smooth cake finish
What You’ll Need for This Buttercream Recipe
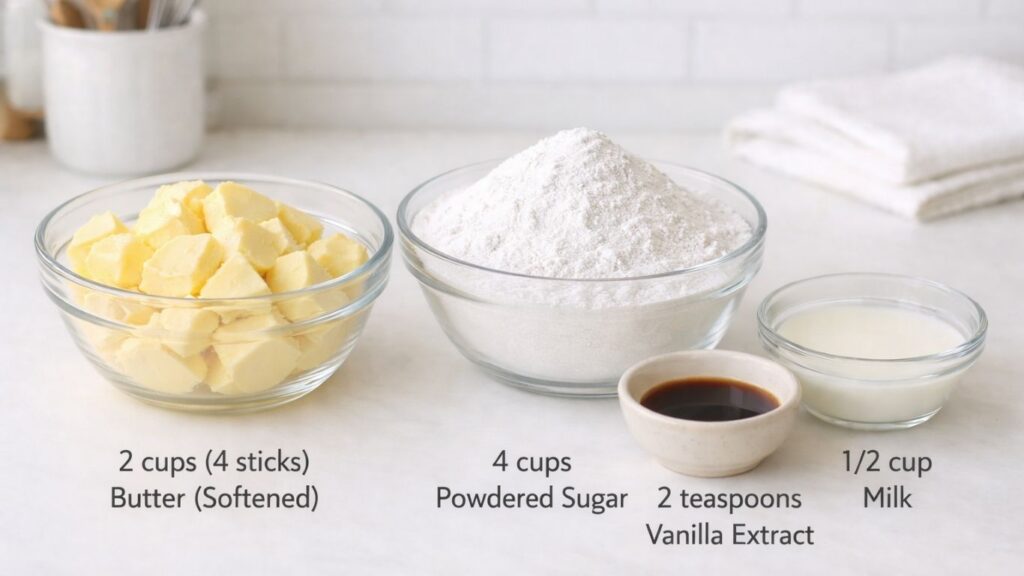
Making the perfect buttercream starts with quality ingredients. Each component plays a crucial role in creating that luxurious texture and beautiful finish.
The softened butter provides the rich, creamy base, while the powdered sugar adds sweetness and helps achieve that silky consistency. The vanilla extract brings depth of flavor, and the milk helps create the perfect spreadable texture.
The key to success is using room temperature butter – this ensures it mixes smoothly with the sugar and creates an airy, fluffy buttercream. Cold butter will be difficult to beat and won’t incorporate properly, resulting in a lumpy texture. Make sure all your ingredients are at room temperature for the best results!
Let’s gather everything we need and get started on creating this delicious frosting.
Why You Will Love This Recipe
This buttercream recipe is an absolute game-changer for any baker. Here’s why you’ll fall in love with it:
Easy to Make – With just 15 minutes of total time, you can have a professional-quality frosting ready to decorate your cakes. No complicated techniques or special equipment needed – just a stand mixer and basic ingredients.
Smooth and Creamy Texture – This buttercream spreads like silk and pipes beautifully. Whether you’re creating delicate rosettes or smooth finishes, it holds its shape perfectly while maintaining that luxurious, melt-in-your-mouth taste.
Versatile – Use it as a crumb coat before fondant, as a base for beautiful piping designs, or for smooth frosting coverage. It works with any cake flavor and color you desire. You can even customize it with different extracts and food coloring.
Professional Results – Even if you’re a beginner, this recipe delivers bakery-quality results every single time. Your cakes will look like they came straight from a professional pastry shop.
Delicious Taste – Beyond its beauty, this buttercream is absolutely delicious. The balance of butter and sugar creates the perfect sweetness, and the vanilla adds wonderful flavor depth.
Get ready to create stunning cakes that will impress everyone!
INGREDIENTS
- 2 cups (500g) softened butter
- 4 cups (1000g) powdered sugar
- 2 tablespoons vanilla extract
- 1/2 cup whole milk
How to Make Buttercream
The first and most important step is preparing your butter correctly. Remove the butter from the refrigerator several hours ahead of time, or preferably the night before. Room temperature butter is essential – it should be soft to the touch but still hold its shape. Cold butter will be impossible to beat properly and will result in a lumpy, uneven buttercream.
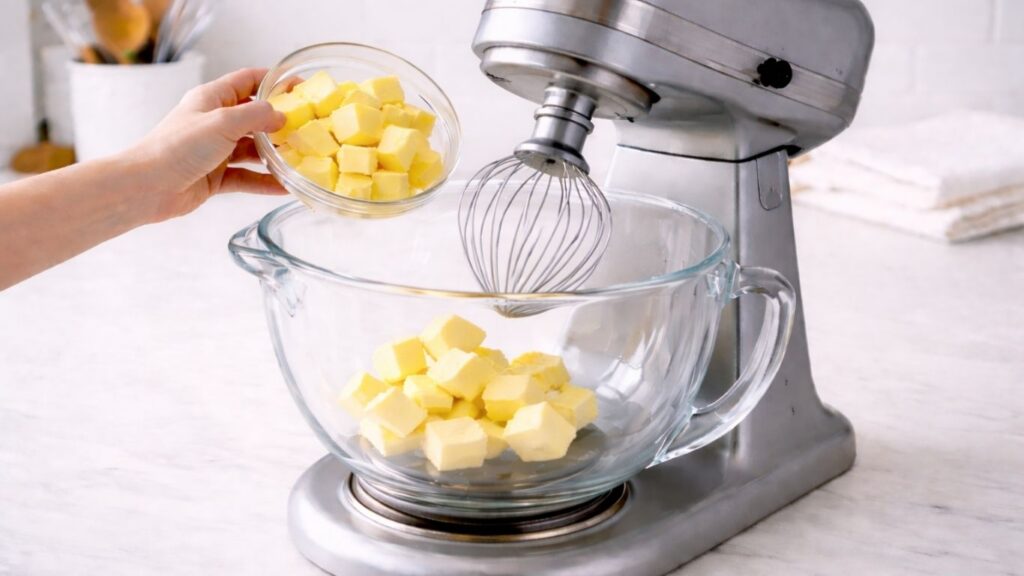
Once your butter reaches room temperature, place it in the bowl of your stand mixer. Using the paddle attachment, start mixing on medium speed. The butter will gradually transform from a dense block into a light, fluffy, and pale mixture. This process is crucial – you’re incorporating air into the butter, which creates that luxurious, creamy texture.
As you mix, you’ll notice the butter will stick to the sides of the bowl. Don’t worry! Every few minutes, stop the mixer and use a rubber spatula to scrape down the sides of the bowl, pushing the butter back toward the center. This ensures all the butter gets evenly whipped and incorporates air uniformly. Continue mixing for about 3-5 minutes until the butter is completely pale, fluffy, and almost doubled in volume.

You’ll know it’s ready when it looks like clouds – light, airy, and creamy. This is the foundation of your perfect buttercream!
Now comes the magic! With the mixer on low speed, slowly add the powdered sugar in several batches. Don’t dump all the sugar at once – adding it gradually prevents a cloud of powdered sugar from escaping your mixer and ensures even incorporation of this essential buttercream recipe ingredient.

After each addition of sugar, let the mixer run for about a minute before adding more. As you add the sugar, you might notice the butter mixture becoming thick and stiff. This is completely normal! Again, stop the mixer every couple of minutes and use your rubber spatula to scrape down the sides of the bowl. Push the mixture back toward the center to ensure the butter and sugar are mixing evenly and uniformly.
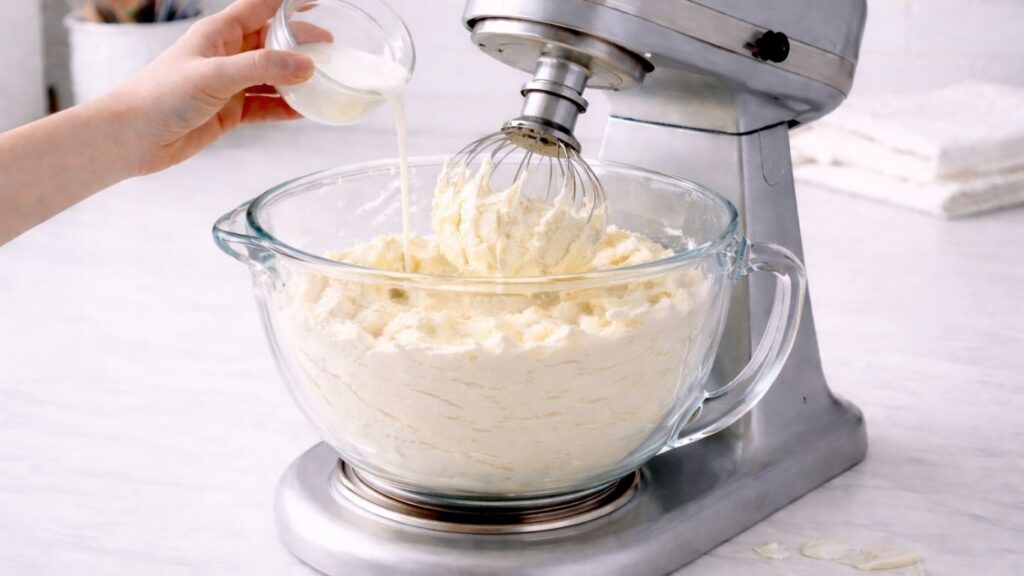
Adding the Milk for Smoothness
Here’s a pro tip that makes all the difference in this buttercream recipe: while you’re adding the powdered sugar, also add the milk gradually, a little at a time. Add about a tablespoon or two of milk after every 1-2 cups of sugar. This helps keep the mixture smooth and creamy instead of becoming too thick and grainy. The milk acts as a tenderizer, creating that silky, spreadable texture we’re aiming for.
Continue this process – adding sugar, scraping the bowl, adding a splash of milk – until all the powdered sugar and milk are fully incorporated. The mixture should look smooth, light, and creamy.
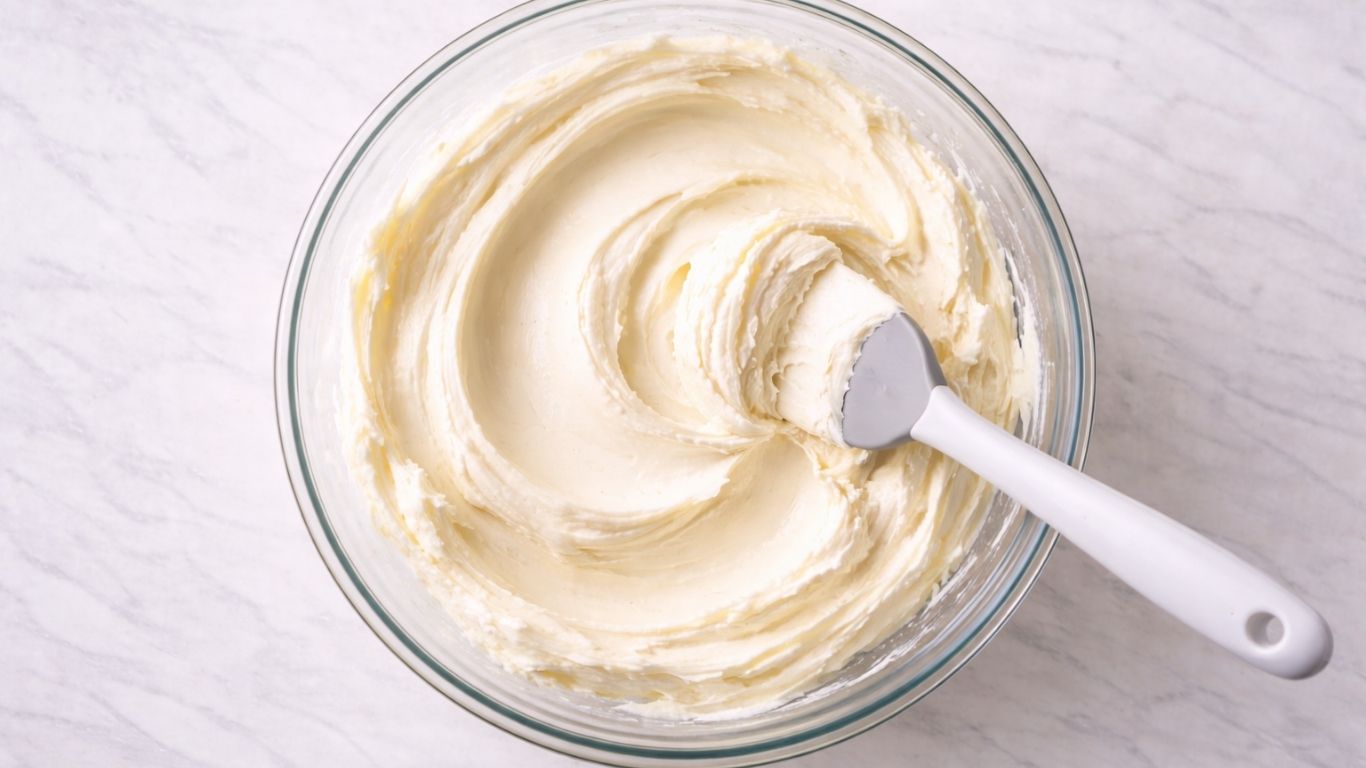
Once all the sugar and milk are fully incorporated and the mixture looks smooth and creamy, it’s time to add the vanilla extract. With the mixer still running on medium speed, slowly pour the vanilla extract into the buttercream. The mixer will quickly incorporate it into the mixture. Continue beating for another 5-10 minutes until the buttercream recipe reaches its final, luxurious texture.
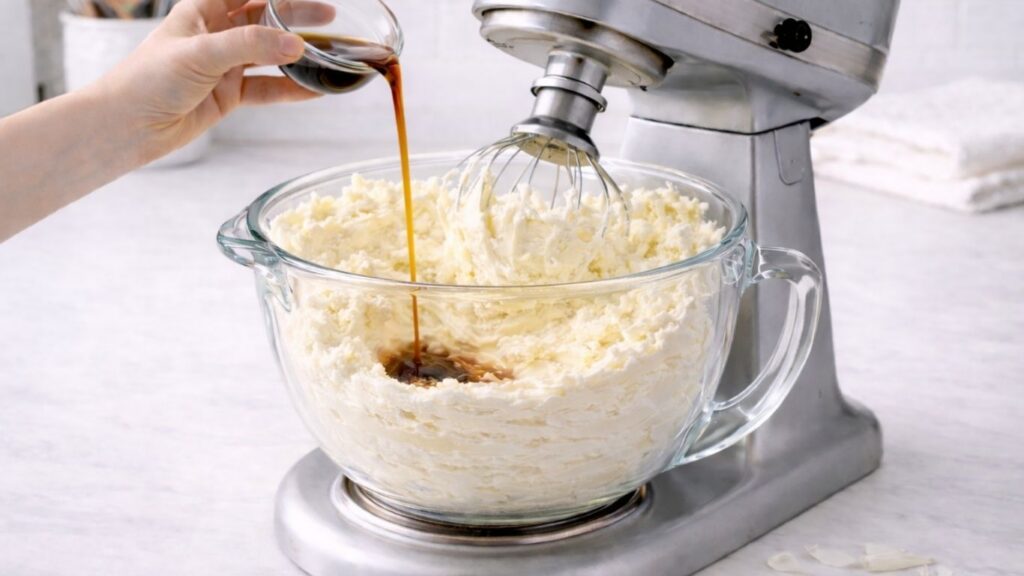
During this final mixing time, the buttercream will continue to become lighter, fluffier, and more luxurious. You’ll notice it transforming from a slightly grainy mixture into a silky, cloud-like frosting that’s absolutely gorgeous.
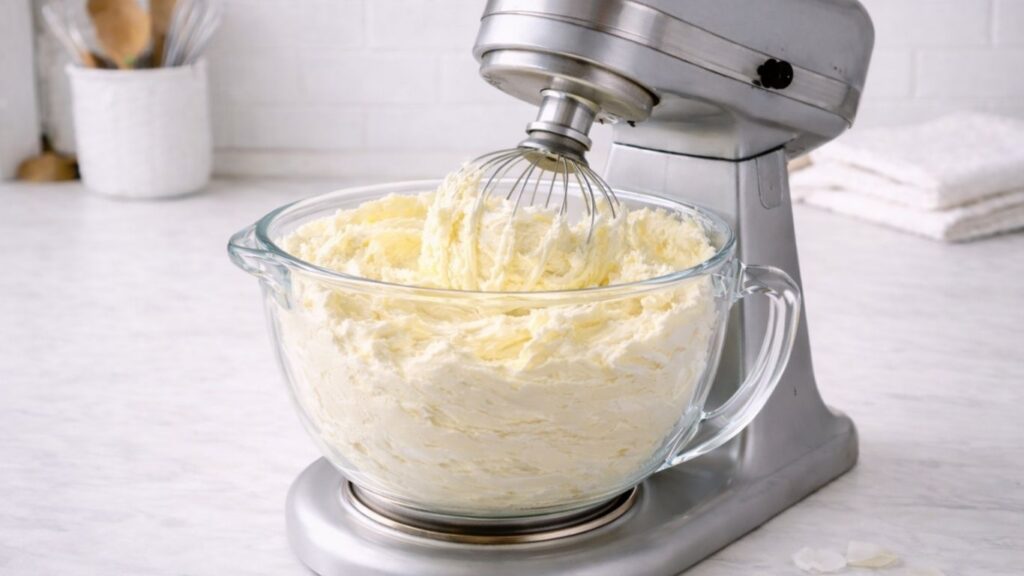
Testing the Texture
After the final mixing, it’s time to test your buttercream recipe. Using your rubber spatula, scoop a small amount and feel the texture between your fingers. Rub it gently – it should feel smooth, creamy, and easy to spread. If it feels too stiff or firm to the touch and doesn’t spread easily, don’t worry!
Simply add a little more milk – just a tablespoon at a time – and continue mixing. Keep adding milk gradually and mixing for another minute or two until you reach the perfect consistency. Your buttercream recipe should feel silky to the touch and spread like butter on warm toast. This is when you know you’ve achieved perfection and created the ultimate frosting for all your cake decorating needs!

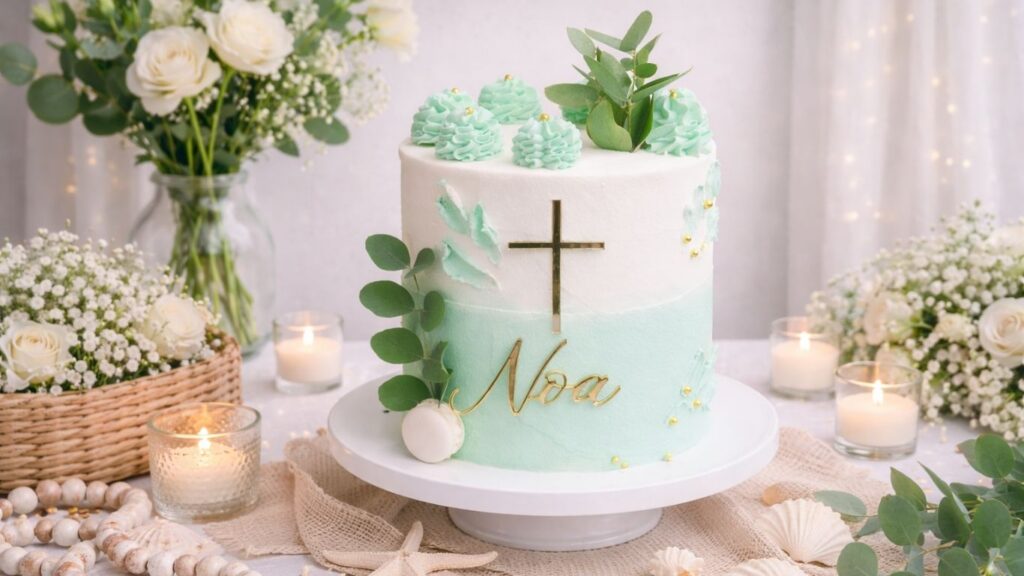
Now that you’ve mastered this incredible buttercream recipe, it’s time to put it to work! This frosting is the perfect foundation for creating stunning, professional-looking cakes. Whether you’re decorating a simple layer cake, creating intricate piping designs, or preparing a smooth base before fondant application, this buttercream recipe delivers beautiful results every single time.
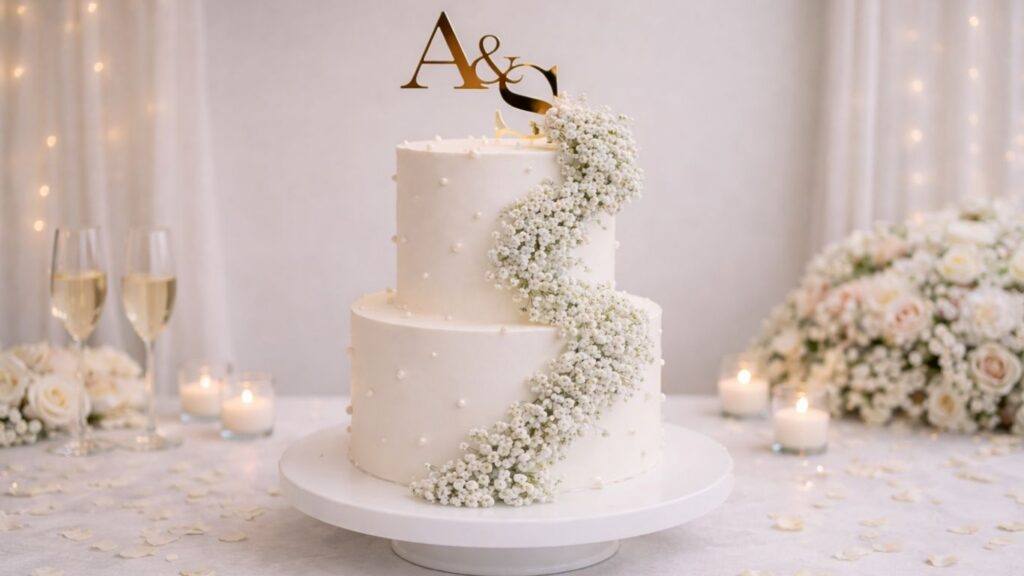
Below, I’ve showcased some of my favorite cakes decorated with this exact buttercream. These designs range from elegant and minimalist to intricate and detailed – all created with the same recipe you just learned. Let these creations inspire you and show you the endless possibilities this versatile frosting offers. Your cake decorating journey starts here!
Tips and Tricks for Perfect Buttercream
1. Room Temperature is Everything
The most important rule for perfect buttercream is ensuring all your ingredients are at room temperature. This includes the butter, milk, and even the mixing bowl. Cold ingredients won’t blend smoothly and will result in a lumpy, uneven texture. If you forget to take your butter out early, you can cut it into small cubes and let it soften for 15-20 minutes. Room temperature butter beats faster, incorporates air more efficiently, and creates that signature fluffy texture.
2. Sift Your Powdered Sugar
Before adding powdered sugar to your buttercream recipe, sift it through a fine mesh strainer. This removes lumps and aerates the sugar, making it easier to incorporate into the butter. Sifted sugar creates a smoother, more refined buttercream without any grainy texture.
3. Don’t Skip the Scraping
Throughout the mixing process, stop your mixer frequently and scrape down the sides of the bowl with a rubber spatula. This seemingly simple step is crucial! It ensures every bit of butter and sugar gets evenly incorporated, preventing lumpy spots and creating a uniformly smooth buttercream.
4. Add Milk Gradually
The consistency of your buttercream recipe depends on how much milk you add. Start with less milk than you think you need – you can always add more. Add milk one tablespoon at a time and mix well between additions. This gives you more control over the final consistency and prevents the buttercream from becoming too thin.
5. Use Quality Ingredients
The better your ingredients, the better your buttercream will taste and look. Use real butter (not margarine), pure vanilla extract (not imitation), and fresh powdered sugar. Quality ingredients make a noticeable difference in the final result.
6. Perfect Your Beating Time
Don’t rush the final beating stage! Beating the buttercream for the full 5-10 minutes after adding vanilla is what gives it that luxurious, cloud-like texture. This process incorporates air and creates the fluffy, professional finish you’re aiming for.
7. Storage Tips
Your buttercream recipe can be made ahead and stored. Keep it in an airtight container at room temperature for up to 2 days, in the refrigerator for up to 2 weeks, or in the freezer for up to 3 months. If you refrigerate it, allow it to come to room temperature and re-whip it for a few minutes before using to restore its creamy texture.
8. Color and Flavor Variations
Once you master this basic buttercream recipe, have fun experimenting! Add gel food coloring for vibrant colors without adding extra liquid. Try different extracts like almond, lemon, or mint. You can even add a tablespoon of cocoa powder for chocolate buttercream or fresh fruit purees for fruity variations.
Frequently Asked Questions
Why is my buttercream grainy or lumpy?
Grainy buttercream usually means your ingredients weren’t at room temperature or the powdered sugar wasn’t sifted. Make sure your butter is soft and pliable, and always sift your powdered sugar before adding it. If you already have lumpy buttercream, you can try re-whipping it for a few more minutes or gently warming the bowl with a warm towel while mixing.
Can I make this buttercream recipe ahead of time?
Absolutely! You can prepare your buttercream recipe up to 2 days in advance and store it in an airtight container at room temperature. For longer storage, keep it in the refrigerator for up to 2 weeks or freeze it for up to 3 months. Before using refrigerated or frozen buttercream, allow it to come to room temperature and re-whip it for 2-3 minutes to restore its creamy, fluffy texture.
What’s the difference between this buttercream and other types?
This is American-style buttercream, which is made with butter and powdered sugar. It’s known for being easy to make, delicious, and perfect for piping and decorating. Other types include Swiss meringue buttercream (cooked), Italian meringue buttercream (also cooked), and French buttercream (egg-based). This buttercream recipe is the most beginner-friendly option.
Can I use this buttercream with fondant?
Yes! This buttercream is actually the perfect base layer before applying fondant. Apply a thin “crumb coat” of this buttercream recipe to seal in the cake crumbs, refrigerate for 15-20 minutes, then apply your fondant on top. The smooth buttercream creates an even surface for your fondant to adhere to beautifully.
How do I get a smooth finish with this buttercream?
To achieve a smooth finish, apply a crumb coat first (a thin layer of buttercream), refrigerate for 20 minutes, then apply a final coat. Use an offset spatula or cake scraper dipped in warm water to smooth out any imperfections. Practice makes perfect – your technique will improve with each cake you decorate!
Can I color this buttercream?
Absolutely! Use gel food coloring instead of liquid food coloring to avoid making your buttercream recipe too thin. Gel colors are more concentrated and won’t affect the consistency. Add a small amount, mix well, and gradually add more until you reach your desired color.
What if my buttercream is too soft or too stiff?
If it’s too soft, refrigerate it for 15-30 minutes until it firms up. If it’s too stiff, add milk one tablespoon at a time and re-whip until you reach the perfect consistency. If it’s too thin, add more powdered sugar gradually while mixing. Getting the consistency just right is all about practice and adjusting to your preference.
Can I use this buttercream for piping decorations?
Yes! This buttercream recipe is perfect for piping. For intricate piping work, you may want a slightly stiffer consistency, so use less milk. For smooth frosting, use the regular consistency with the full amount of milk. The buttercream should hold its shape when piped but still be smooth and creamy.
How long does buttercream stay fresh on a cake?
A frosted cake decorated with this buttercream recipe can sit at room temperature for up to 2 days. For longer storage, refrigerate it for up to 5 days or freeze it for up to 3 months. Always store cakes in an airtight container to prevent them from drying out.
Conclusion
Congratulations! You’ve now mastered one of the most essential skills in cake decorating – making the perfect buttercream recipe. What started as simple ingredients – butter, powdered sugar, vanilla, and milk – has transformed into a luxurious, versatile frosting that will elevate every cake you create.
This buttercream recipe is more than just a frosting; it’s the foundation of professional-looking cakes that taste absolutely delicious. Whether you’re decorating your first cake or you’re an experienced baker looking to perfect your technique, this recipe delivers consistent, beautiful results every single time.
The key to mastery is practice. Each cake you decorate will teach you something new. You’ll discover your preferred consistency, develop your piping techniques, and build confidence in your decorating skills. Don’t be discouraged if your first cake isn’t perfect – even the most experienced bakers started exactly where you are right now.
Now it’s time to put this buttercream recipe to work! Bake a cake, gather your decorating tools, and create something beautiful. Share your creations with friends and family, and watch their faces light up when they taste this incredible frosting. There’s nothing quite like the joy of serving a cake you made with your own hands using this amazing recipe.
If you found this guide helpful, please share it with fellow bakers and cake decorators. And if you create something beautiful using this buttercream recipe, I’d love to see it! Tag me on social media and share your cake creations – I can’t wait to be inspired by your work.
Happy decorating, and enjoy every delicious bite!
Leave a Reply