📖 Table of Content:
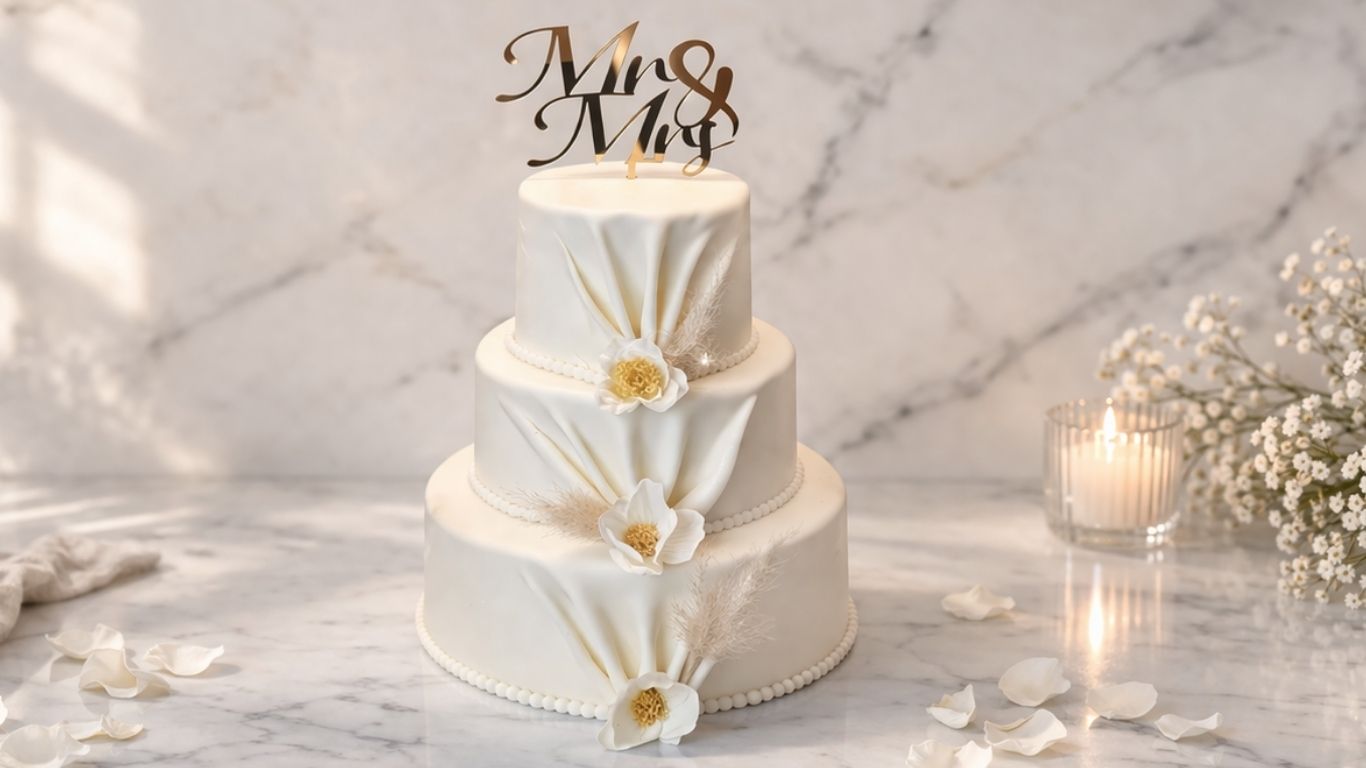
Making a 3-tier wedding cake at home might sound intimidating, but trust me, you’ve got this. With the right steps and a little patience, you’ll create a showstopper that looks like it came straight from a professional bakery. This guide walks you through everything from baking your first layer to decorating your finished 3-tier wedding cake so you can nail it with confidence.
Here’s the thing: a 3-tier wedding cake isn’t just dessert. It’s the beautiful centerpiece of your big day, and there’s something incredibly special about knowing you baked it yourself. Whether you’re an experienced baker or you’ve never made a tiered cake before, we’ll break this down into simple, doable steps. By the end, you’ll have created something you’re genuinely proud of and your guests will be seriously impressed.

Why Make Your Own 3-Tier Wedding Cake?
You’ll save 40-60% compared to hiring a professional baker. Plus, you get complete control over flavors, fillings, and design. If you want to take your decorating skills even further, check out our guide on how to make fondant it’s a game-changer for creating smooth, polished finishes.
The best part? Your guests will taste the love and care you put into every layer. I used this Wilton silicone mold for decorating details on this cake, and it makes creating professional designs so much easier.
MY LATEST VIDEOS
What You’ll Need For This 3-Tier Wedding Cake
For the Cake & Fillings:
- 3 cake fillings (your choice of flavors)
- 3 batches of buttercream https://ingakitchenstory.com/buttercream-recipe/
- 3 batches of fondant https://ingakitchenstory.com/homemade-fondant-recipe/
For Assembly & Support:
- Cake boards (for each tier)
- Dowel rods (for structural support)
- Wilton silicone mold (for decorative details)
For Decoration:
- Offset spatula
- Pastry brush
- Fresh flowers
- Cake topper
Why You’ll Love This 3-Tier Wedding Cake
Making your own 3-tier wedding cake gives you something that no bakery can replicate, a dessert made with your own hands and heart. You control every ingredient, from the cake flavor to the frosting sweetness, ensuring it matches your vision perfectly.

Beyond taste, there’s an undeniable pride in serving a centerpiece you created yourself. Your guests won’t just enjoy the cake; they’ll be amazed knowing you baked and decorated it. Plus, you’ll save thousands of dollars compared to hiring a professional baker, money you can use elsewhere for your celebration.
How to Make a 3-Tier Wedding Cake
Start with three chocolate cake layers 10 inches, 20 inches, and 30 inches in diameter. The beauty of a tiered cake lies in the proportional spacing between each tier; this size combination creates the most visually balanced and elegant look. Refrigerate your baked cakes overnight so they’re firm and easier to work with the next day.
Whip up three batches of buttercream using our signature recipe (find the full recipe on our website). The consistency is crucial here your frosting needs to be thick enough to hold the weight of the upper tiers without sagging or sliding.
Begin assembly by placing your largest 30-inch cake directly onto your cake stand or serving board. This bottom tier carries all the weight, so it needs a sturdy foundation. Stack the 20-inch tier on top, but here’s the secret: place it on a cake board that matches its exact diameter. This board does two things it distributes the weight evenly and prevents the frosting from crushing under pressure. Do the same with your smallest 10-inch top tier.
Now comes the structural magic. Carefully drill a hole through the center of each cake board this is where your wooden dowel rod will pass through. This wooden support system is essential for stability, keeping your cake standing perfectly straight and secure throughout your event.
Step 1: Prepare Your Smallest Tier
Begin with your smallest 10-inch cake layer and place it on a sturdy, food-grade cardboard cake board that matches its diameter. The cardboard should be water-resistant so it won’t absorb any moisture from the frosting. This board will serve as the foundation for your tier and help distribute weight evenly.
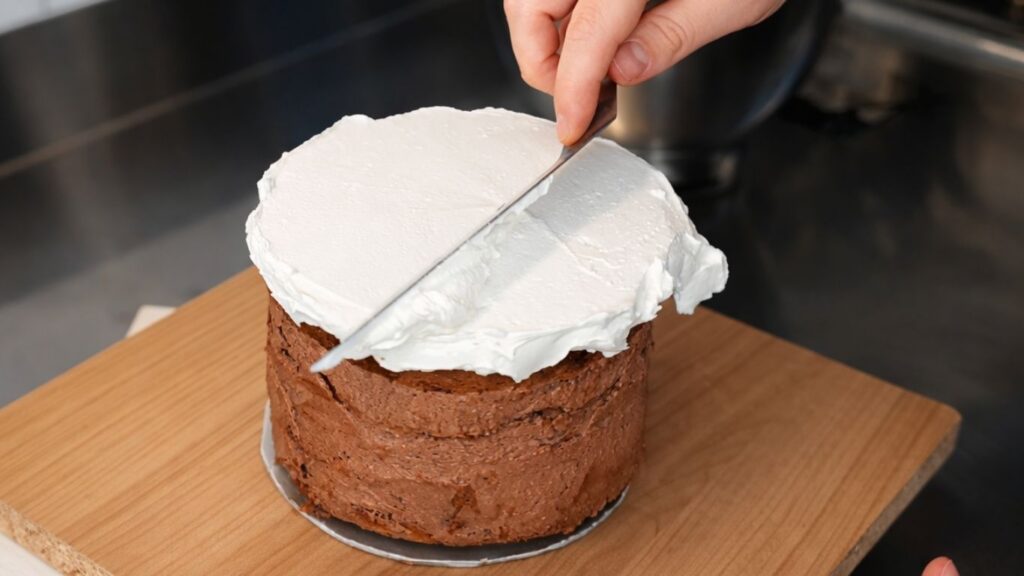
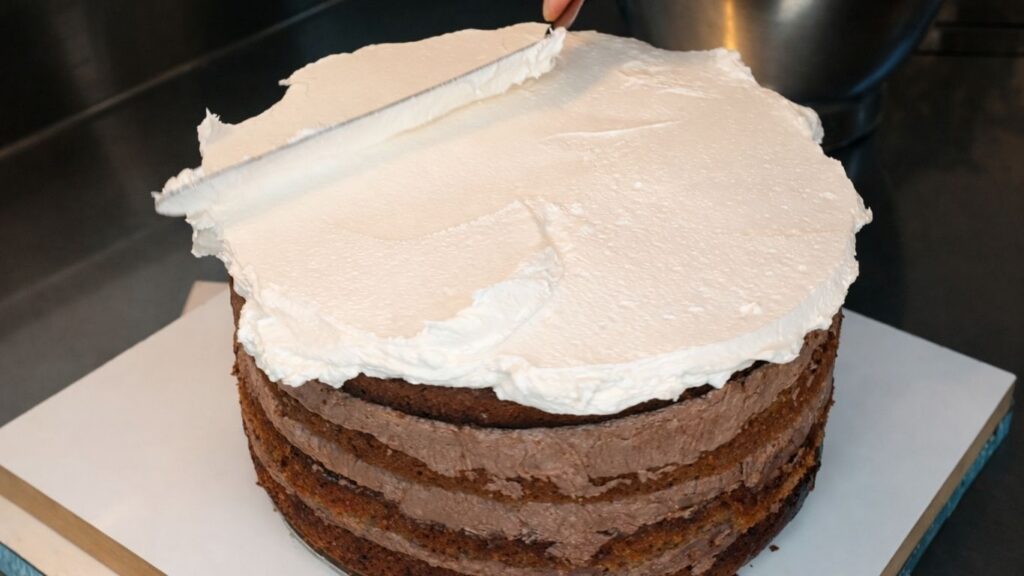
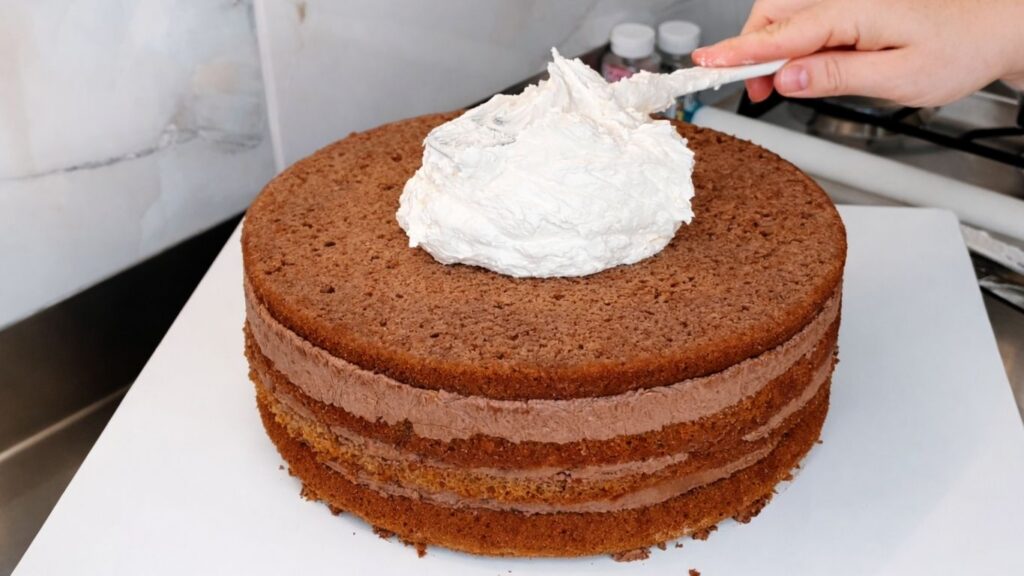
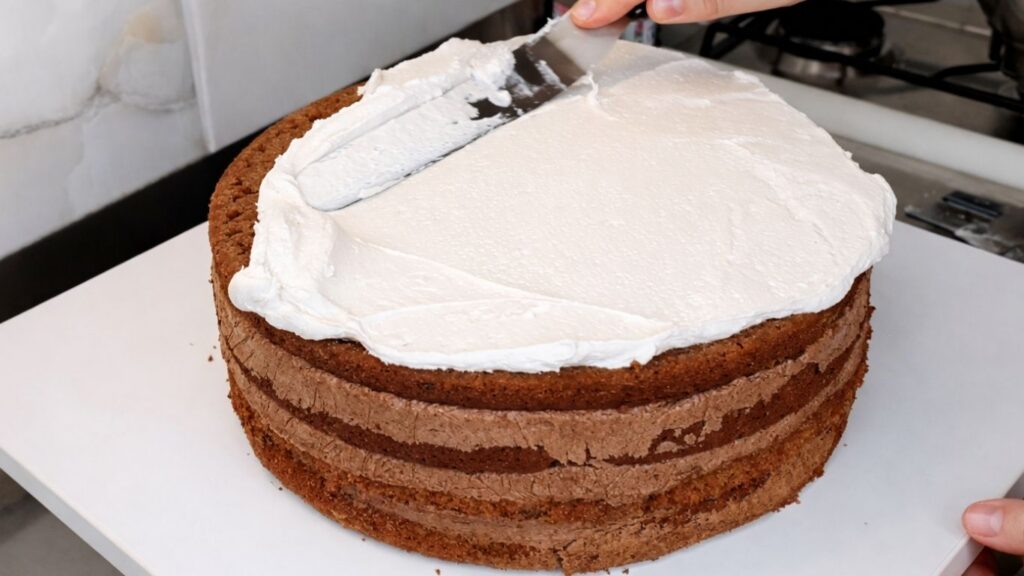
Apply your first layer of buttercream directly onto the cake. Don’t worry about making it perfectly smooth or symmetrical this initial frosting layer isn’t about perfection. Its purpose is to fill in any gaps, level out uneven spots, and create a smooth base for what comes next.
Think of it as your correction layer. Once you’ve covered the entire cake with this first coat of buttercream, you’re ready for the fondant that will go on top, which will give you that flawless, polished finish.
Step 2: Prepare Your Middle Tier
Take your 20-inch cake layer and place it on its own water-resistant cardboard cake board. Just like with the smallest tier, apply your first layer of buttercream evenly across the entire cake.

Again, don’t strive for perfection here this is your leveling and correcting layer. Spread the frosting to fill any gaps and smooth out any uneven spots on the cake surface. This foundational coat ensures that when you add your fondant on top, you’ll have a perfectly even, professional-looking base to work with.
Step 3: Prepare Your Largest Base Tier
Take your 30-inch cake layer and place it directly on your cake stand or serving board this largest tier doesn’t need a separate cake board underneath since it’s your foundation.
Apply your first layer of buttercream across the entire surface, spreading it evenly to cover the cake. Just like the smaller tiers, this initial coat isn’t about achieving a perfect finish. Focus on filling any gaps and leveling out the cake’s surface so you have a smooth, even base.
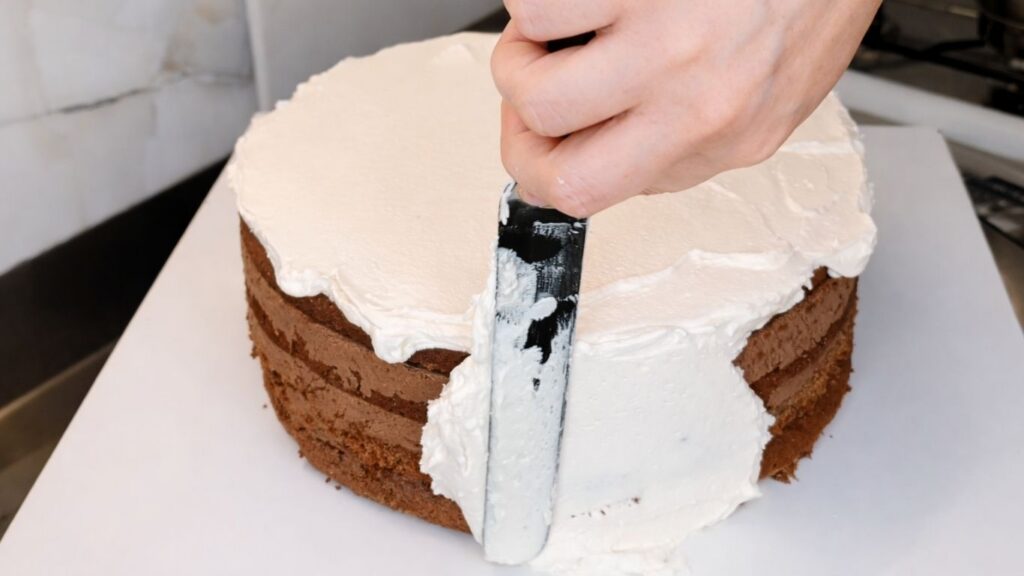
Once you’ve covered the entire tier with this foundational layer of buttercream, you’re ready to move on to the next step.
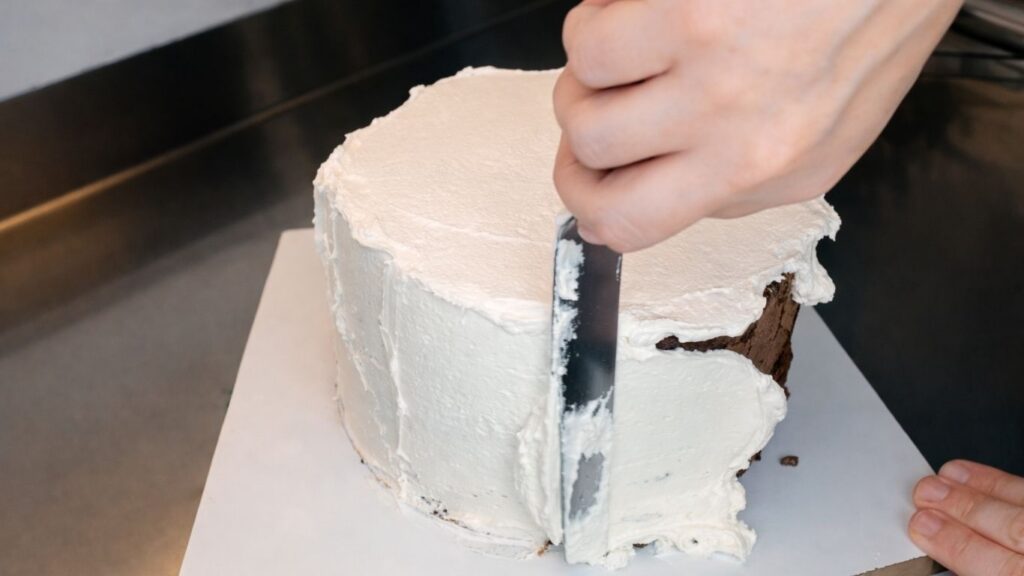
Step 4: Apply Your Second Buttercream Layer
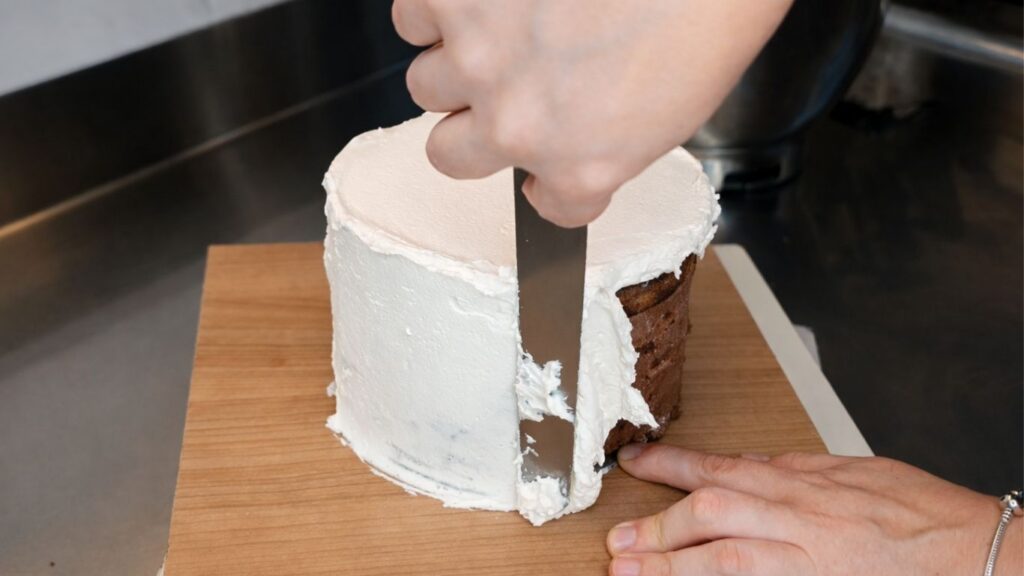
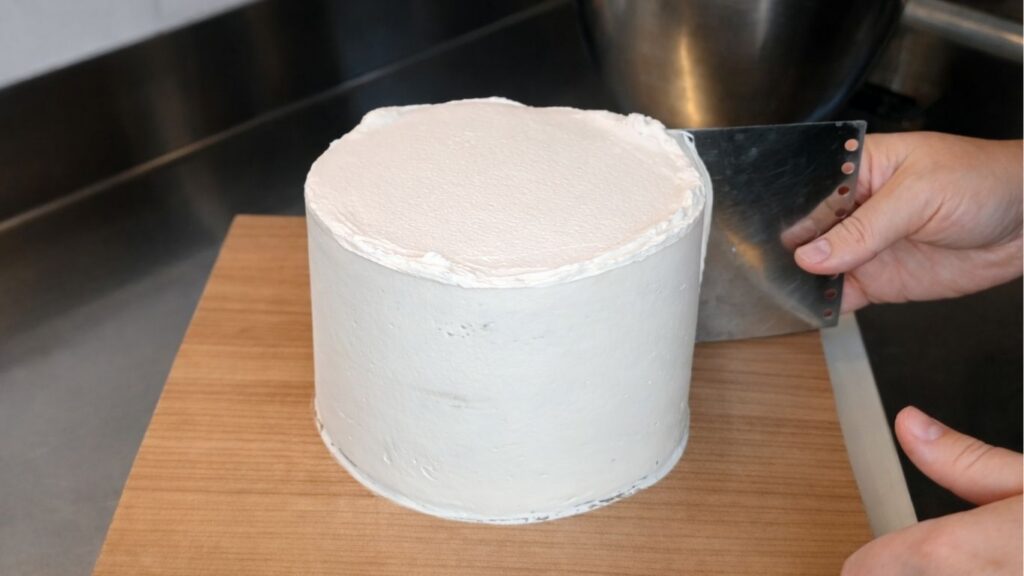
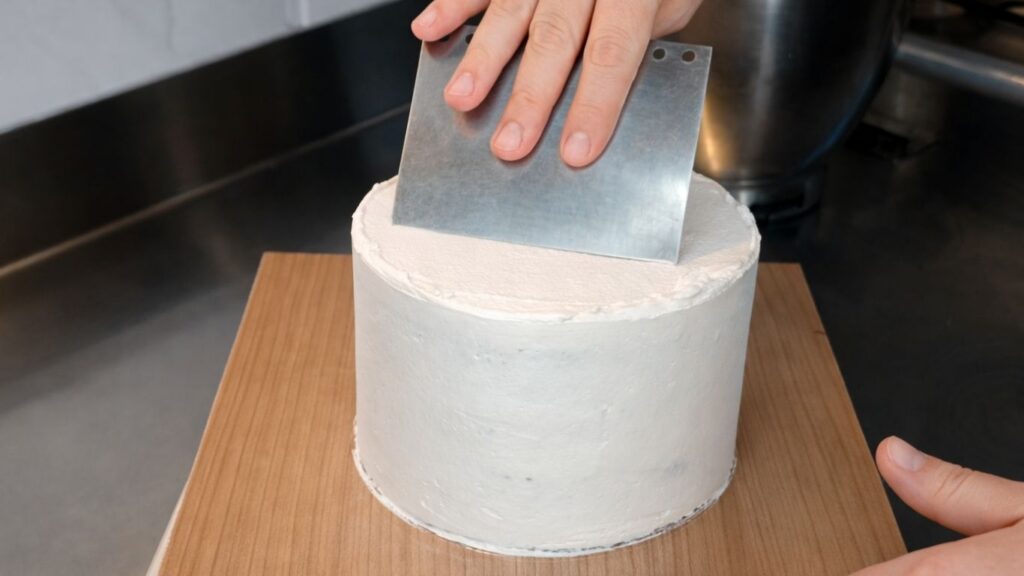
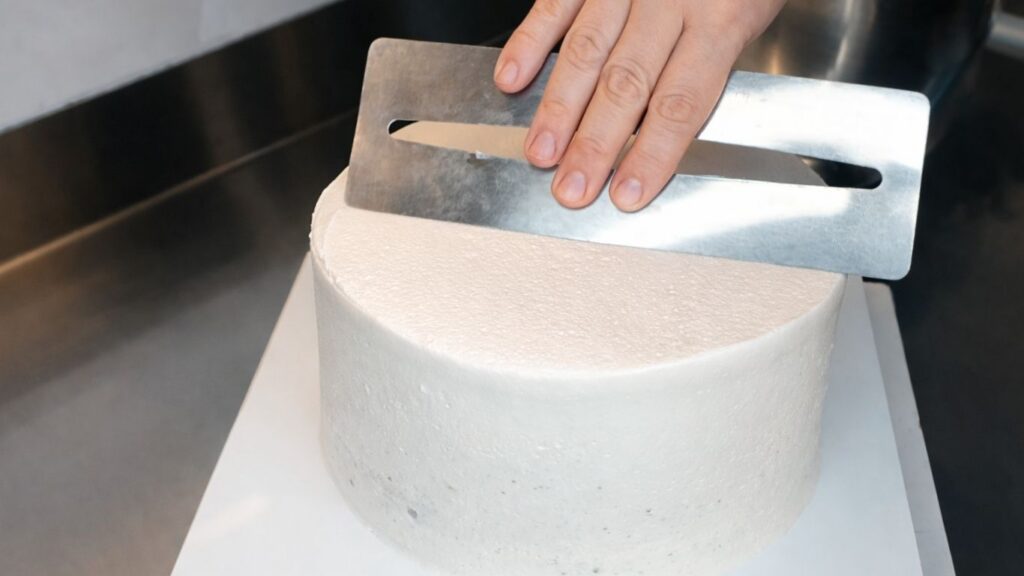
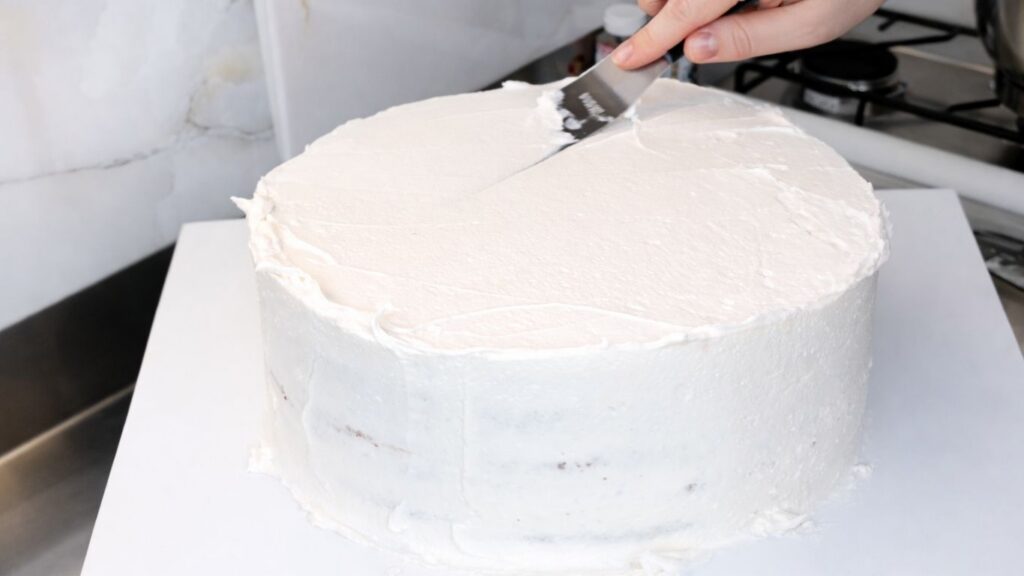
While you were frosting the middle and largest tiers, your smallest cake has been setting and firming up perfect timing. Now return to it and apply your second layer of buttercream. This time, spread it smoothly and evenly across the entire surface. This coat needs to be neat and polished because this is what your fondant will adhere to, and any bumps or imperfections will show through. Take your time and create an even, professional finish.

Repeat this process with your 20-inch middle tier and your 30-inch base tier. Apply the second buttercream layer to each, making sure it’s smooth, level, and ready to receive the fondant.
Important tip: Before applying the second buttercream layer to your smallest tier, check if the fondant is firm to the touch. If it still feels soft or sticky, let it rest for another 10 minutes until it hardens. You want a firm fondant base before adding your second layer of buttercream, as this ensures proper adhesion and a flawless final appearance.
Step 5: Prepare Your Fondant
I always prepare my fondant a day in advance, it’s so much easier to work with, less sticky, and saves you precious time during the final decoration stage. When you’re ready to cover your cakes, break off a portion of fondant and warm it gently in the microwave for just a few seconds. The goal is to soften it, not melt it.
Dust your work surface lightly with butter and begin kneading the warm fondant with your hands. Work it gently until it becomes smooth, pliable, and stretchy, you want it to feel like soft clay that’s ready to be rolled out and shaped.
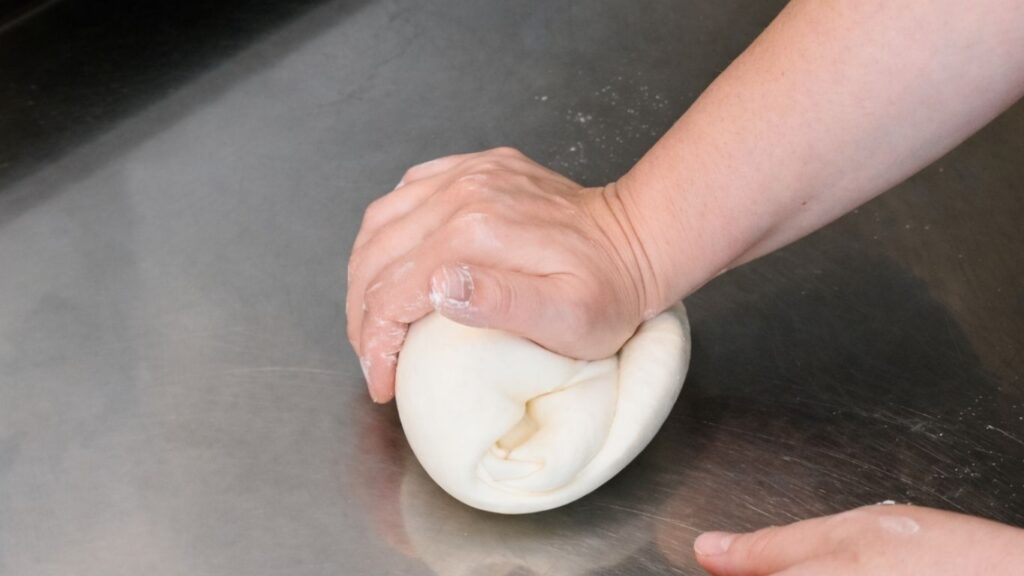
If the fondant feels too stiff while you’re working with it, place it back in the microwave for just a few seconds to soften it further. Be careful not to overheat it, or you risk burning yourself or creating a mess. On the flip side, if the fondant becomes too sticky and won’t cooperate, simply dust your hands and work surface with a bit more butter. This helps prevent sticking and makes the fondant easier to handle without drying it out.
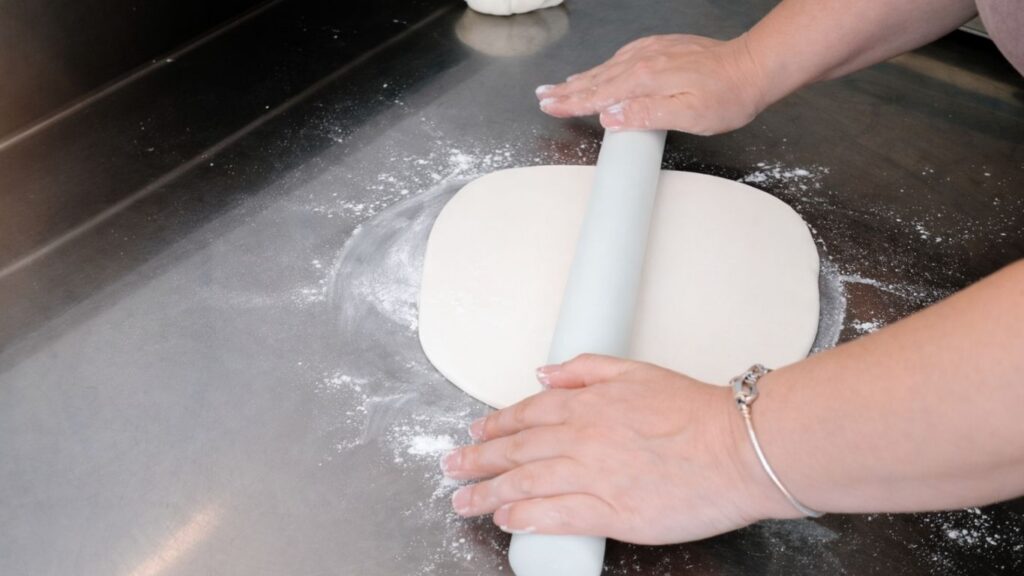
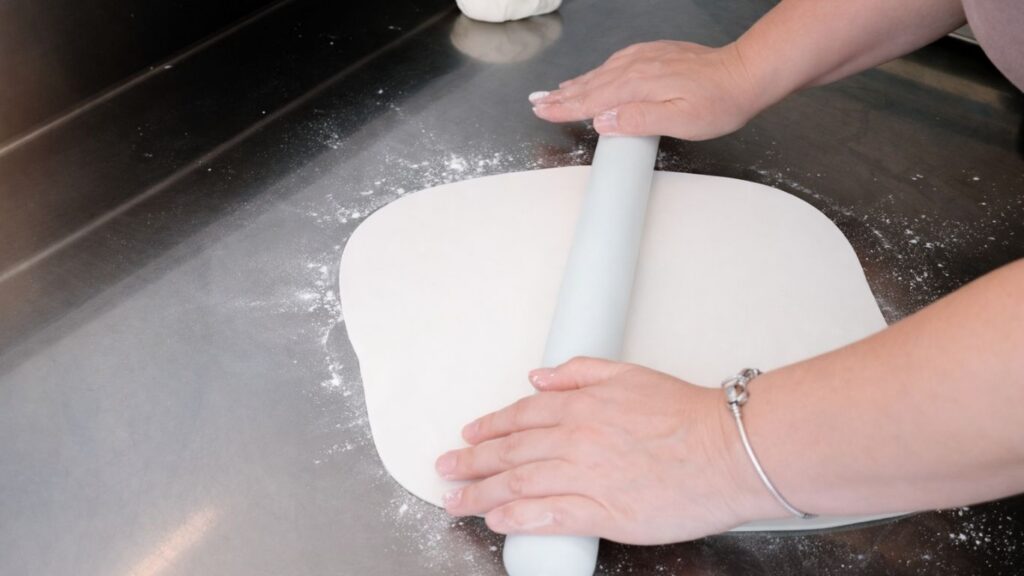
Step 6: Roll and Apply the Fondant
Once you’ve finished kneading the fondant to the right consistency, lightly dust your work surface with powdered sugar, this prevents sticking without adding moisture like regular flour would. Gently roll out the fondant to about 2mm thickness, which is the ideal thickness for a smooth, professional finish. If you want to ensure even thickness throughout, use a rolling pin with thickness guides or spacers on each side. This keeps your fondant consistent and prevents thin or thick spots.
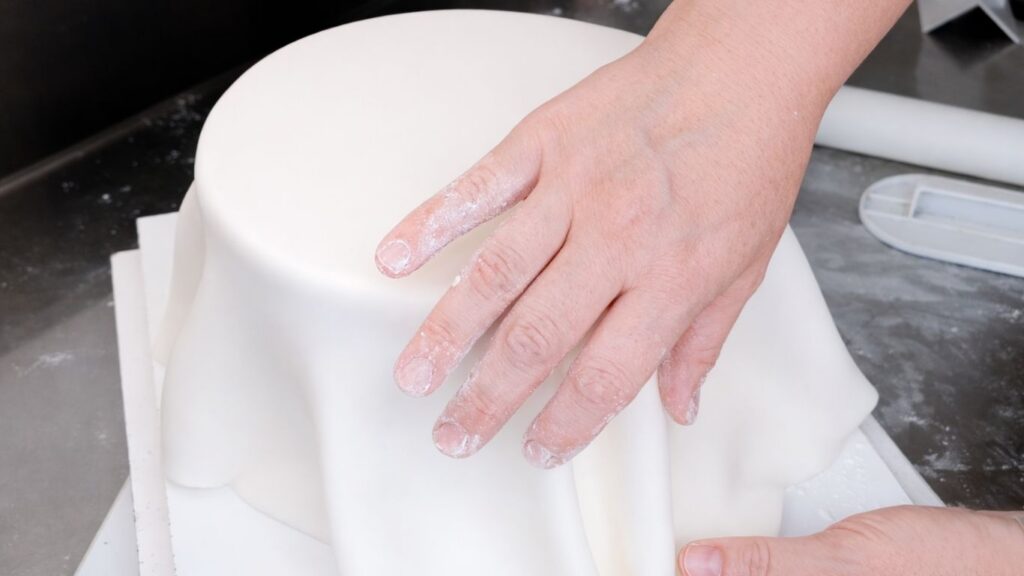
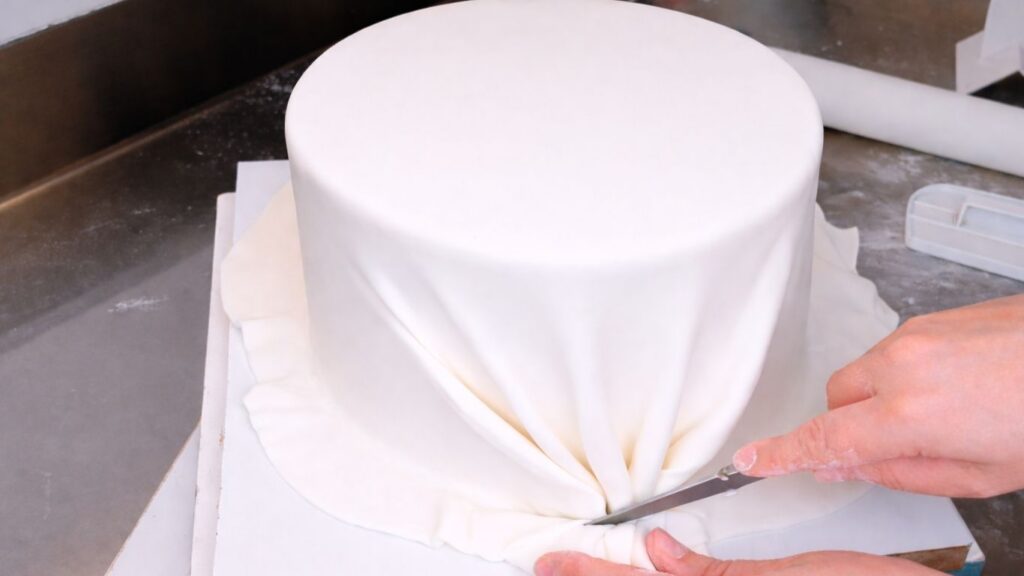
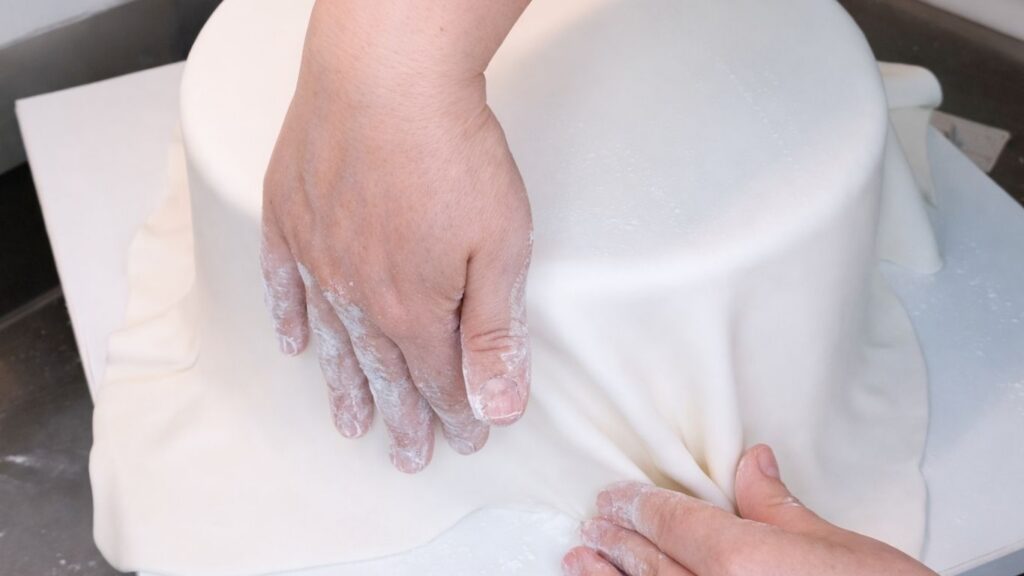
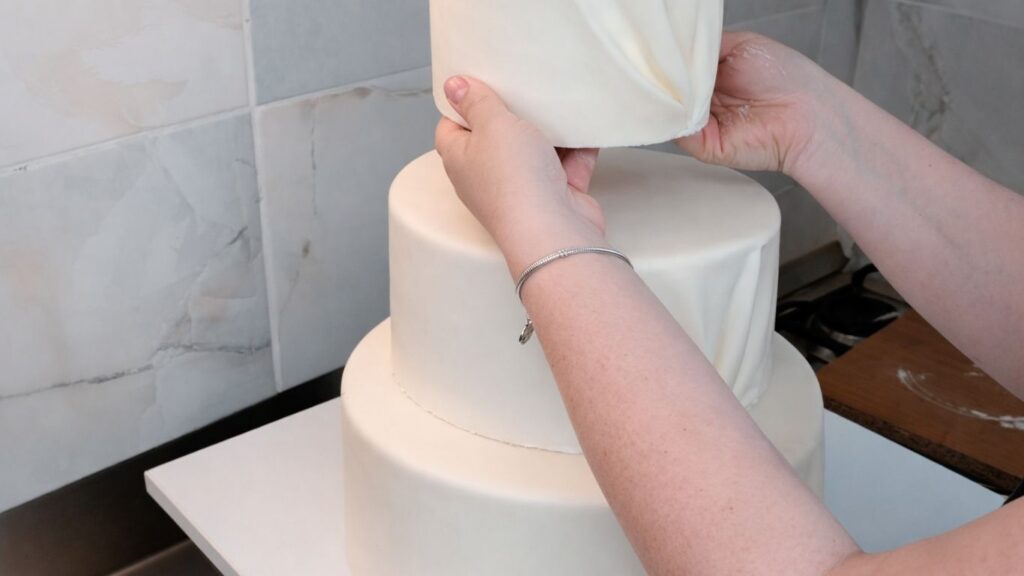
Carefully lift the rolled fondant and drape it over your smallest tier first. Gently smooth it across the top, working out any air bubbles with your hands or a smoothing tool. Once the top is smooth and bubble-free, begin working your way down the sides of the cake.

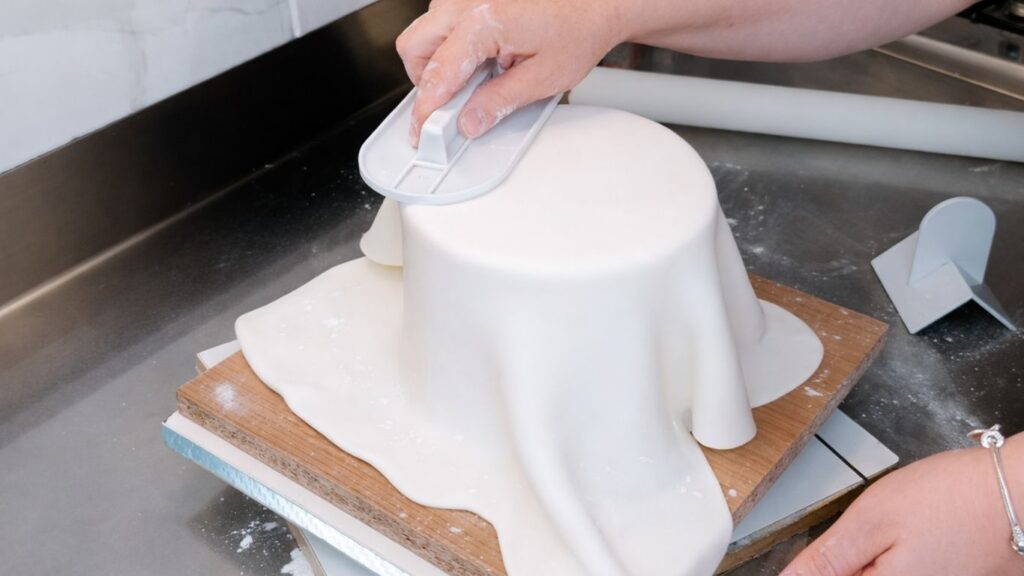
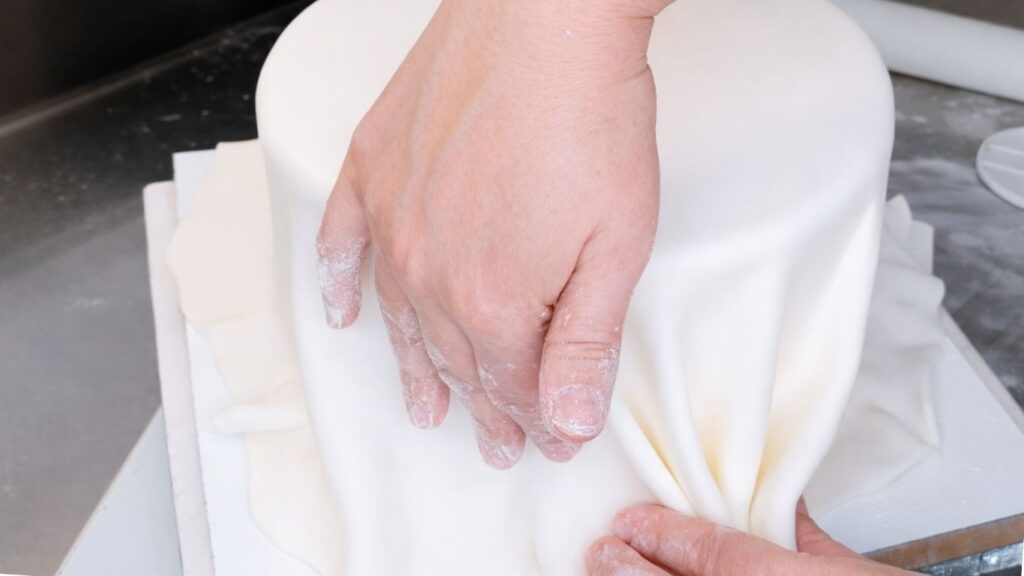
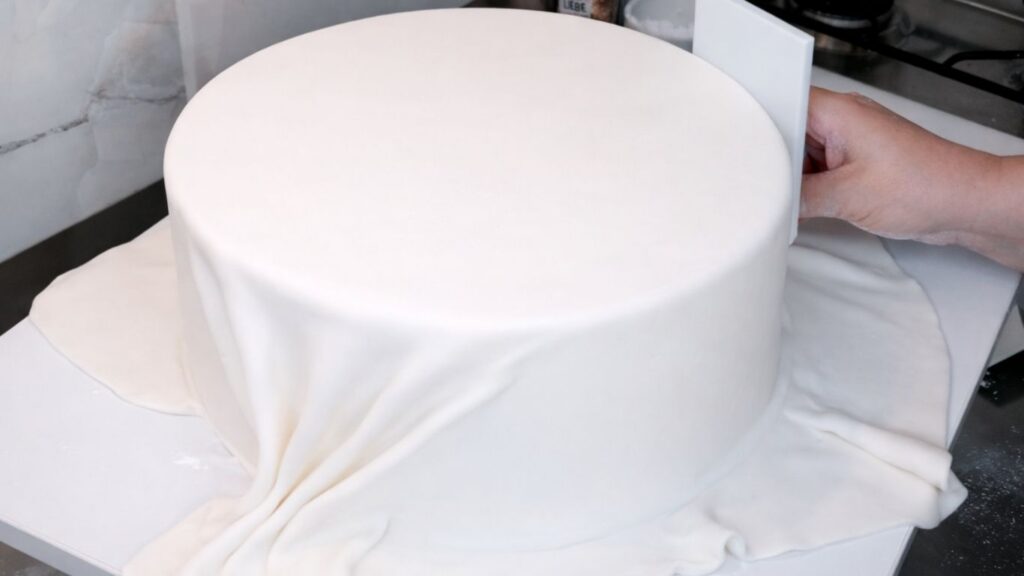
Slowly stretch and pull the fondant down, smoothing it as you go and pressing it gently against the buttercream. Work carefully to eliminate wrinkles and air pockets, creating a seamless, polished surface that hugs the cake perfectly.Repeat this process with your middle and largest tiers, always working from the smallest to largest.
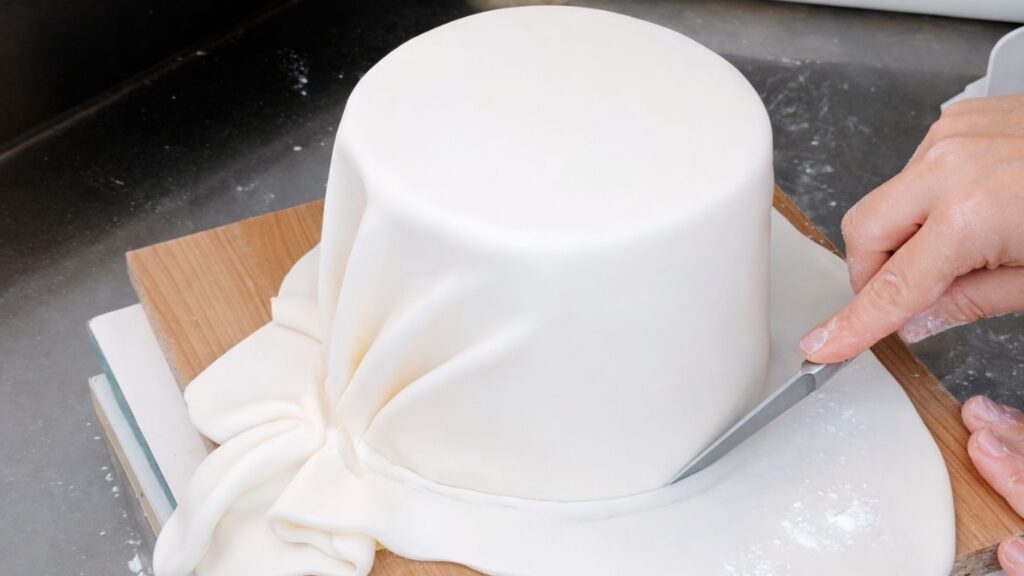
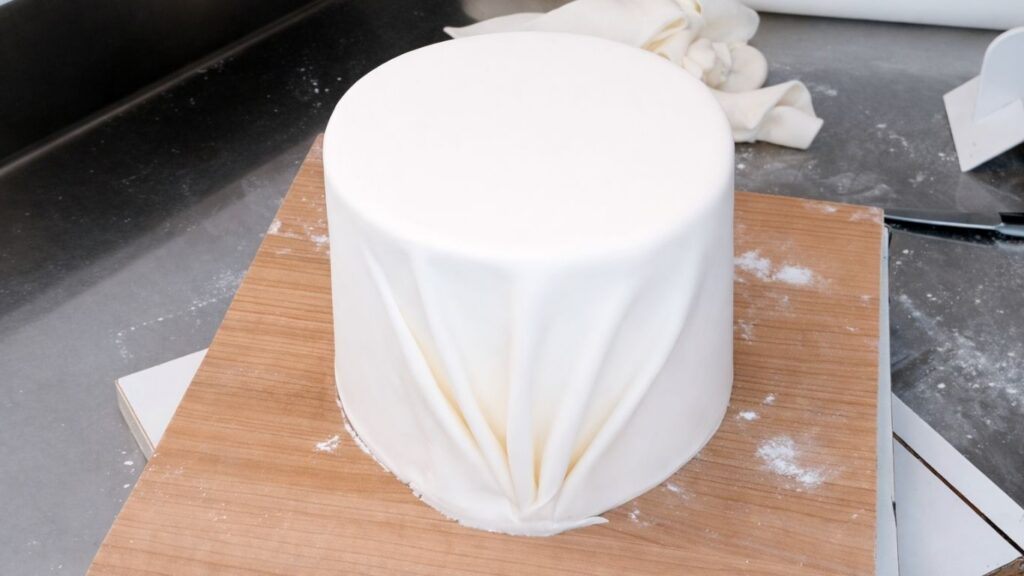
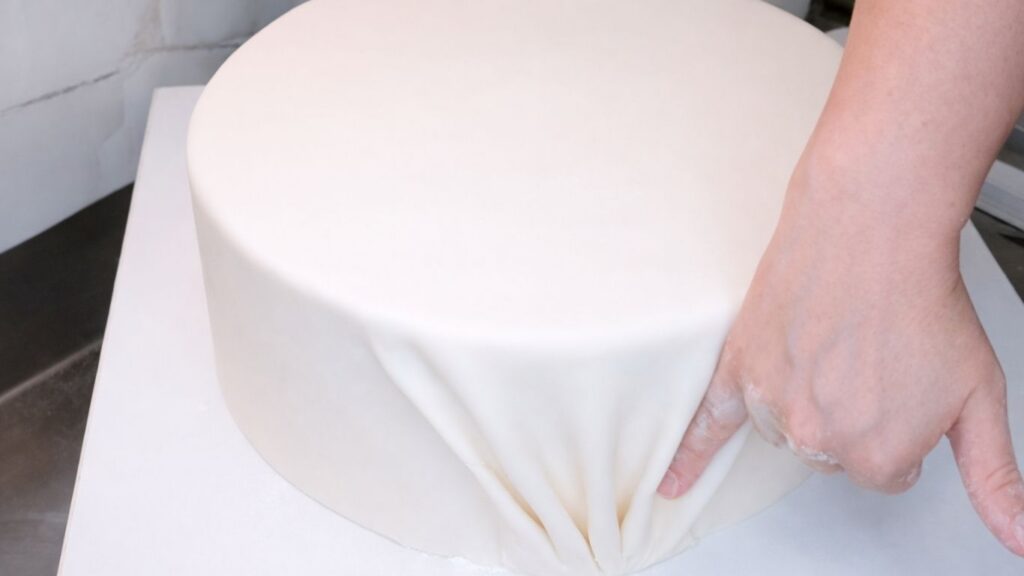
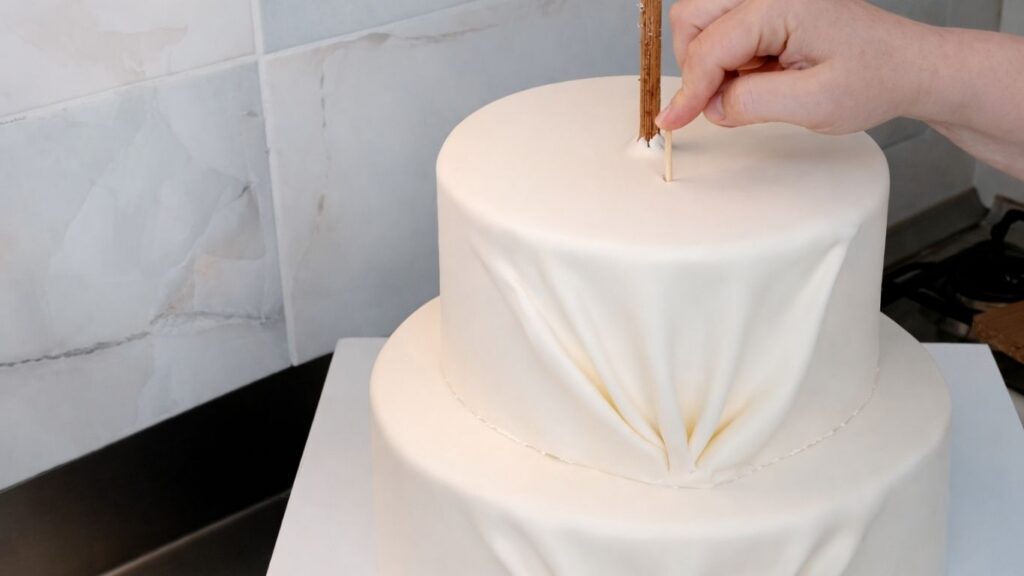
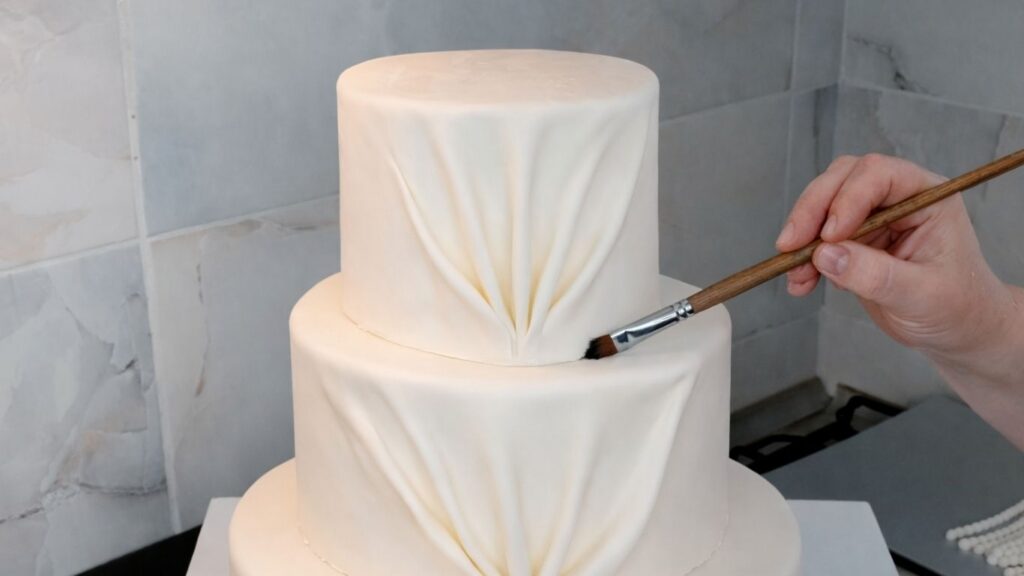
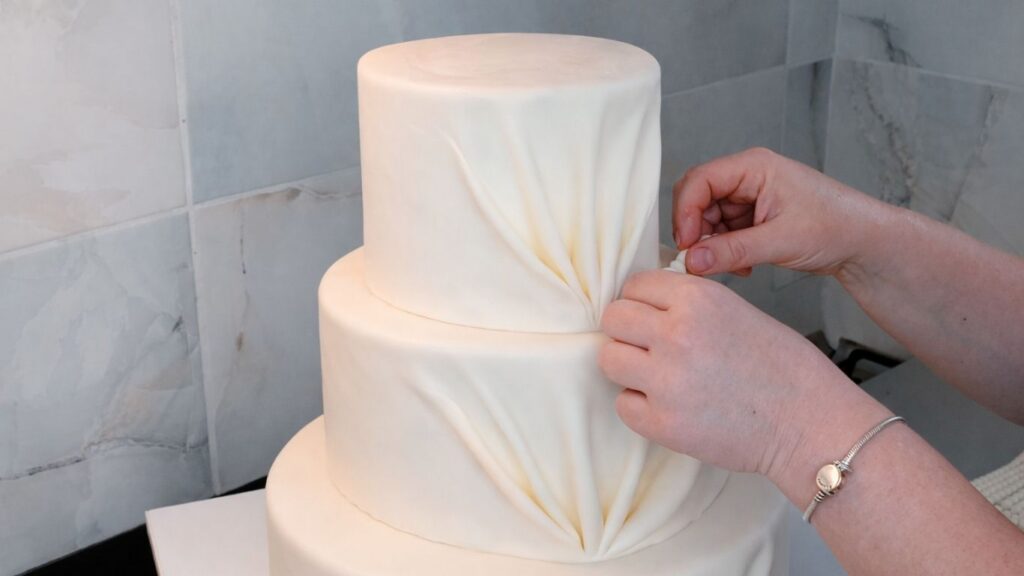
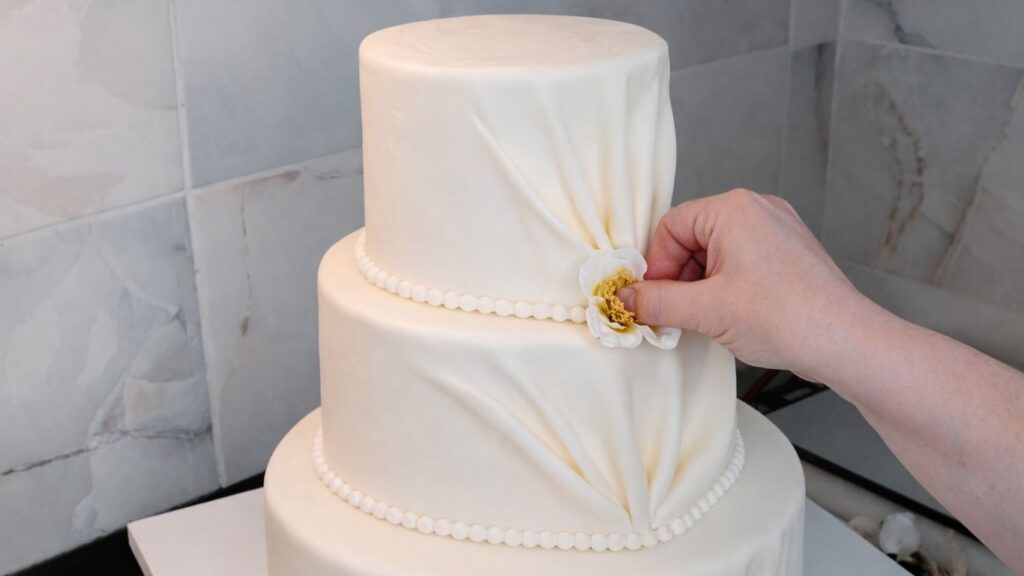
Before you flatten the sides completely, gather any excess fondant at the front of the cake and carefully, gently pull it upward to create a beautiful draped ruffle effect. This elegant detail is created by slowly and delicately bunching the fondant, allowing it to gather naturally into soft folds. Work gently and patiently, rushing this step can tear the fondant. Once your ruffle is positioned exactly where you want it, smooth the remaining fondant on the sides, ensuring everything is seamless and polished.
Step 7: Apply Fondant to Your Middle Tier
Repeat the same process with your 20-inch middle tier. Roll out fondant to 2mm thickness and drape it over the cake. Smooth the top and work out any air bubbles.
As you move down the sides, gather the excess fondant at the front and gently pull it upward to create the same beautiful draped ruffle effect. Work slowly and delicately, allowing the fondant to gather naturally into soft folds. Once your ruffle is perfect, smooth the remaining fondant on the sides for a seamless, polished finish.
Step 8: Apply Fondant to Your Largest Tier
Finally, apply fondant to your 30-inch base tier using the identical technique. Roll out fondant to 2mm thickness and carefully drape it over the cake. Smooth the top thoroughly, working out all air bubbles.
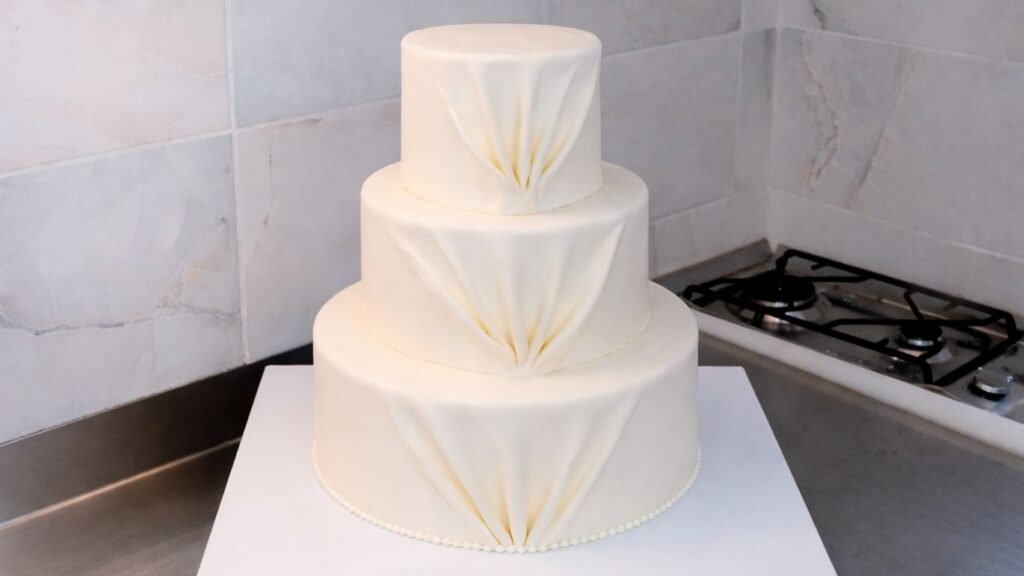
Gather the excess fondant at the front and gently create the draped ruffle detail, working with patience and care. Once the ruffle is in place, smooth the remaining fondant on the sides until the entire tier is seamless and polished. Your three-tiered cake is now beautifully covered and ready for the final assembly and decoration.
Step 9: Assemble Your Tiered Cake Structure
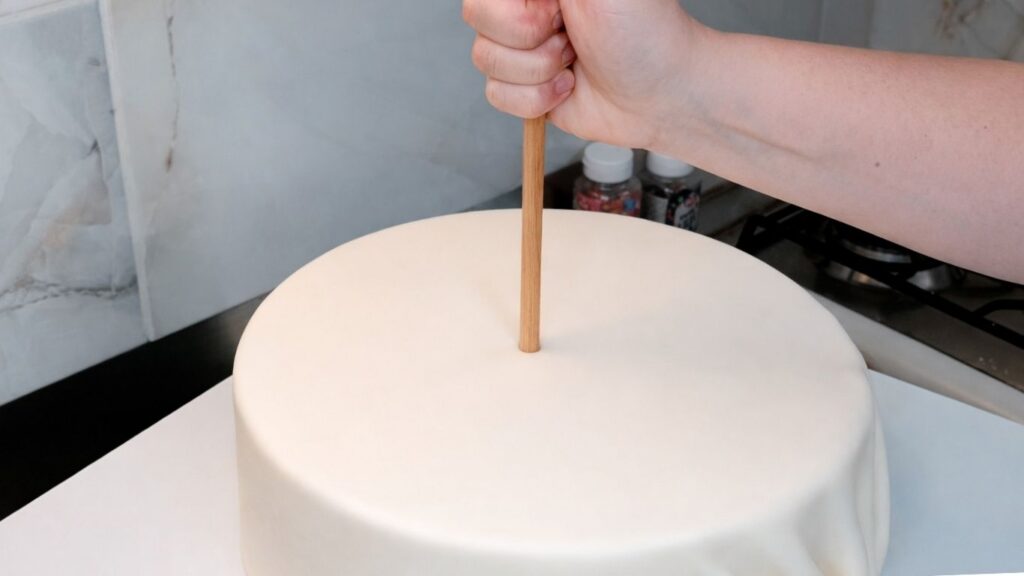
After the fondant has chilled in the refrigerator for about 30 minutes, remove your largest 30-inch tier and place it on your cake stand or serving board. This is where the structural support system comes in, your cake’s stability depends on proper placement of dowel rods and support columns.
Measure and insert your central support dowel rod vertically through the center of the cake. This main dowel will support the weight of the two upper tiers. Cut it so that it reaches exactly to the midpoint of your top tier, this measurement is crucial. Cutting it to the right height ensures that when you stack your tiers, the dowel won’t pierce through the fondant and ruin your cake’s appearance.
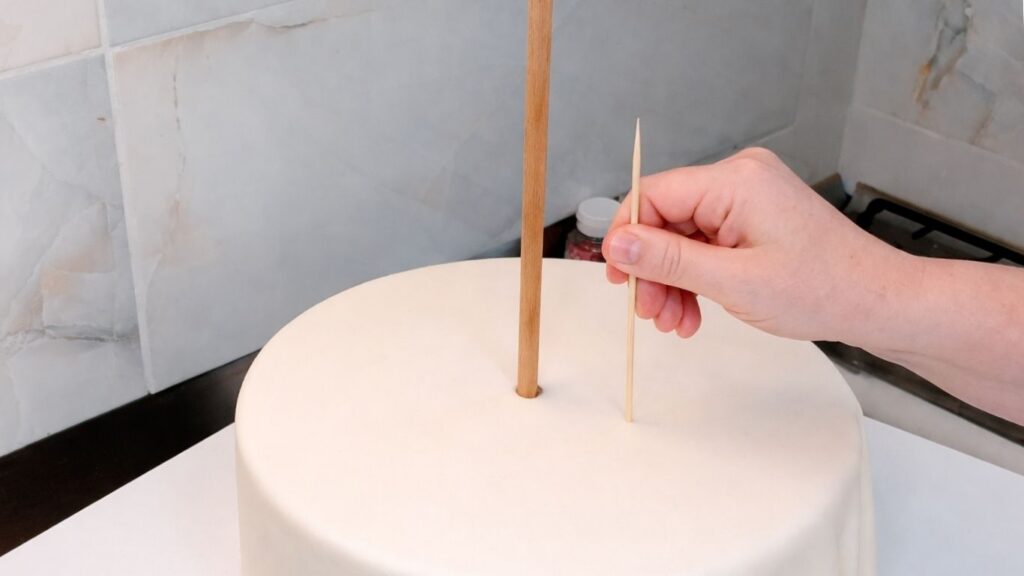
Around this central dowel, insert six smaller dowel rods in a circular pattern. These secondary supports work together to hold the middle and top tiers securely in place, distributing the weight evenly and preventing any shifting or leaning. Position them carefully and ensure they’re all cut to the same height as your central dowel. Your tiered cake structure is now strong, stable, and ready for the next phase of assembly.
Step 10: Stack Your 3-Tier Wedding Cake
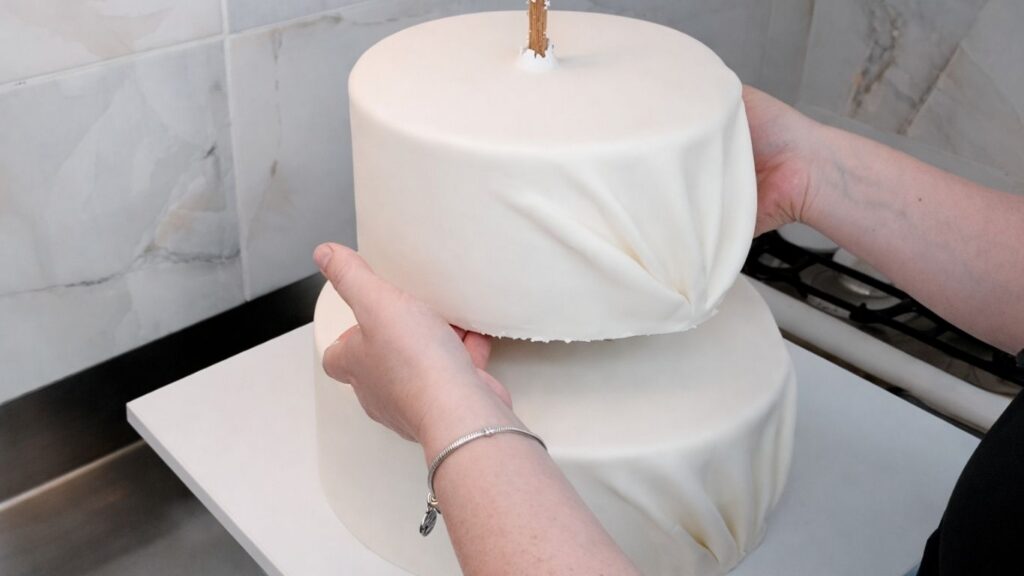
Carefully lift your 20-inch middle tier and gently center it on top of the largest base tier, aligning the central dowel rod so it passes directly through the hole you drilled in the cake board. Press down gently to ensure it’s stable and level.
Once the middle tier is secure, insert four smaller dowel rods in a circular pattern around the central dowel. Space them evenly and cut them to the same height as your central dowel, these four rods will support the weight of your smallest top tier.
Finally, lift your 10-inch top tier and carefully position it on top of the middle tier, centering it perfectly over the support rods. Make sure it’s level and secure. Take a step back and view your 3-tier wedding cake from all angles to ensure all three tiers are properly aligned and the cake stands perfectly straight. Your 3-tier wedding cake is now stacked, stable, and ready for decoration.
Step 11: Decorate Your 3-Tier Wedding Cake
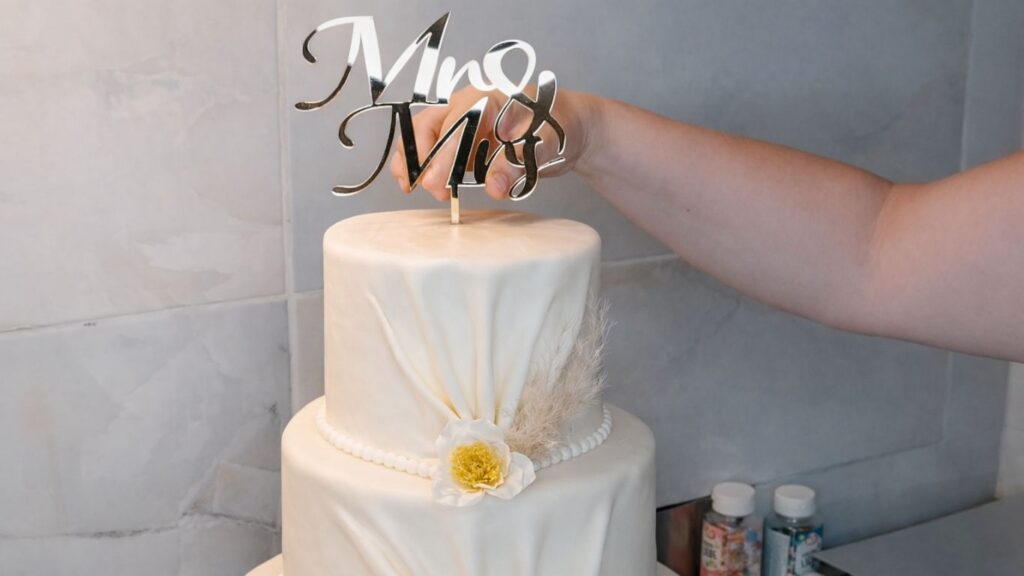
Now that you’ve assembled your 3-tier wedding cake, it’s time for the final decorative touches that will make it truly stunning. You’ve already prepared your fresh flowers and cake topper, now it’s time to create the delicate pearl details that will frame each tier.

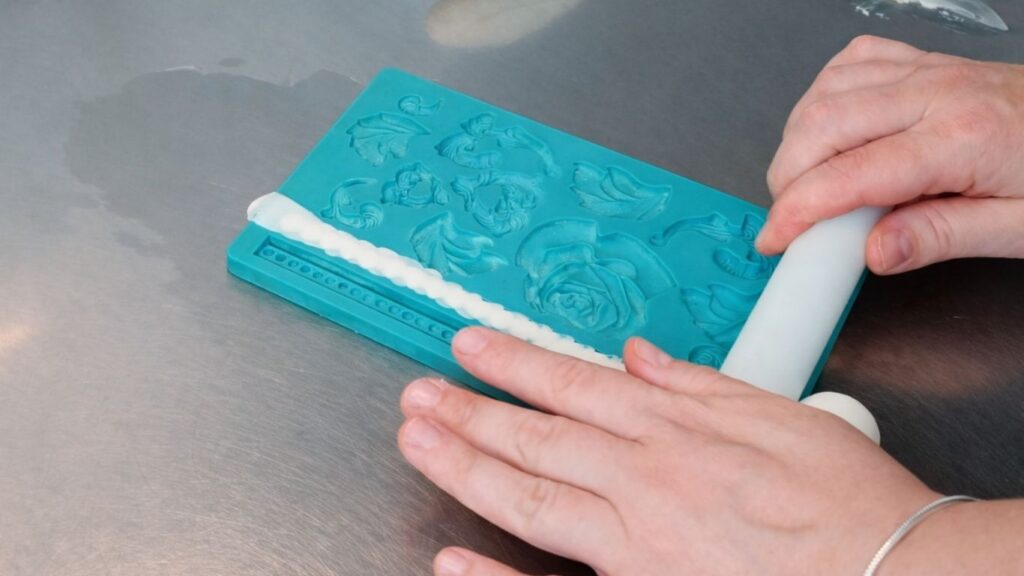
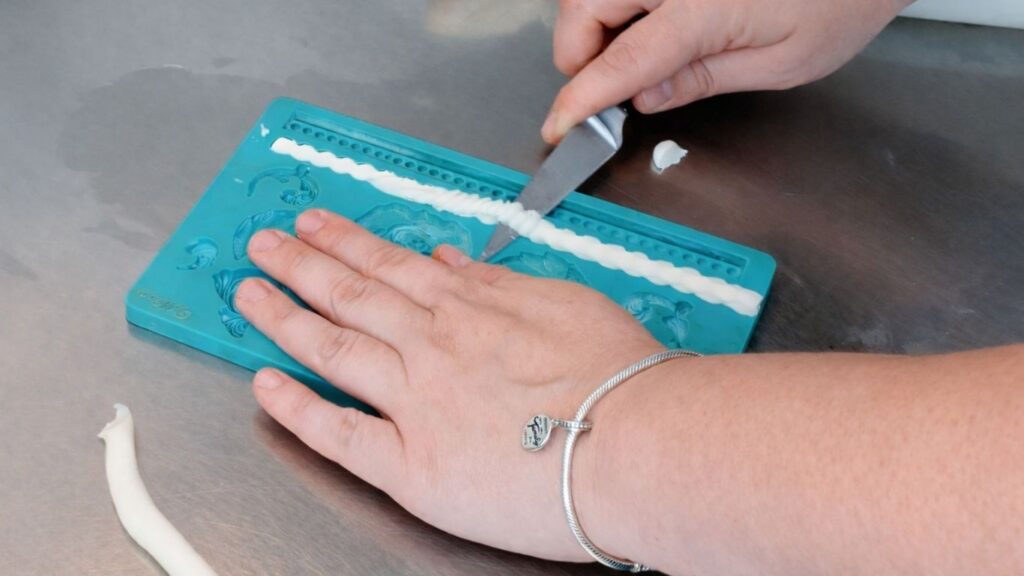
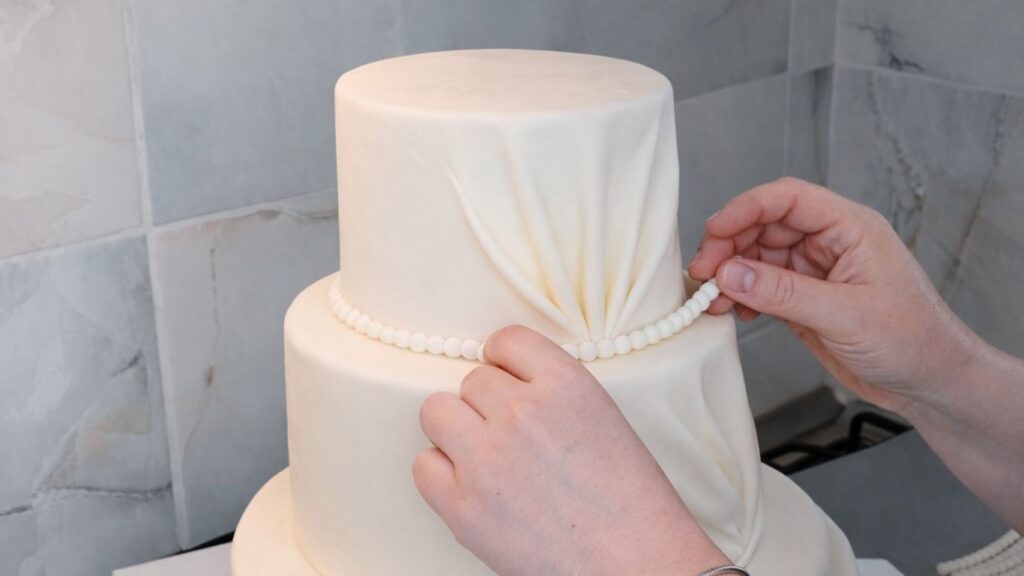
Using your Wilton silicone mold, create fondant pearls by rolling out small pieces of fondant and pressing them gently into the mold. Cover the mold with your rolling pin and use a sharp knife to trim away any excess fondant flush with the mold’s surface. Carefully pop out the fondant pearls and set them aside.

If the fondant sticks to the mold and won’t release cleanly, lightly brush the inside of the mold with butter. This simple step makes the entire process much smoother and prevents frustration. The butter acts as a release agent, allowing your fondant pearls to come out perfectly without tearing or breaking. Once you have all your pearls ready, you can begin arranging them along the base of each tier, creating an elegant border that frames your cake beautifully.
Step 12: Apply the Pearl Details
With your fondant pearls ready, it’s time to add the finishing touches to your 3-tier wedding cake. Using a small pastry brush, lightly apply a thin layer of water along the seam where each tier meets the one below it. Water acts as the perfect edible adhesive for fondant, allowing the pearls to stick securely without additional frosting.
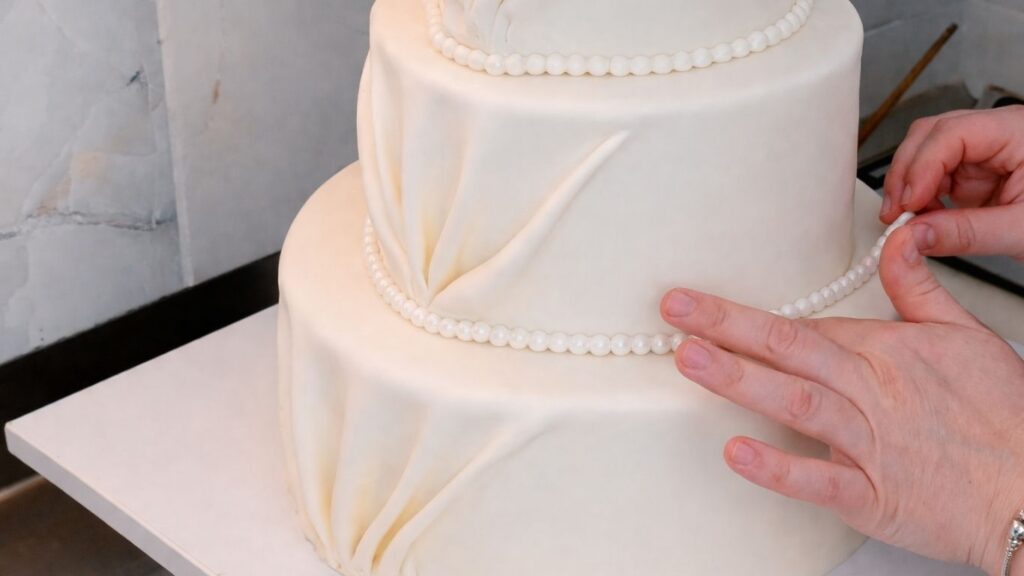
Gently press each fondant pearl onto the wet seam, spacing them evenly around the circumference of each tier. Work carefully and methodically, ensuring each pearl is firmly attached. Repeat this process for all three tiers of your 3-tier wedding cake, the base tier, middle tier, and top tier. The delicate pearl border creates an elegant frame around each level, adding sophistication and a polished, professional finish.
Once all the pearls are in place and have dried slightly, add your fresh flowers and cake topper to complete your 3-tier wedding cake masterpiece. Your creation is now fully decorated and ready to impress your guests.

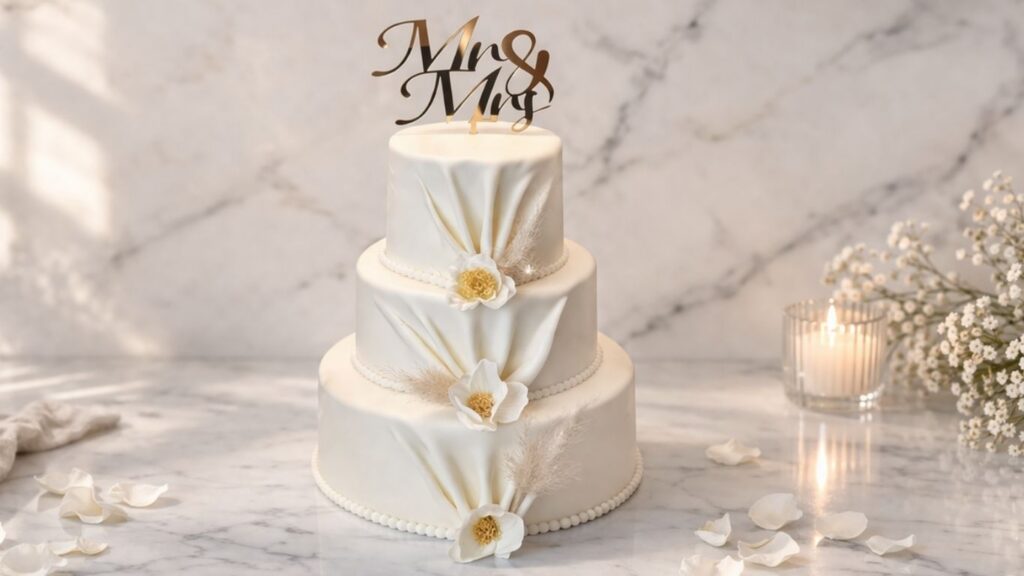
Your Beautiful 3-Tier Wedding Cake is Complete!
We hope you’ve enjoyed every moment of creating this stunning 3-tier wedding cake from start to finish. This masterpiece is entirely yours, a testament to your patience, creativity, and dedication. Your guests will not only taste the delicious layers and frosting, but they’ll also feel the love and care you poured into every detail. Congratulations on creating something truly special! If you haven’t already, be sure to watch our complete video tutorial at the end of this post for a visual walkthrough of the entire 3-tier wedding cake process.
Tips and Tricks for a 3-Tier Wedding Cake
- Always prepare your fondant the day before—it becomes smoother and easier to work with on your 3-tier wedding cake
- When kneading fondant, work gently and patiently to avoid overheating it
- If your fondant sticks to the mold, simply butter the mold lightly for easy removal
- Roll fondant to a consistent 2mm thickness using a rolling pin with guides for perfect results
- The draped ruffle detail requires patience—work slowly and let the fondant gather naturally on your cake
- Chill each tier for 30 minutes after fondant application to ensure it sets properly
- Measure your central dowel rod to reach exactly the midpoint of your top tier for stability
- Use water as your fondant adhesive when attaching pearls—it works perfectly on your 3-tier wedding cake
- Keep your finished 3-tier wedding cake in a cool environment until it’s time to serve
- Check your cake from all angles to ensure each tier is level and properly centered
Frequently Asked Questions
How far in advance can I bake the cake layers?
You can bake your cake layers up to 3 days in advance if kept refrigerated in an airtight container. Wrapping them individually in plastic wrap helps preserve moisture and flavor.
Can I use a different frosting instead of buttercream?
Yes! Swiss meringue buttercream or Italian meringue buttercream work well for tiered cakes covered with fondant. However, cream cheese frosting is too moist and can weaken the fondant, so it’s best avoided for 3-tier cakes.
What’s the best way to transport a 3-tier wedding cake? Place the assembled cake in a sturdy, level box. Use non-slip mats on the vehicle floor and drive carefully. If possible, assemble the cake at the venue instead of transporting it fully assembled.
How long can a 3-tier wedding cake sit out before serving?
In temperatures below 75°F, your cake can safely sit out for 4-6 hours. In warmer conditions, keep it in a cool room or refrigerate until an hour before serving.
Can I make the cake a day before the wedding?
Yes! Bake the layers 2-3 days ahead, assemble and frost 1 day before, then refrigerate. Remove from the fridge 1 hour before serving for best taste.
What if my fondant tears or cracks?
Smooth the area gently with your finger dipped in water. For larger tears, patch it with a small piece of fondant and blend the edges carefully.
Do I need dowel rods for a 3-tier cake?
Absolutely. Dowel rods are essential for stability and prevent upper tiers from crushing the layers below. Never skip this step.
How many servings does a 3-tier wedding cake provide?
A 10-inch, 20-inch, and 30-inch 3-tier wedding cake typically serves 150 pieces.
Watch the Full 3-Tier Wedding Cake Tutorial
Conclusion
Making a 3-tier wedding cake at home may seem challenging, but with the right steps and a little patience, it is absolutely achievable. From baking the layers to the final decoration, you can create a cake that looks just as beautiful as one from a professional bakery.
This guide walks you through the entire process so you can approach each step with confidence. Take your time, follow the process, and enjoy the experience.
In the end, you will have an elegant and stable 3-tier wedding cake that is sure to impress.
Happy decorating!
Leave a Reply