📖 Table of Content:
This homemade fondant recipe is incredibly easy to make, stretches beautifully, and shapes like a dream.
After 15 years of covering every single cake with it, I can honestly say nothing compares – it’s smooth, flexible, and never lets me down.
Whether you’re making a simple birthday cake or an elegant wedding cake, this fondant works perfectly every time.
Once you try it, you’ll never go back to store-bought!
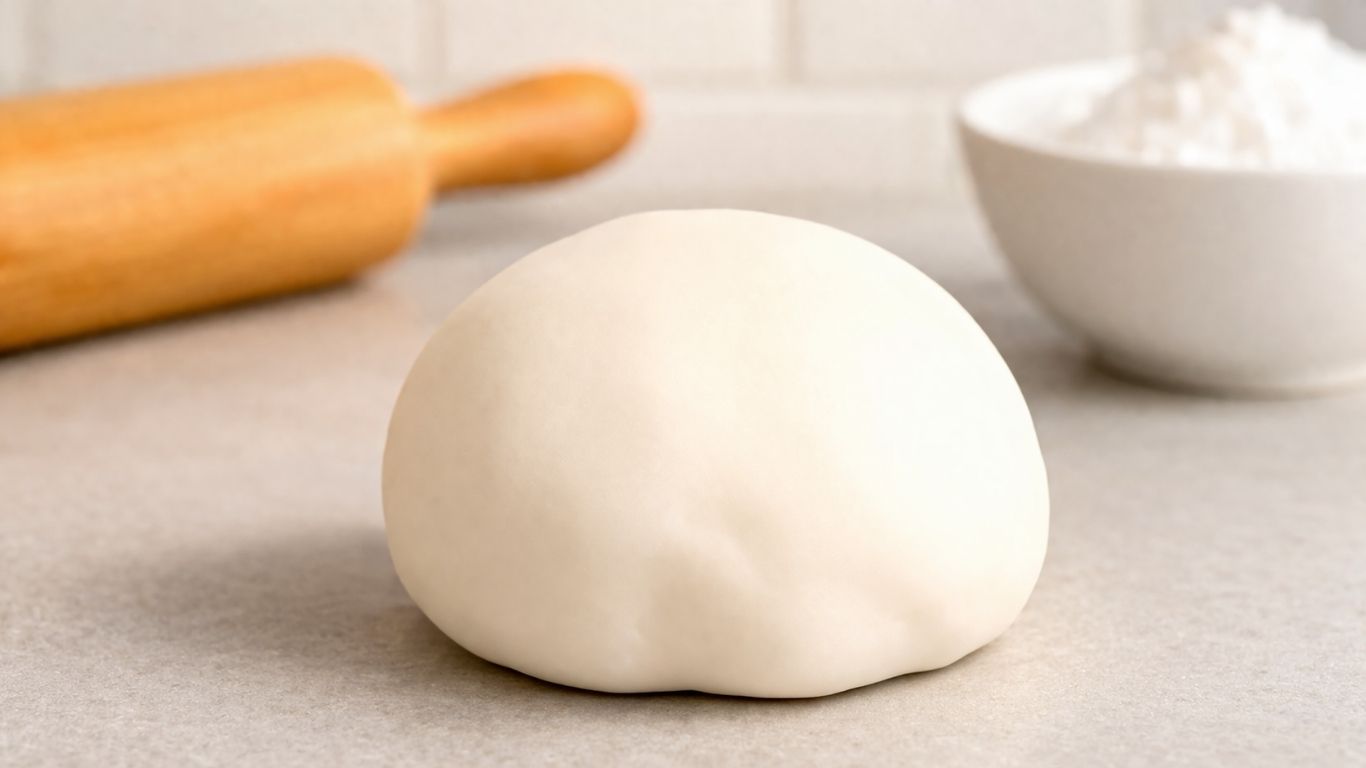
This homemade fondant recipe gives you a smooth, flexible finish that drapes beautifully over any cake – from simple birthday cakes to elaborate wedding tiers.
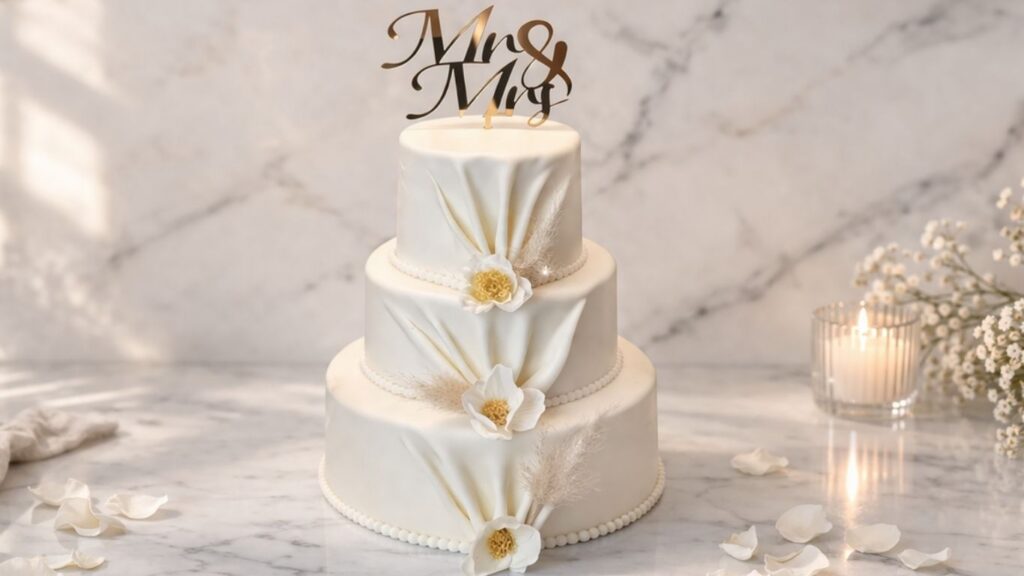
The stunning three-tier wedding cake you see above is covered entirely with this fondant – every layer, every fold, every detail. That’s the kind of finish this recipe delivers every single time.
If you’re just getting started with cake decorating, I also recommend checking out this cake decorating guide on Sally’s Baking Addiction – a great resource for beginners.
And if you’re looking for cake inspiration to go with your fondant, take a look at my 40th Birthday Cake – Red & Gold Fondant Design – also made with this exact recipe!
MY LATEST VIDEOS
Quick Recipe Info
Prep Time: 20 minutes
Rest Time: 30 minutes
Total Time: 50 minutes
What You’ll Need for Homemade Fondant Recipe
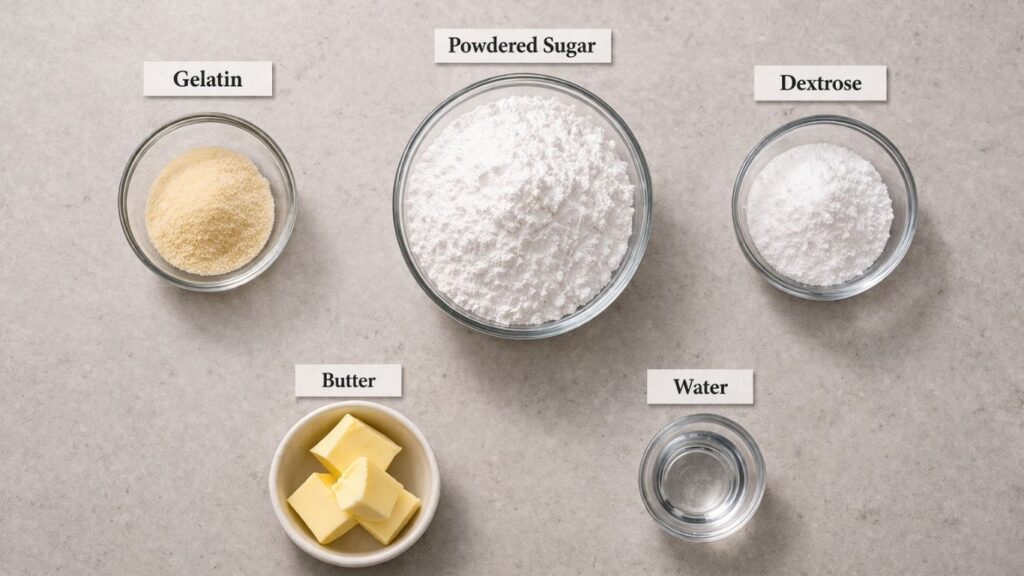
Gelatin is the backbone of this homemade fondant recipe – it gives the fondant its signature stretchy, elastic texture that makes it so easy to roll out and drape smoothly over any cake without cracking or tearing.
Dextrose is the secret ingredient that keeps your fondant soft and pliable for days. It prevents the sugar from crystallizing, which means your fondant stays smooth and workable – perfect for covering cakes and creating detailed decorations.
Powdered sugar is the base of this homemade fondant recipe – it gives the fondant its structure, smooth finish, and that classic sweet taste. The finer the powdered sugar, the smoother your fondant will be.
Butter adds softness and a subtle richness to the fondant, making it easier to knead and work with. It also gives the fondant a beautiful silky finish that sets it apart from store-bought versions.
Why You Will Love This Recipe
You will love this homemade fondant recipe because it is incredibly easy to make, even if you have never worked with fondant before – no special skills or experience required.
It stretches beautifully, never cracks, and gives every cake that smooth, professional finish that looks like it came straight from a bakery. Whether you are covering a simple single-tier cake or building something more elaborate, this fondant handles it all effortlessly.

The colorful birthday cake you see in the photo above is made entirely with this fondant – every decoration, every detail, and every vibrant color was shaped and crafted from this exact recipe.
Once you make it yourself, you will never reach for store-bought fondant again – this recipe is simply too good, too easy, and too reliable to give up. It has been my go-to for 15 years, and it will become yours too.
Ingredients
- 3½ oz (100g) dextrose
- 0.35 oz (10g) gelatin powder
- 3½ tbsp (50ml) water for gelatin
- 2 tsp (10ml) water for dextrose
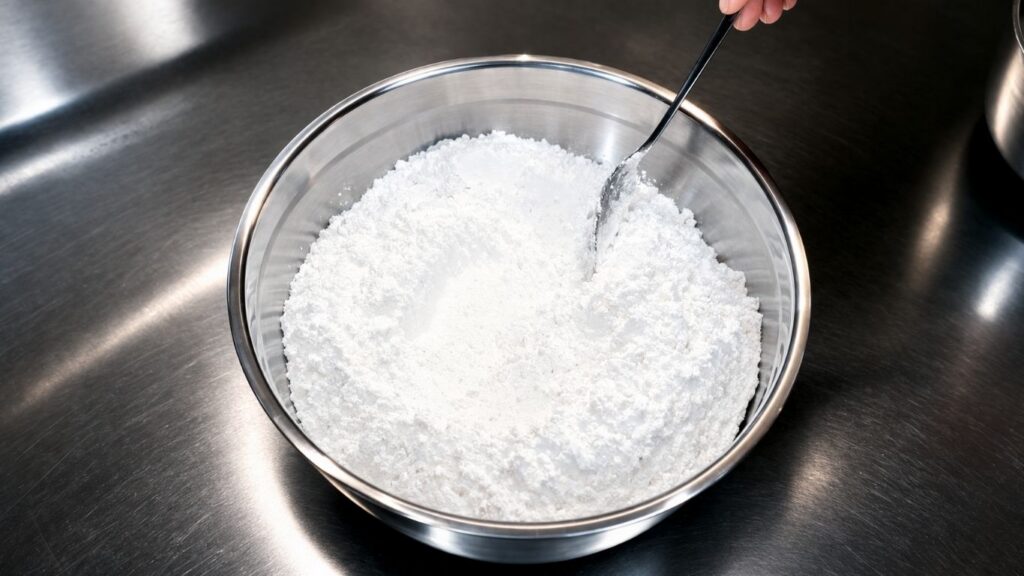
- 7 cups (1kg) powdered sugar
- 1¾ oz (50g) butter
How to Make Homemade Fondant Recipe
Step 1. Bloom the Gelatin
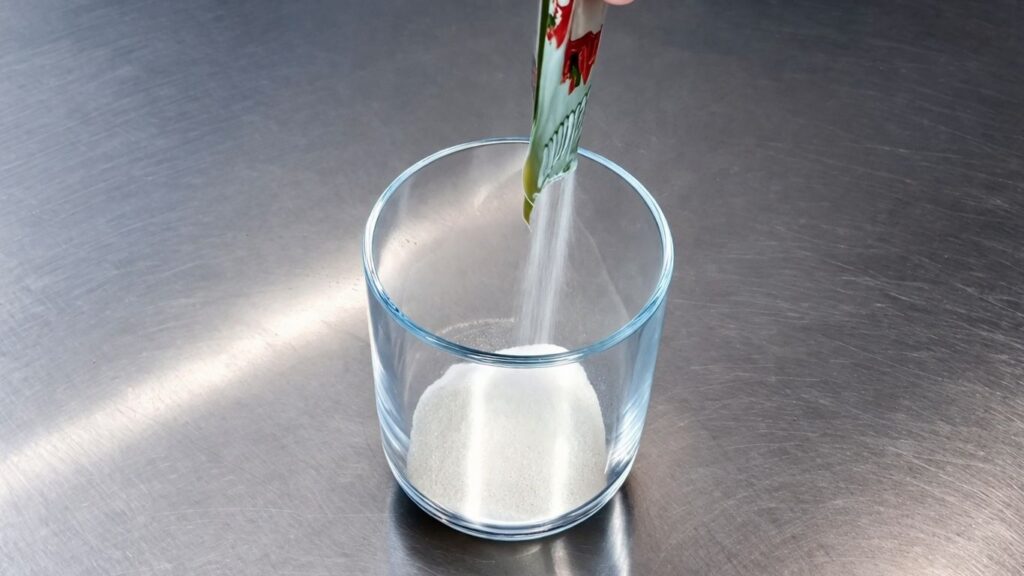
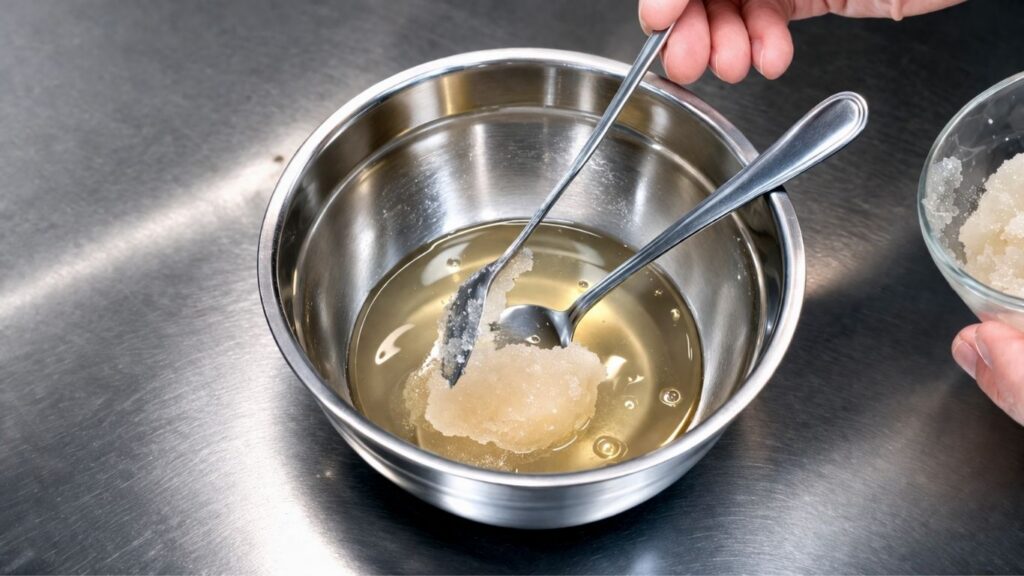
Start by preparing your gelatin – this is the very first and most important step in making the perfect homemade fondant recipe, so don’t rush it.
Pour the gelatin powder into a clean bowl, then add 3½ tbsp (50ml) of cold water. Using a spoon or small whisk, stir well until the gelatin and water are fully combined with no dry powder remaining at the bottom of the bowl.
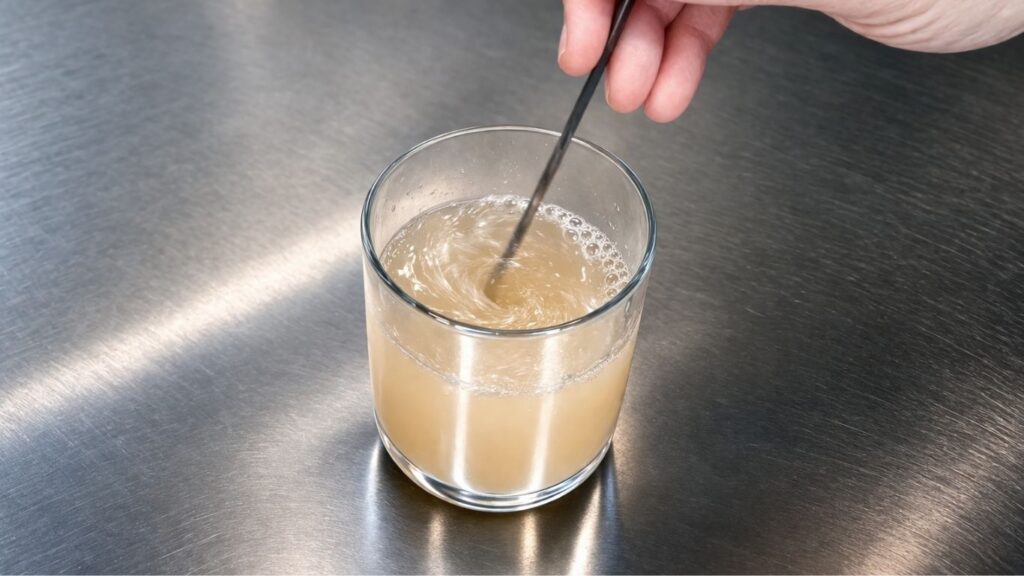
Once mixed, set the bowl aside and allow the gelatin to bloom for 10 minutes. During this time you will notice it thicken and swell – this is exactly what you want. The bloomed gelatin is what gives your fondant that beautiful elastic stretch and smooth finish.
Do not skip this resting time – properly bloomed gelatin is the key to a fondant that rolls out perfectly every time.
Step 2. Cook the Dextrose & Combine
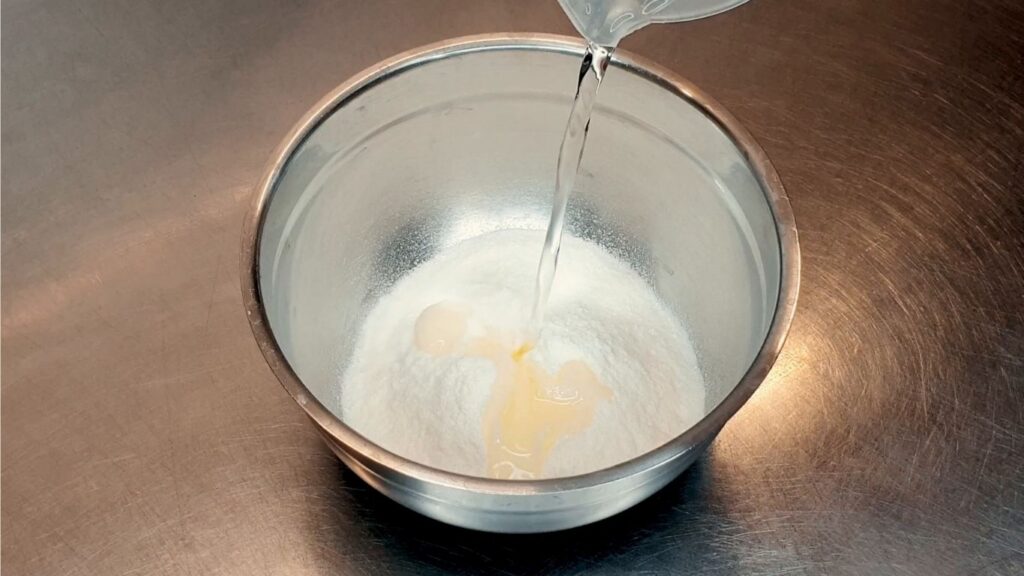
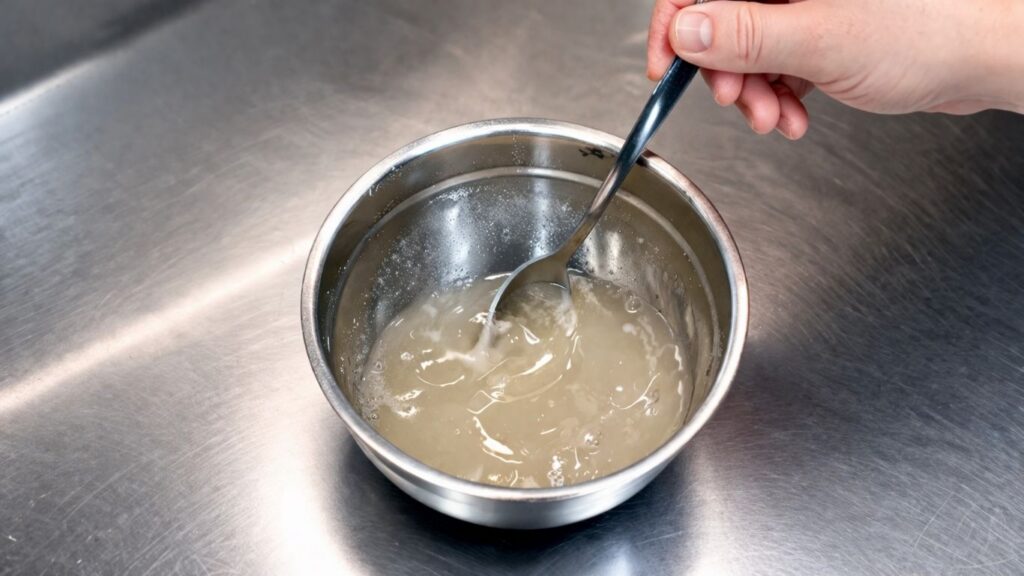
Pour 3½ oz (100g) of dextrose into a small saucepan and add 2 tsp (10ml) of water. Place it on the stove over medium heat and bring it to a boil, stirring gently as it heats up.
Once it reaches a full boil, slowly count to 10, then immediately remove the saucepan from the heat. Do not let it cook any longer than this – timing is everything in this step.
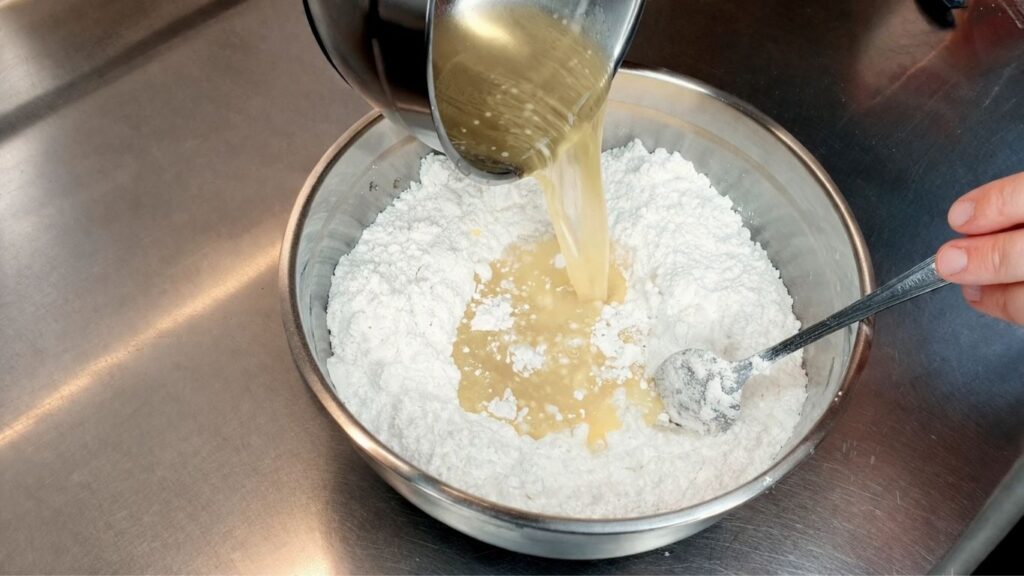
While the dextrose mixture is still hot, pour in your bloomed gelatin and stir well until everything is fully combined and smooth.
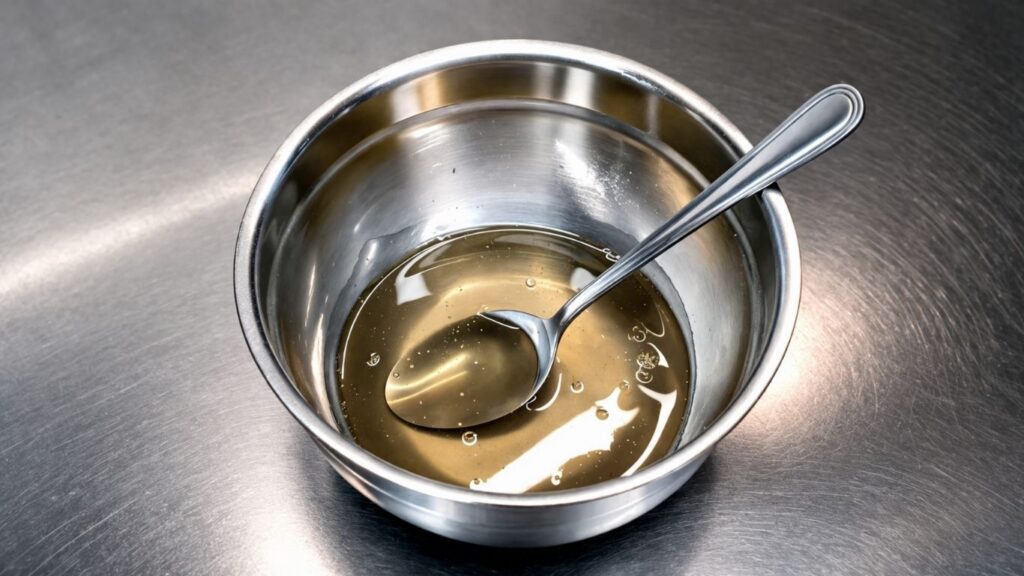
Once the gelatin is fully incorporated, add 1¾ oz (50g) of butter directly into the hot dextrose mixture. Stir continuously until the butter is completely melted and the mixture is silky, smooth and uniform.
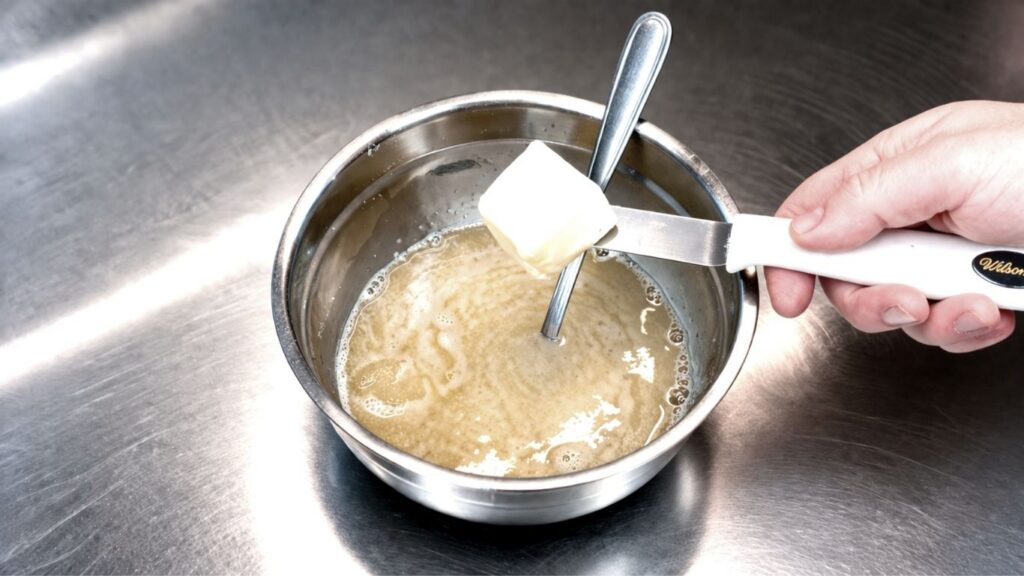
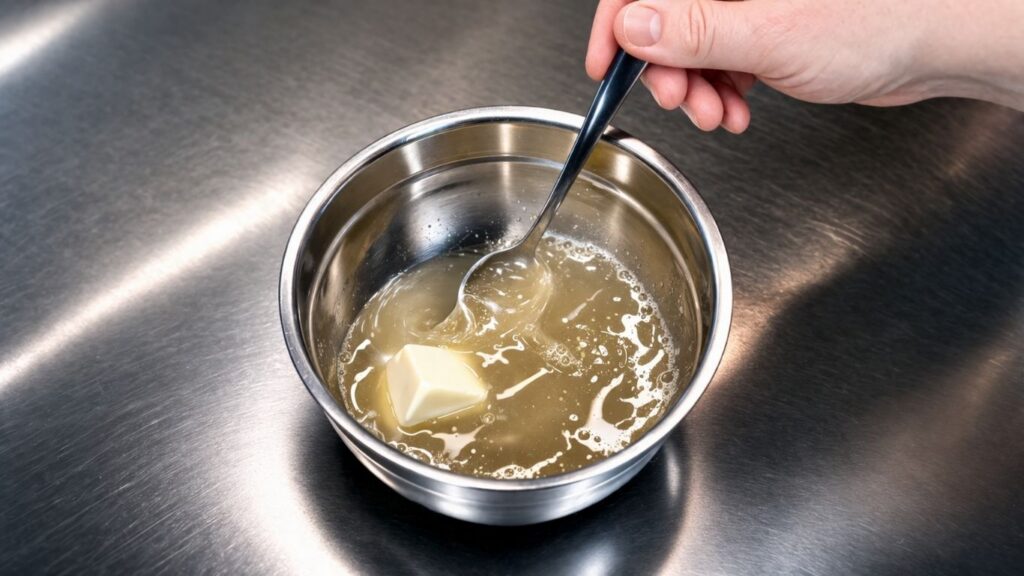
Work quickly through this step – everything needs to stay warm so that all the ingredients combine properly before moving on to the final stage of making your fondant.
Step 3. Making the Fondant
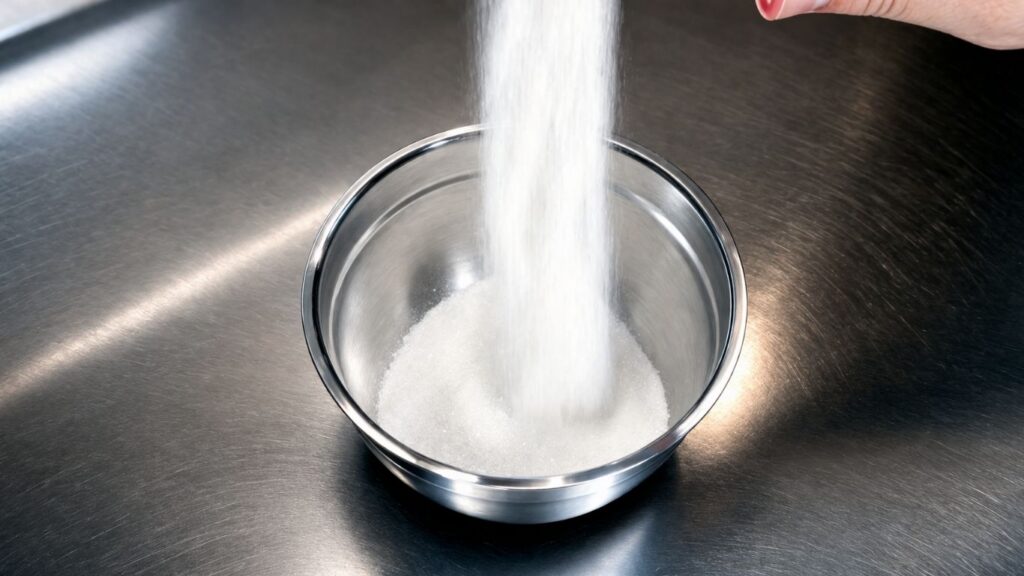
While your dextrose was cooking on the stove, measure out 4⅔ cups (700g) of powdered sugar and pour it into a large mixing bowl. Set the remaining powdered sugar aside – you will be adding it gradually as you go.
Take your warm dextrose mixture, which is combined with the gelatin and butter, and slowly begin pouring it into the bowl of powdered sugar. As you pour, stir at the same time – it is important to keep mixing continuously so that everything incorporates evenly from the very beginning.
Once you have poured in all of the dextrose mixture, continue mixing until the fondant starts to come together into a firmer, thicker mass. You will feel it getting denser and harder to stir with a spoon – this is the sign that it is ready to move to the next stage.

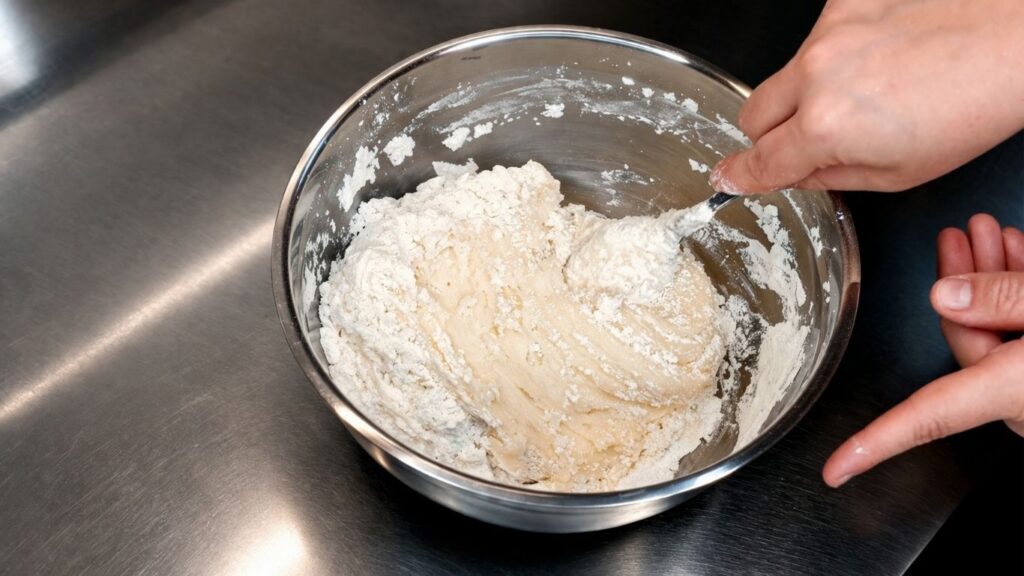
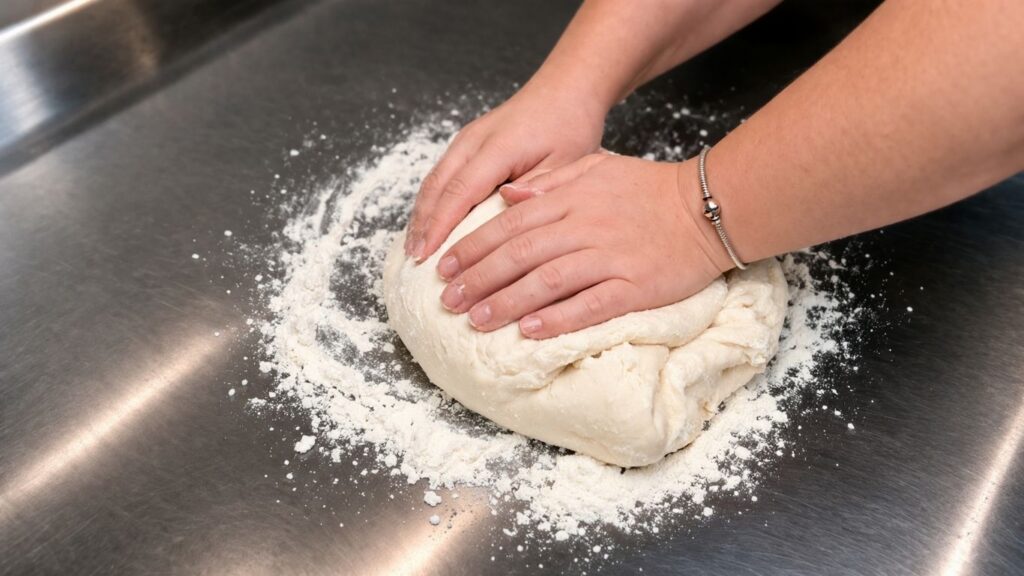
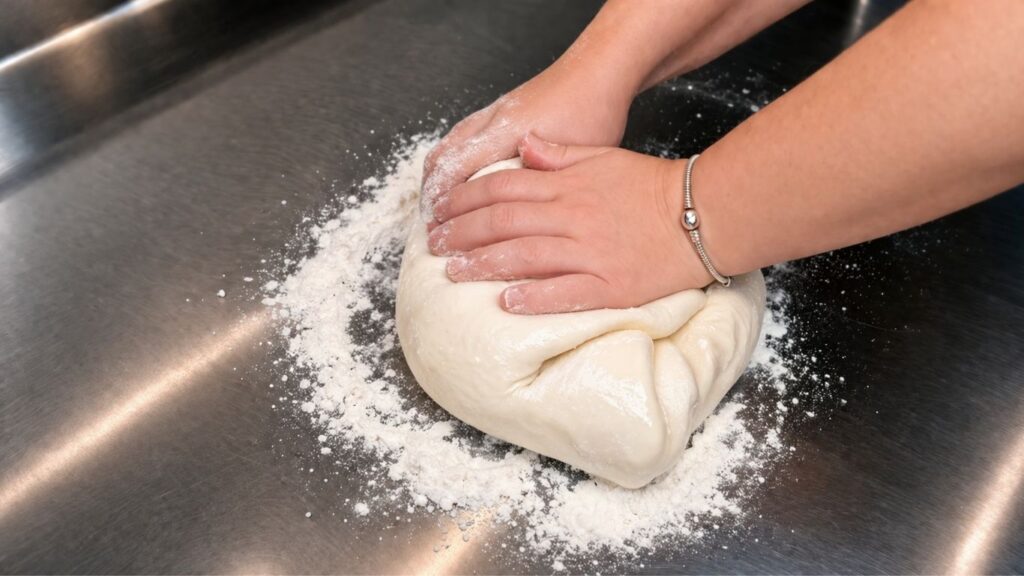
When the mixture is firm enough to handle with your hands, transfer it onto your work surface. Make sure you dust the surface generously with powdered sugar beforehand so the fondant does not stick as you work.
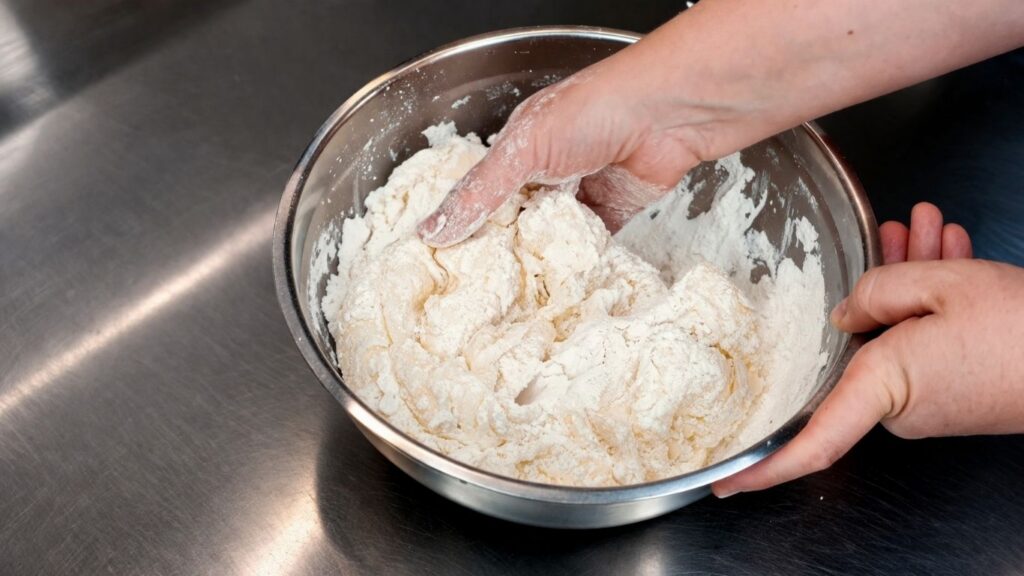
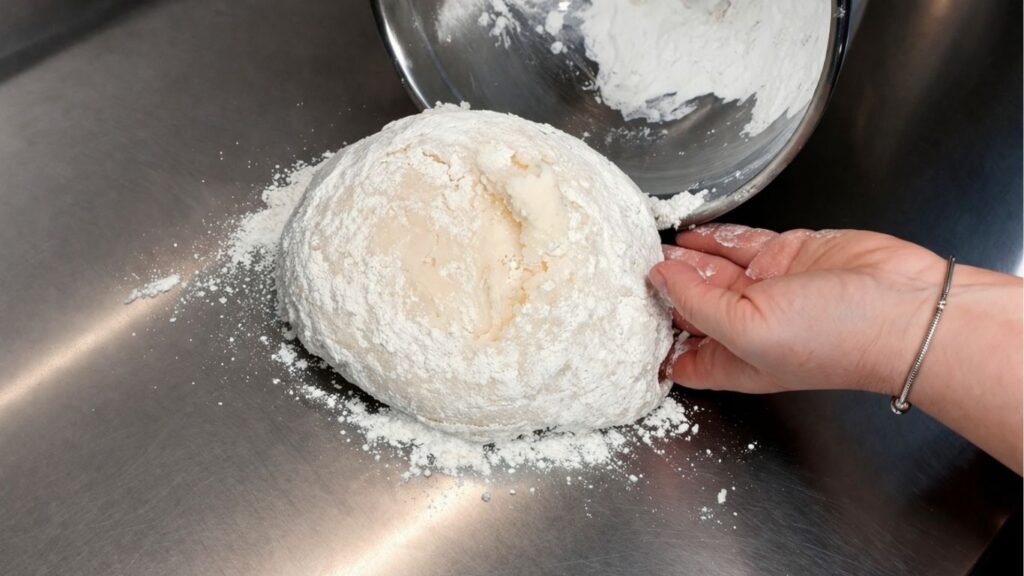
Knead the fondant by hand for about 10 minutes, gradually adding the remaining powdered sugar little by little as you go. Keep kneading until you have a smooth, soft and beautifully uniform fondant that is no longer sticky and holds its shape perfectly.
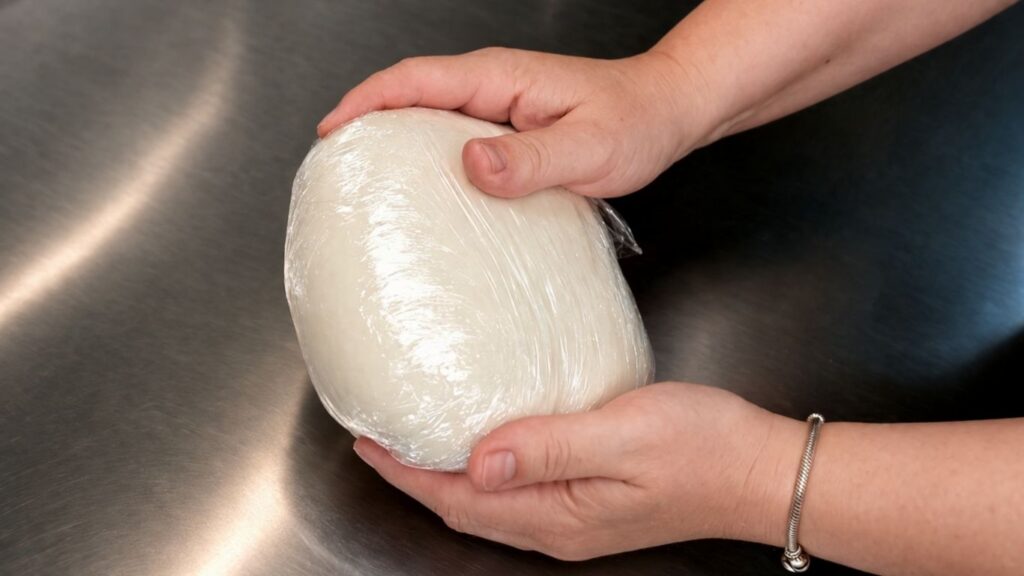
Once your fondant is ready, wrap it tightly in plastic wrap making sure there are no air gaps. Air is the enemy here – even a small opening can dry out the fondant and cause lumps to form on the surface.


Set it aside to rest for 30 minutes before using. This resting time allows the fondant to settle and become even easier to roll out and work with when covering your cake.
Tips and Tricks for a Perfect Homemade Fondant Recipe
If your homemade fondant recipe feels soft or sticky even after adding most of the powdered sugar, do not panic and do not keep adding more. Adding too much powdered sugar will make the fondant stiff, difficult to work with, and it will crack when you try to cover your cake.
Always set aside about ¾ cup (100g) of powdered sugar and add less rather than more – your fondant will firm up beautifully on its own after the 30 minute rest, and you will be much happier with the result.
You can also make this homemade fondant recipe a few hours ahead of time. Simply wrap it tightly in plastic wrap, store it at room temperature, and when you are ready to use it, give it a quick 10 to 15 second warm up in the microwave. It will soften right up and be just as easy to work with as freshly made fondant.
Just be careful not to overheat it in the microwave – a few seconds is all it needs. Too much heat will melt it and you risk burning yourself as the mixture can get very hot very quickly.
To color your fondant, simply add a small amount of gel food coloring directly into the fondant and knead it in until the color is fully and evenly distributed. Always use gel coloring rather than liquid – liquid coloring can change the consistency of your fondant and make it too soft to work with.
When it comes to storage, wrap your homemade fondant tightly in plastic wrap making sure there are no air gaps at all, then place it in an airtight container or zip-top bag. Stored this way at room temperature in a cool, dark place, your fondant will stay fresh and workable for up to 2 weeks. If you need to store it longer, it can last up to 2 months when wrapped properly and kept away from heat, light and moisture.
Always dust your work surface and rolling pin generously with powdered sugar before rolling out your fondant. This prevents it from sticking and makes the whole process much smoother and easier.
If your fondant starts to crack when you are covering a cake, there are a few possible reasons. You may have added too much powdered sugar, rolled it out too thin, or the fondant may not be warm enough to work with. The good news is that kneading it well with your hands for a few minutes naturally warms it up, reactivates the gelatin and brings back that beautiful elasticity that makes this homemade fondant recipe so easy to use.
Frequently Asked Questions
Can I make this homemade fondant recipe ahead of time?
Yes, absolutely! You can make this fondant a day or even a few days ahead of time. Simply wrap it tightly in plastic wrap, store it at room temperature, and it will be ready to use whenever you need it. Just give it a quick knead before rolling it out and it will be as good as freshly made.
Can I use this fondant to make decorations and figures?
Yes! This fondant is perfect for making flowers, figures, and all kinds of decorations. Shape it however you like and allow the decorations to air dry at room temperature for 24 to 48 hours depending on their thickness. The thicker the decoration, the longer it needs to dry.
Can I double this recipe for a larger cake?
Yes, you can double or even triple this recipe without any problems. When making a large tiered cake in one color, it is best to color all the fondant at once so that the shades match perfectly across all tiers.
What is the difference between fondant and buttercream?
Fondant is a rolled sugar paste that gives cakes a perfectly smooth, polished finish that you simply cannot achieve with buttercream. Buttercream is soft and creamy and is applied with a spatula or piping bag. Many bakers actually use both – a thin layer of buttercream underneath the fondant to help it stick and create an even surface.
Can I add flavor to this fondant?
Yes! You can add a few drops of your favorite clear extract – such as vanilla, almond, or lemon – directly into the fondant while kneading. Always use a clear extract if you want to keep the fondant perfectly white.
Watch the Full Homemade Fondant Recipe Video
Conclusion
This homemade fondant recipe has been my most trusted kitchen companion for 15 years, and I hope it becomes yours too. Whether you are covering a simple birthday cake or an elaborate wedding masterpiece, this fondant will give you that smooth, professional finish every single time.
The best part? Once you make it yourself, you will realize just how easy and rewarding it is – no special equipment, no complicated techniques, just a handful of simple ingredients and a little bit of love.
If you try this recipe, I would love to hear how it went! Leave a comment below and let me know how your fondant turned out, what cake you used it on, or any questions you might have. Your feedback means the world to me and helps other bakers find their way to the perfect fondant.
Happy decorating! 🎂
Leave a Reply