Go Back
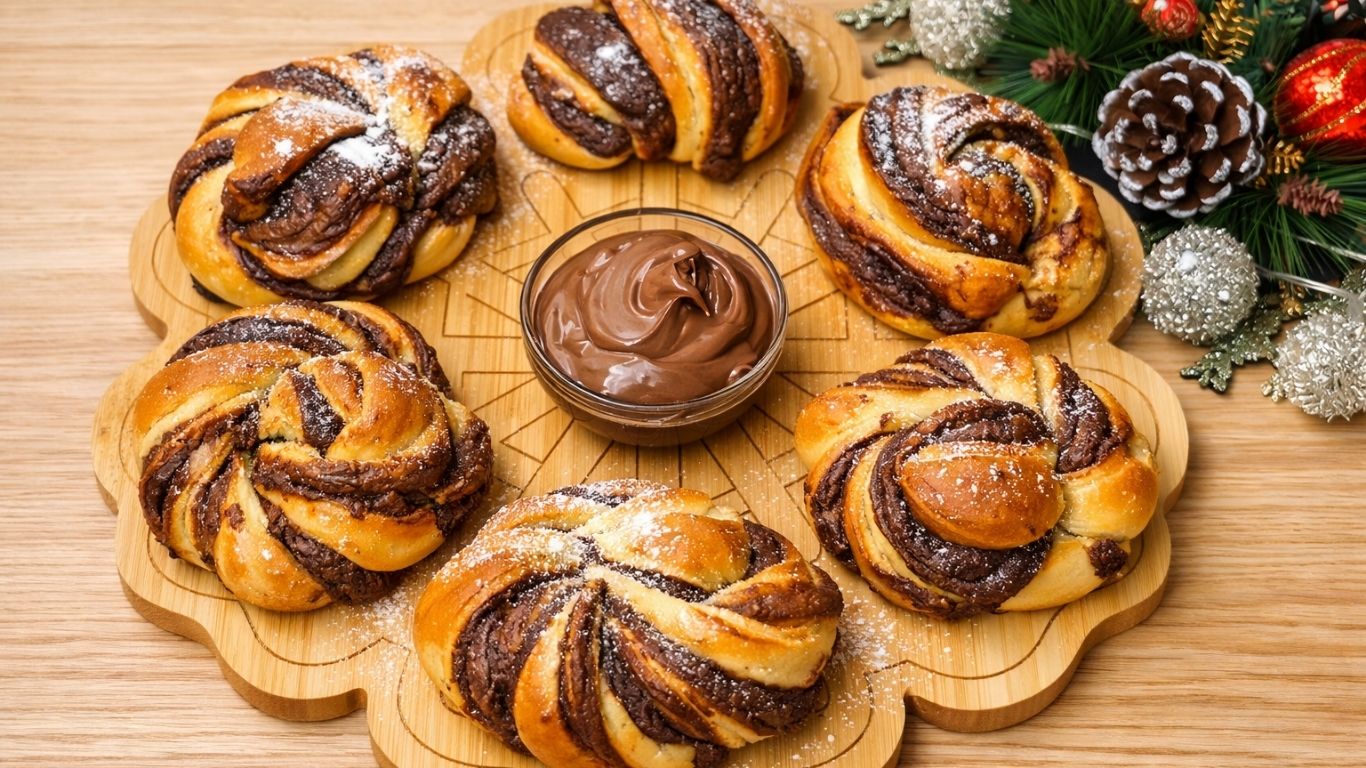
Chocolate swirl buns arranged in a circle on a wooden board with a bowl of chocolate spread in the center, and a hand holding a halved bun to show the soft, fluffy interior and chocolate swirls.
Inga

Soft Chocolate Swirl Buns

These Chocolate Swirl Buns combine soft, fluffy homemade dough with rich layers of chocolate spread. Twisted into beautiful spirals and brushed with melted butter, they make a delicious breakfast, brunch, or sweet dessert.
Prep Time 20 minutes
Cook Time 25 minutes
Rising Time 1 hour 30 minutes
Total Time 2 hours 15 minutes
Servings: 9
Course: Breakfast, Brunch, Dessert
Cuisine: American
Calories: 400

Ingredients
  

For the Dough
  • cups lukewarm milk (300 ml)
  • 2 tbsp granulated sugar (25 g)
  • 1 tbsp instant yeast (10 g)
  • 2 large eggs, at room temperature
  • 1 tbsp unsalted butter, melted and slightly cooled (15 g)
  • 1 packet vanilla sugar or 1 teaspoon vanilla extract (8 g)
  • ½ tsp salt
  • 4 cups all-purpose flour (500 g)
  • ½ cups all-purpose flour , for dusting as needed (60 g)
For the Filling and Topping
  • cup chocolate hazelnut spread, such as Nutella (200 g)
  • 1 tbsp unsalted butter, melted, for brushing (15 g)
  • 1-2 tbsp powdered sugar, optional

Equipment

  • 1 Large mixing bowl
  • 1 Measuring cups and spoons
  • 1 Whisk or silicone spatula
  • 1 Stand mixer with dough hook, optional
  • 1 Rolling Pin
  • 1 Offset spatula or spoon
  • 1 Sharp knife or pizza cutter
  • 1 Baking tray or 9 × 13-inch baking pan
  • 1 Parchment paper
  • 1 Pastry brush
  • 1 Wire cooling rack

Method
 

  1. Prepare the yeast mixture: Combine the lukewarm milk, sugar, and instant yeast in a large mixing bowl. Stir gently and let the mixture rest for 5–10 minutes. It should begin to look slightly foamy.
  2. Add the wet ingredients: Add the eggs, melted butter, and vanilla sugar or vanilla extract. Whisk until everything is evenly combined.
  3. Add the flour: Add the salt and gradually mix in the flour. Continue mixing until a soft, slightly sticky dough begins to form. Avoid adding all the extra flour unless it is necessary.
  4. Knead the dough: Transfer the dough to a lightly floured surface and knead for 8-10 minutes, or use a stand mixer fitted with a dough hook. The finished dough should be smooth, elastic, and soft.
  5. Complete the first rise: Shape the dough into a ball and place it in a lightly oiled bowl. Cover with plastic wrap or a clean kitchen towel. Let it rise in a warm, draft-free place for approximately 1 hour, or until doubled in size.
  6. Roll out the dough: Gently press the risen dough to release excess air. Transfer it to a lightly floured work surface and roll it into a long, evenly shaped rectangle. Roll it slightly thinner for more defined chocolate layers or leave it a little thicker for softer, bread-like buns.
  7. Add the chocolate filling: Spread the chocolate hazelnut spread evenly over the dough, leaving a small border around the edges. The spread should be at room temperature so it can be applied without tearing the dough.
  8. Fold and cut the dough: Fold the dough in half to enclose the chocolate filling. Press it gently so the layers hold together, then use a sharp knife or pizza cutter to cut it into 9 evenly sized strips.
  9. Shape the buns: Gently twist each strip along its length. Coil the twisted strip into a loose spiral and tuck the end underneath the bun to prevent it from opening.
  10. Complete the second rise: Arrange the shaped buns in a baking tray or pan lined with parchment paper, leaving some space between them. Cover loosely and let them rise for 20-30 minutes, or until soft and puffy.
  11. Bake: Preheat the oven to 400°F (200°C). Bake the Chocolate Swirl Buns for 20-25 minutes, or until lightly golden on top.
  12. Finish the buns: Brush the warm buns with melted butter immediately after removing them from the oven. Let them cool slightly, then dust with powdered sugar if desired.
Notes

  • The milk should be lukewarm, approximately 105-110°F (40-43°C). Hot milk can damage the yeast.
  • Instant yeast can be added directly to the dough, but allowing it to rest briefly in the warm milk helps confirm that it is active.
  • Keep the dough soft and slightly tacky. Adding too much flour can make the buns dense or dry.
  • Warm the chocolate spread briefly if it is too firm, but do not make it hot or runny.
  • Cut the dough into evenly sized strips so the buns bake at the same rate.
  • Store cooled buns in an airtight container at room temperature for up to 2 days or refrigerate them for up to 5 days.
  • Freeze the baked buns for up to 2 months. Thaw at room temperature and warm briefly before serving.