📖 Table of Content:
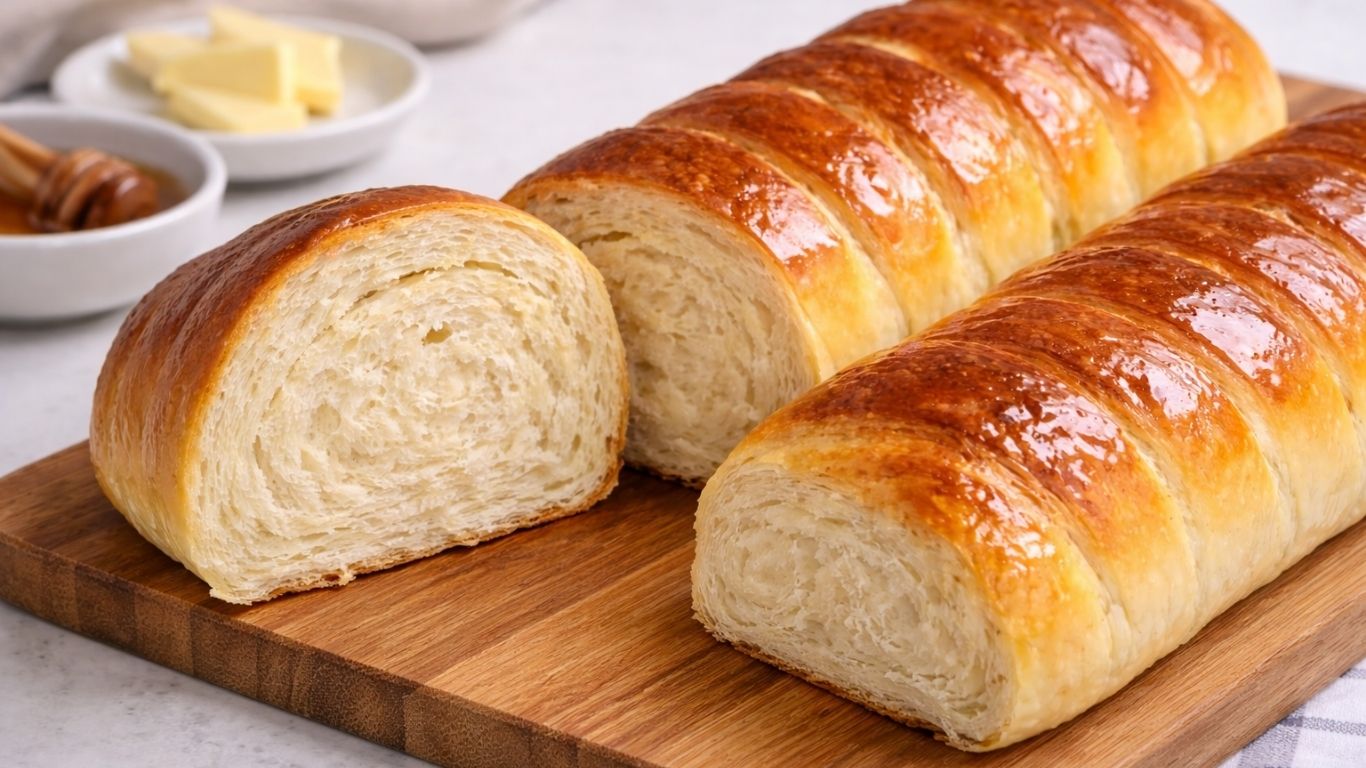
There is something special about homemade bread, especially when it is soft, light and full of flavor. This fluffy milk bread loaf is made with simple ingredients and an easy step by step method that anyone can follow. The result is a beautiful golden loaf with a soft and tender crumb.
Milk bread is known for its light and airy texture. The milk makes the bread softer and slightly richer, giving it that delicate fluffy bite that is perfect for everyday baking. If you enjoy learning more about bread baking techniques, you can also explore helpful guides from King Arthur Baking.
If you are looking for an easy homemade bread recipe, this milk bread loaf is a wonderful place to start. It is simple, reliable and turns out soft and fluffy every time. You might also enjoy baking homemade baguettes or soft milk buns if you love making bread at home.
This bread is wonderfully versatile and works well for many everyday meals. Thick slices are perfect for sandwiches, morning toast or even sweet spreads like jam or honey. Because the dough is easy to prepare and handle, this recipe is also a great option for beginner bakers who want to start making homemade bread with confidence.
Freshly baked milk bread is perfect for sandwiches, toast or simply enjoyed warm with butter and honey. With simple ingredients and an easy step by step method, this recipe is a great choice even if you are new to baking bread at home.
Another reason this milk bread is so popular is its soft texture that stays fresh and tender for days. Whether served warm with butter or used for sandwiches, it is a simple homemade bread that quickly becomes a family favorite.
MY LATEST VIDEOS
Quick Recipe Info
- Prep time: 20 minutes
- Rise time: 1 hour 30 minutes
- Bake time: 30 minutes
- Total time: about 2 hours 20 minutes
- Servings: 2 milk bread loaves
- Cuisine: homemade bread
- Difficulty: easy
- Best for: sandwiches, toast, breakfast
WHAT YOU’LL NEED FOR THIS RECIPE
This fluffy milk bread is made with simple ingredients that come together to create a soft and tender loaf. All purpose flour forms the base of the dough and gives the bread structure while still keeping the crumb light and delicate. For the best texture, try to measure the flour correctly and avoid adding too much extra flour while kneading.
Milk
Warm milk makes this bread softer and richer than bread made with water. It helps create a tender crumb and gives the bread a gentle flavor. A helpful tip is to make sure the milk is warm but not hot, because very hot milk can slow down the yeast and affect how the dough rises.
Yeast
Instant yeast is used to help the dough rise and develop that airy and fluffy texture inside the bread. Since instant yeast works quickly, it can be mixed directly with the dry ingredients. For best results, always check that your yeast is fresh so the dough rises properly.
Sugar
Sugar adds a light sweetness to the bread and also helps feed the yeast during fermentation. It supports a better rise and helps the crust develop a beautiful golden color while baking.
Salt
Salt balances the flavor of the bread and strengthens the dough structure. Even though it is used in a small amount, it plays an important role in creating a well balanced homemade bread.
Why You Will Love This Recipe
This fluffy milk bread loaf is light, tender and incredibly satisfying to slice. With simple ingredients and a straightforward method, it is a great recipe even if you are just starting to bake bread at home.
The dough is smooth and easy to handle, and it rises beautifully during baking. The result is a golden loaf with a delicate crumb that stays fresh and enjoyable for several days.
Another reason to love this recipe is its versatility. It works wonderfully for breakfast toast, sandwiches or served warm with butter and honey.
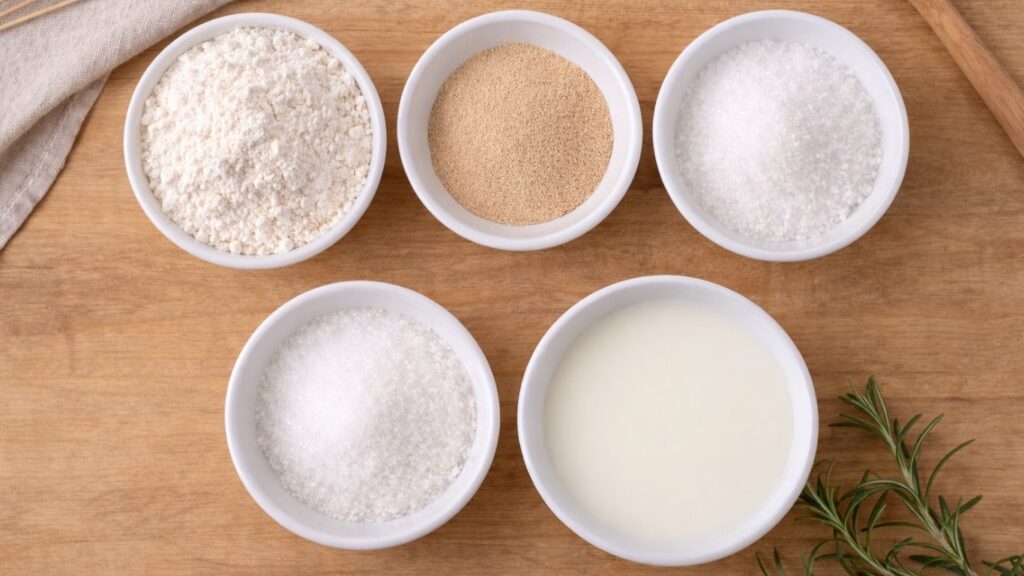
Ingredients
For The Dough
- 4 cups all-purpose flour (500 g)
- 1 tablespoon instant yeast (10 g)
- 1 tablespoon sugar (12 g)
- 1 tablespoon salt (18 g)
- 1 ½ cups warm milk (350 ml)
For Brushing the Baked Bread
- 2 tablespoons water
- 1 tablespoon oil
How to Make a Milk Bread Loaf
1. Activate the Yeast
In a bowl, pour the warm milk and add the sugar and yeast. Stir gently until the yeast begins to dissolve in the milk and the mixture becomes smooth. Let the yeast sit in the milk for about 10 minutes so it has time to activate.
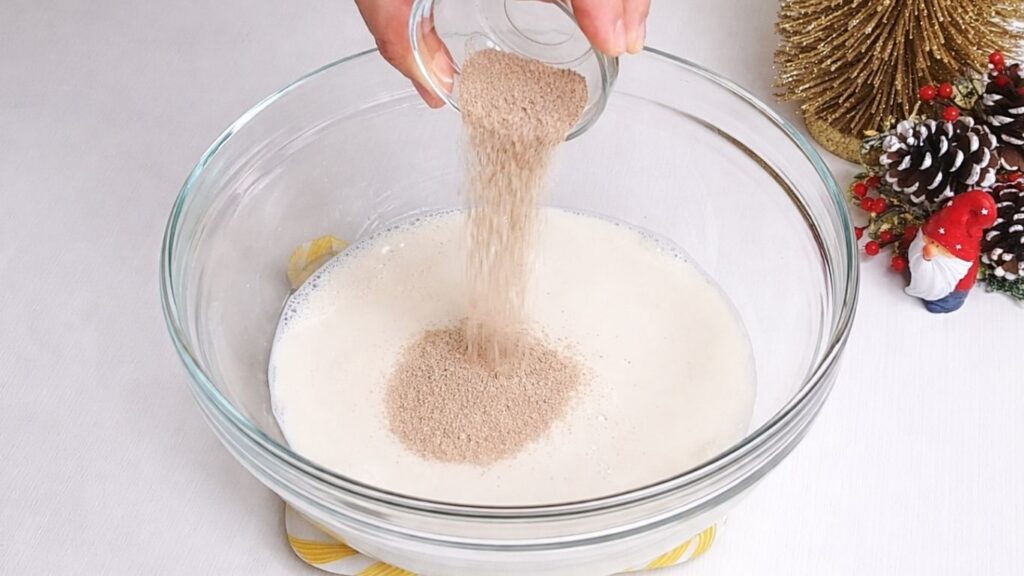
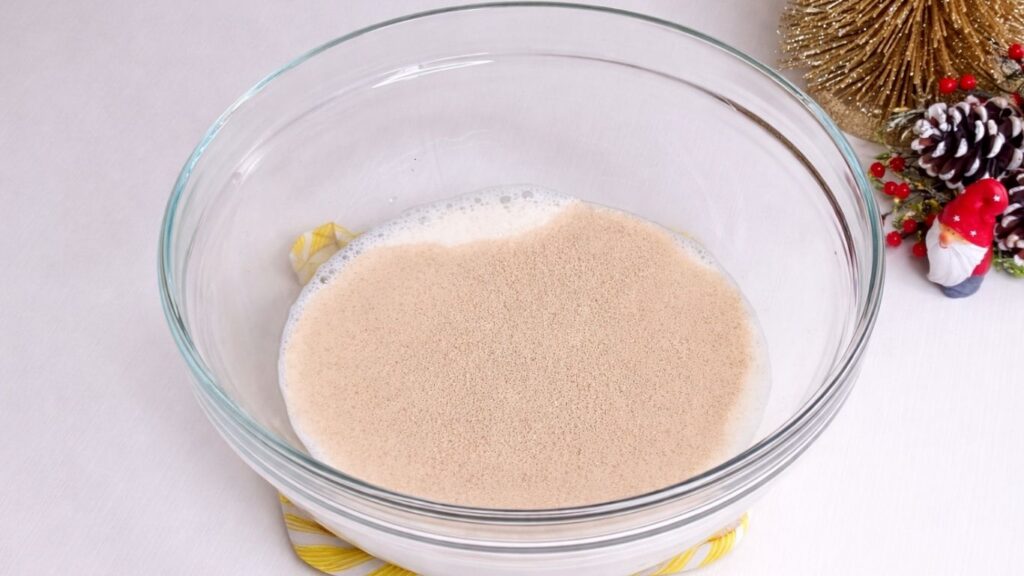
During this time the yeast will begin reacting with the warm milk and sugar. After a few minutes you should start to see small bubbles forming on the surface and the mixture becoming slightly foamy. This shows that the yeast is active and ready to help the dough rise properly.
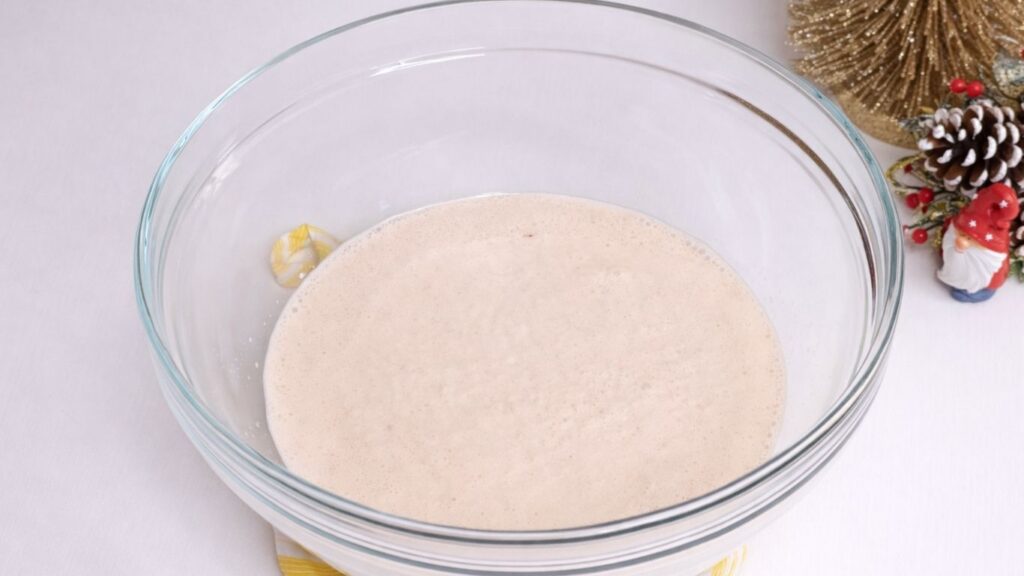
Allowing the yeast to rest in the milk for these 10 minutes helps start the fermentation process and ensures the bread will develop a light and airy texture once baked. When the mixture looks slightly foamy, it is ready for the next step in the recipe.
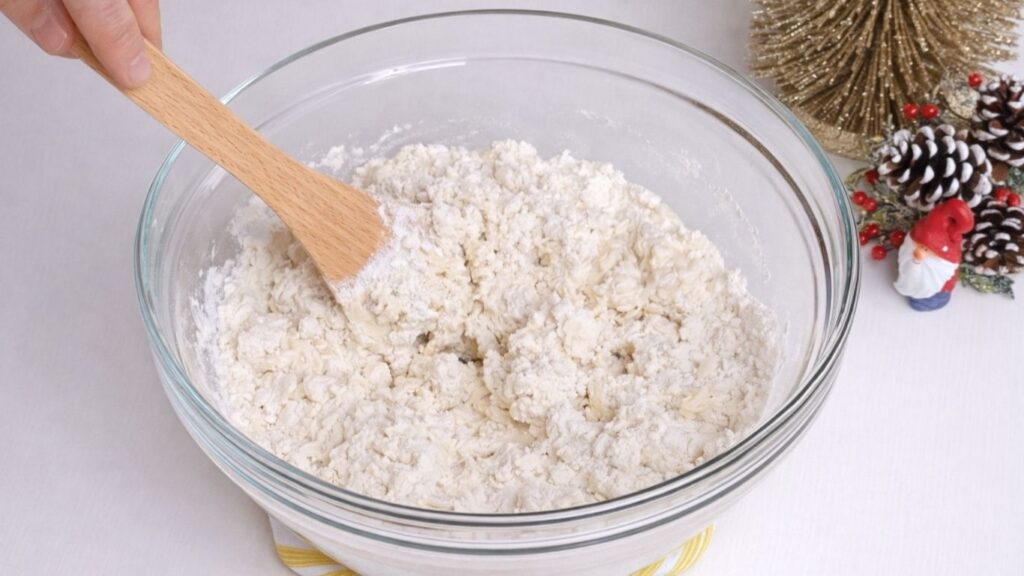
2. Mix and Knead the Dough
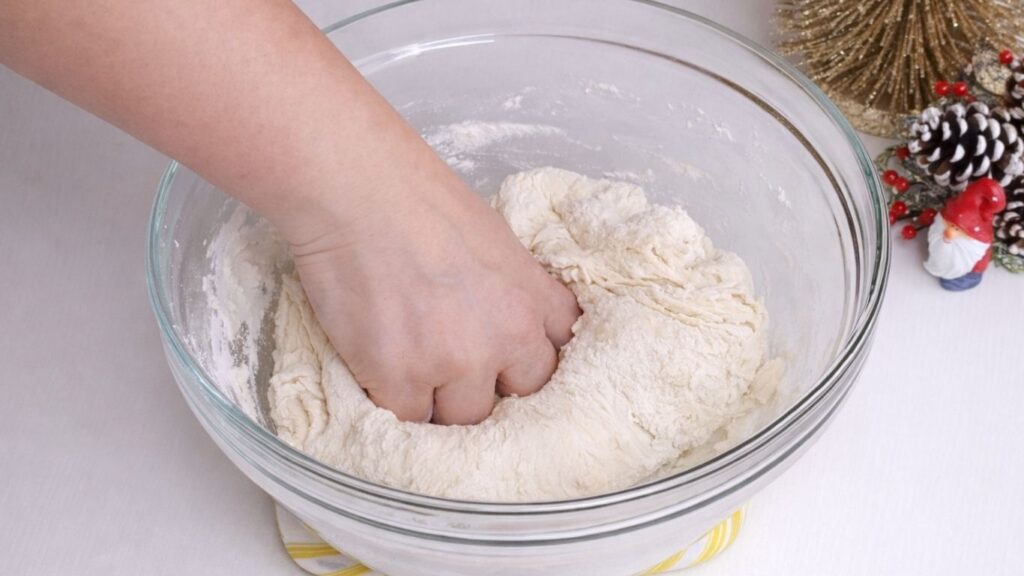
Once the yeast mixture becomes foamy and active, add the sifted flour and salt to the bowl. Begin mixing the ingredients together until a soft dough starts to form. At first the dough may look slightly sticky, but as you continue mixing it will gradually come together.

Knead the dough for about 10 minutes until it becomes smooth and elastic. This kneading process helps develop the gluten in the flour, which gives the bread its structure and allows the dough to rise properly. As the gluten develops, the dough will become more flexible and easier to handle.
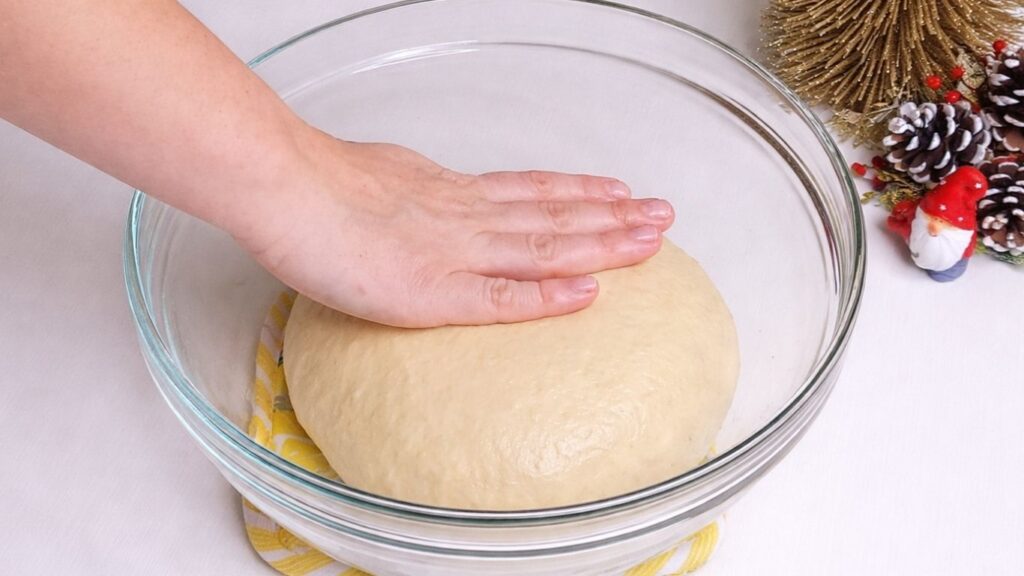
After the dough is well kneaded, lightly coat it with a small amount of oil. This helps prevent the dough from sticking to the sides of the bowl while it rises and keeps the surface soft. Once lightly oiled, the dough is ready for the resting and rising stage.
3. First Rise
After the dough has been kneaded until smooth and elastic, place it in a lightly oiled bowl. Cover the bowl with plastic wrap so the surface of the dough does not dry out while it rests.
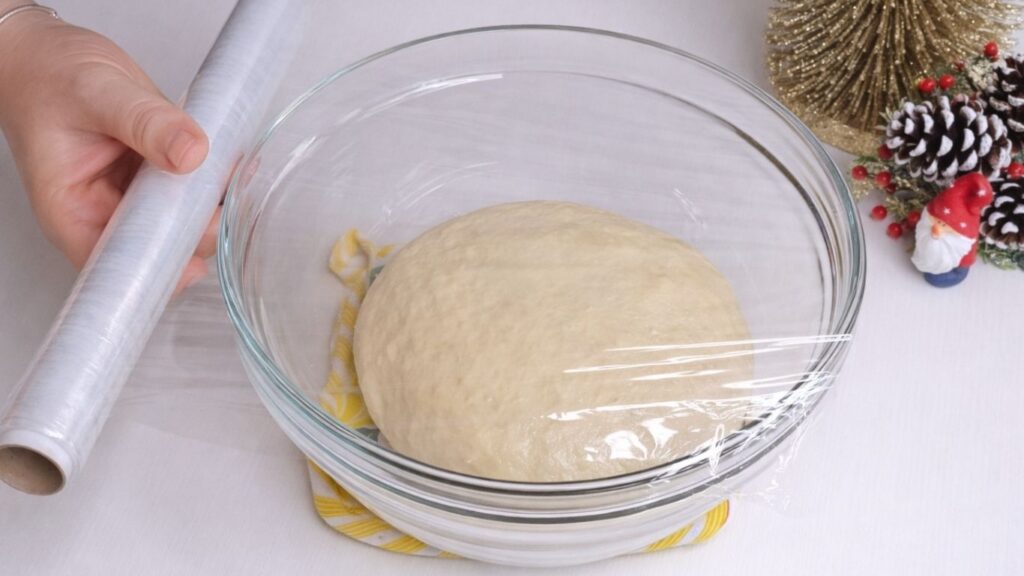
Let the dough rise for about 1 hour, or until it has doubled in size. It is best to leave the bowl in a warm place in the kitchen, as warmth helps the yeast work more effectively and allows the dough to rise properly.
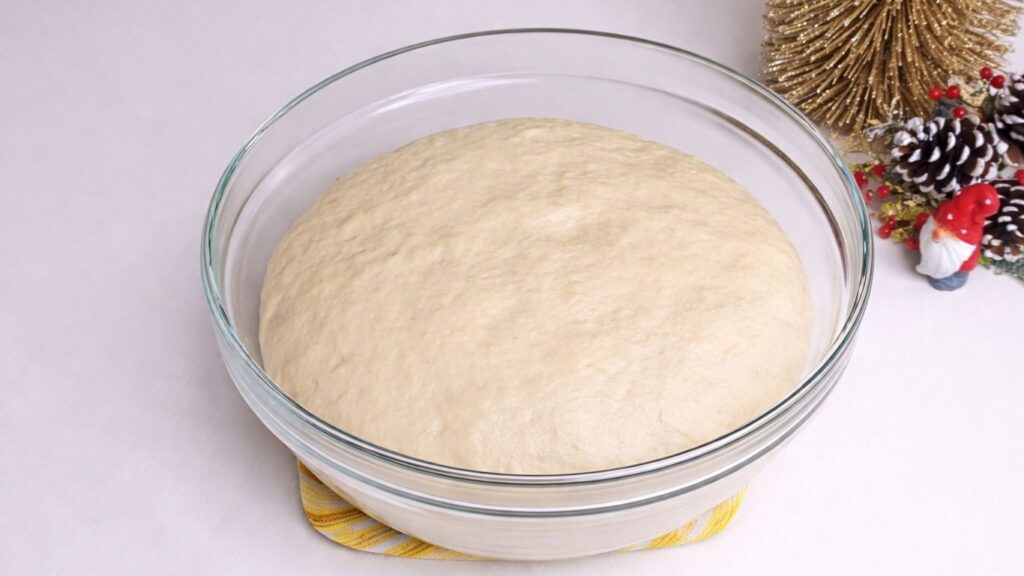
During this resting time the yeast continues to ferment inside the dough, creating small air pockets that will give the bread its soft and airy texture. Once the dough has noticeably doubled in size, it is ready for the next step.
4.Shaping the Dough
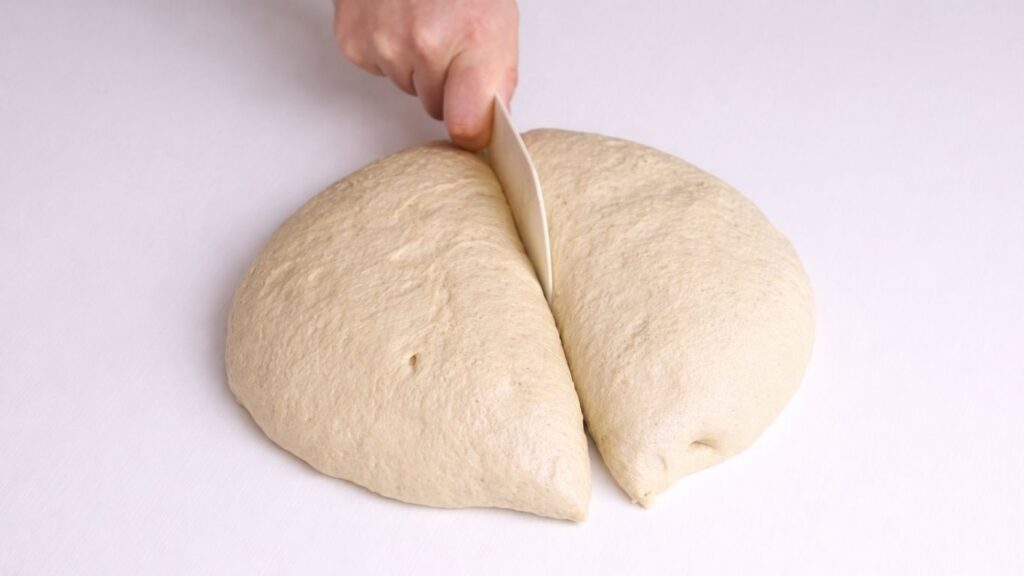
Once the dough has doubled in size, gently transfer it from the bowl onto a clean work surface. The dough should feel soft, airy and slightly elastic after the first rise.

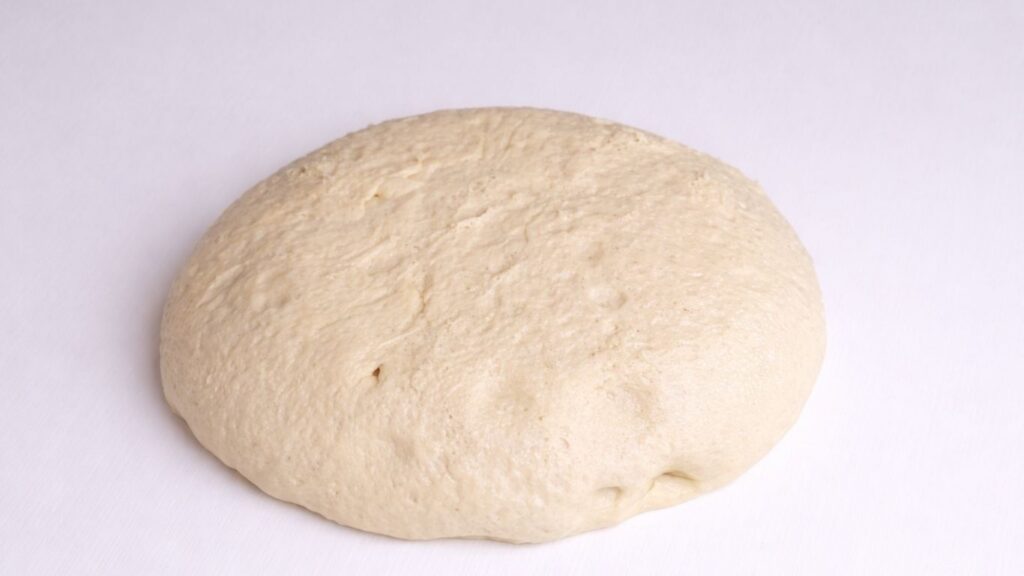
Divide the dough into two equal portions to make two loaves. Use your hands or a dough scraper to separate the dough evenly. Take one portion of the dough and set the other aside while you begin shaping the first loaf.
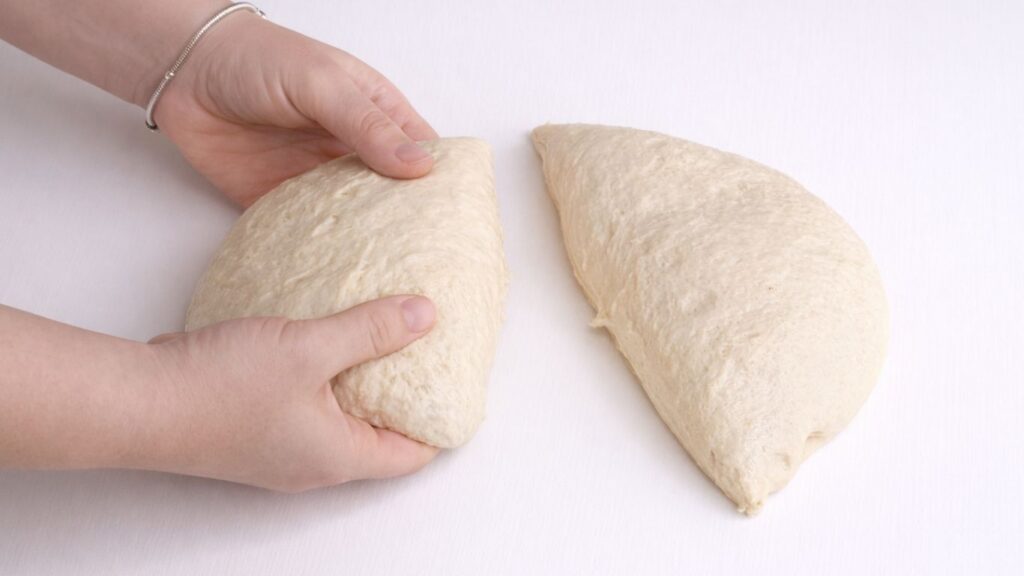
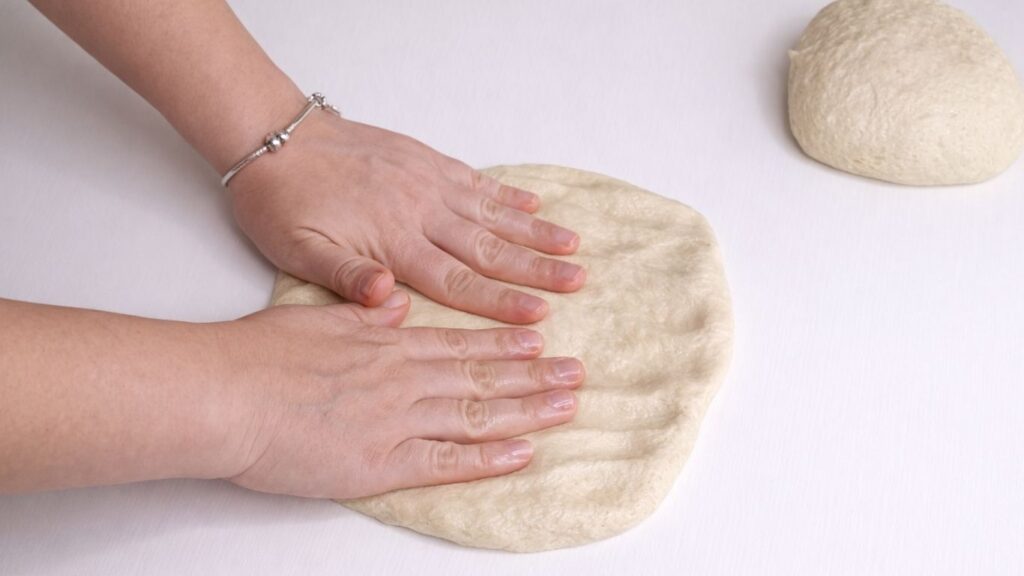
Gently shape the dough with your hands and begin to flatten it slightly. If needed, you can also use a rolling pin to help stretch the dough into an even shape. The goal is to create a smooth piece of dough that will be easy to roll.
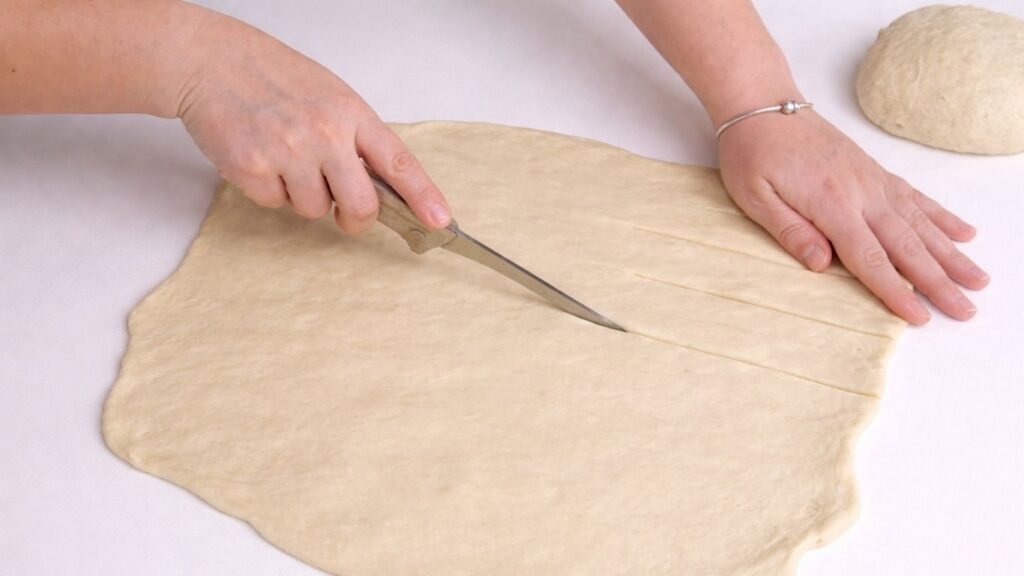
To give the baked loaf a decorative look, lightly cut a few thin strips at one end of the dough. These small cuts will create beautiful lines on the surface of the bread once it is baked.
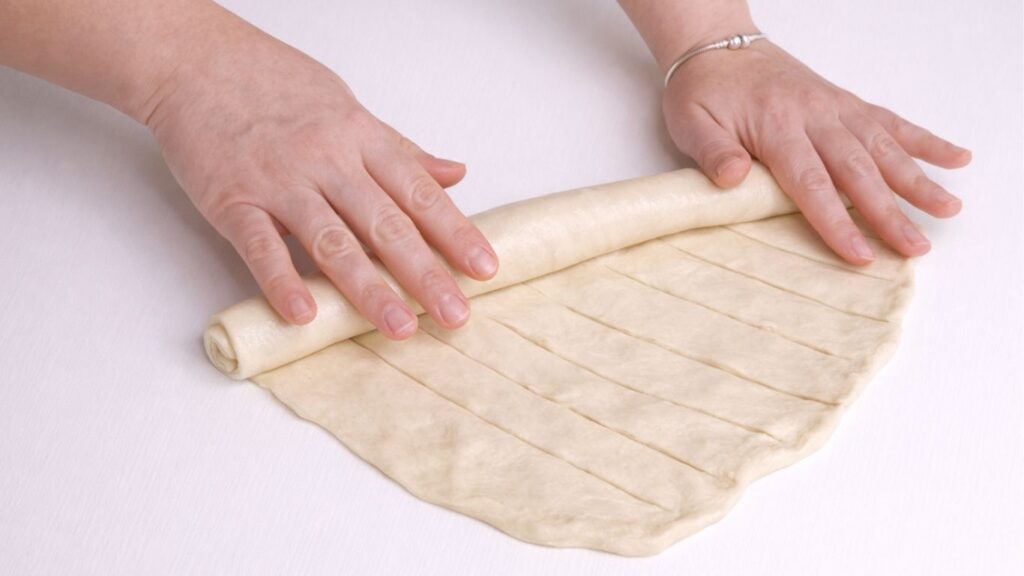
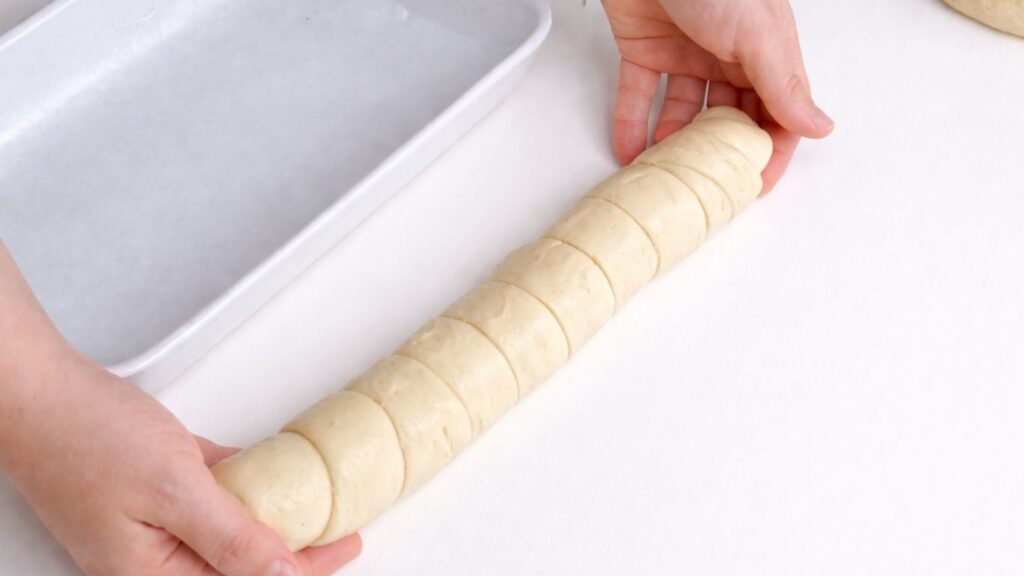
Finally, carefully roll the dough into a loaf shape by folding and rolling it forward until it forms a smooth, compact log. Repeat the same shaping process with the second portion of dough. Once both loaves are shaped, they are ready for the next rising step before baking.
5. Second Rise
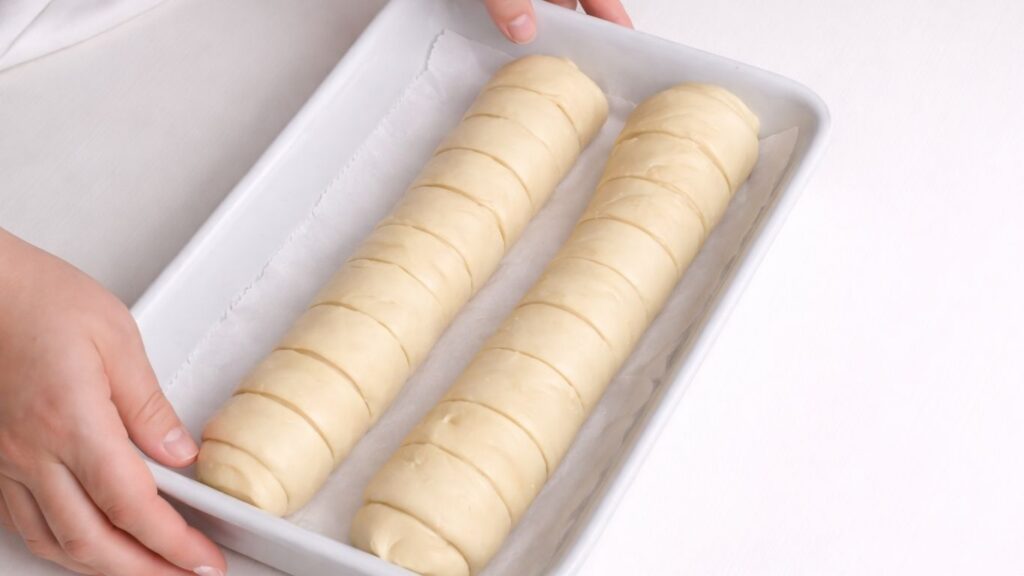
After shaping the loaves, place them into the ceramic baking dish, leaving a little space between them so they have room to expand. The dough should sit evenly in the dish so it can rise and bake into well shaped loaves.
Cover the dish loosely with plastic wrap to prevent the surface of the dough from drying out. Let the shaped loaves rest and rise again for about 20 to 30 minutes, or until they look slightly puffed and have expanded.
This second rise allows the dough to relax and develop an even softer texture. During this time the yeast continues working inside the dough, creating small air pockets that will make the bread light and fluffy once baked.
When the loaves look slightly larger and soft to the touch, they are ready for baking.
6. Baking the Bread
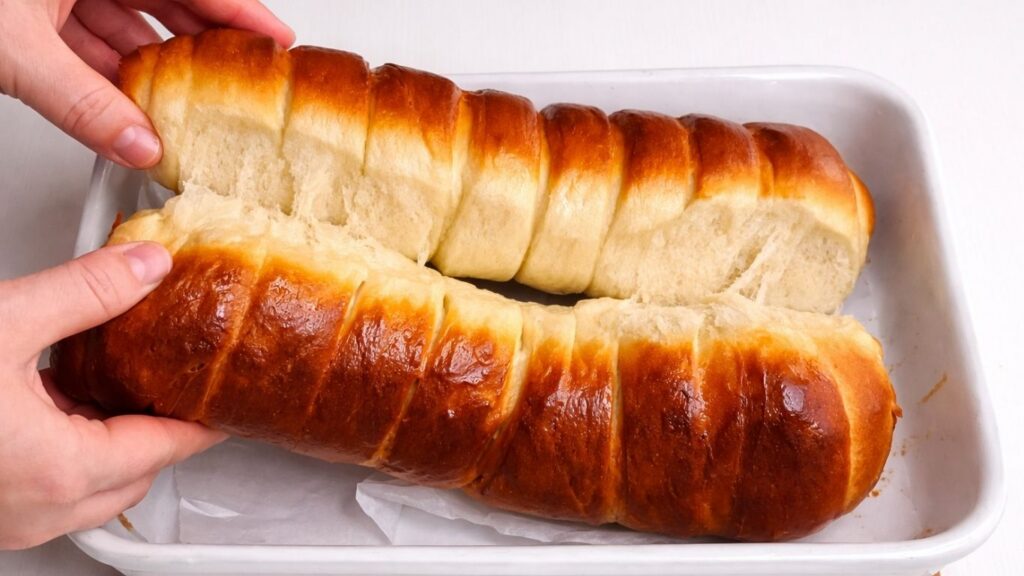
Once the loaves have completed the second rise, they are ready to be baked. Place the ceramic baking dish in a preheated oven and bake at 390°F (200°C) for about 30 minutes, or until the loaves turn beautifully golden on the outside.
As the bread bakes, the dough rises further and develops a soft and airy interior with a lightly golden crust. The kitchen will quickly fill with the warm aroma of freshly baked bread.
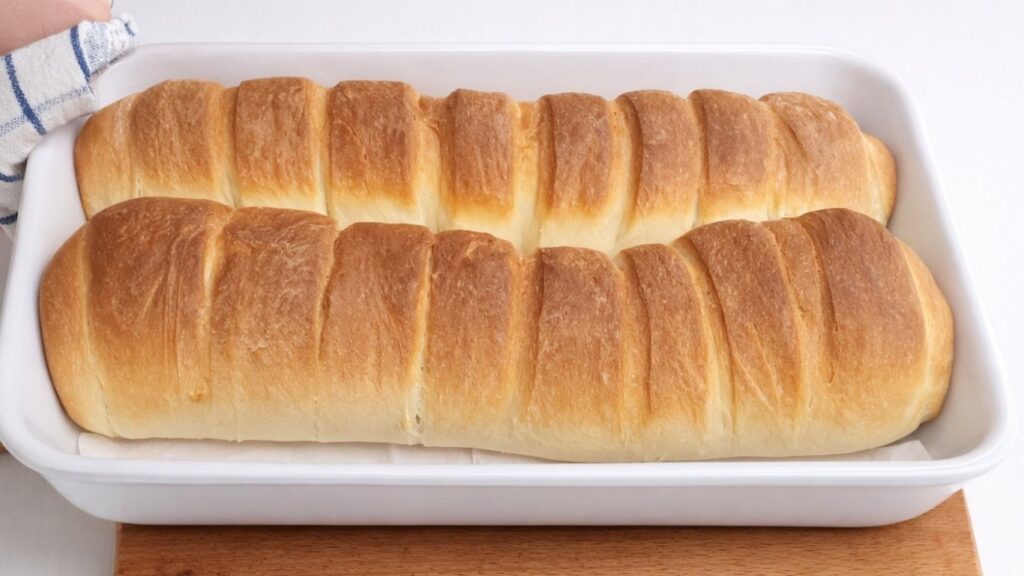
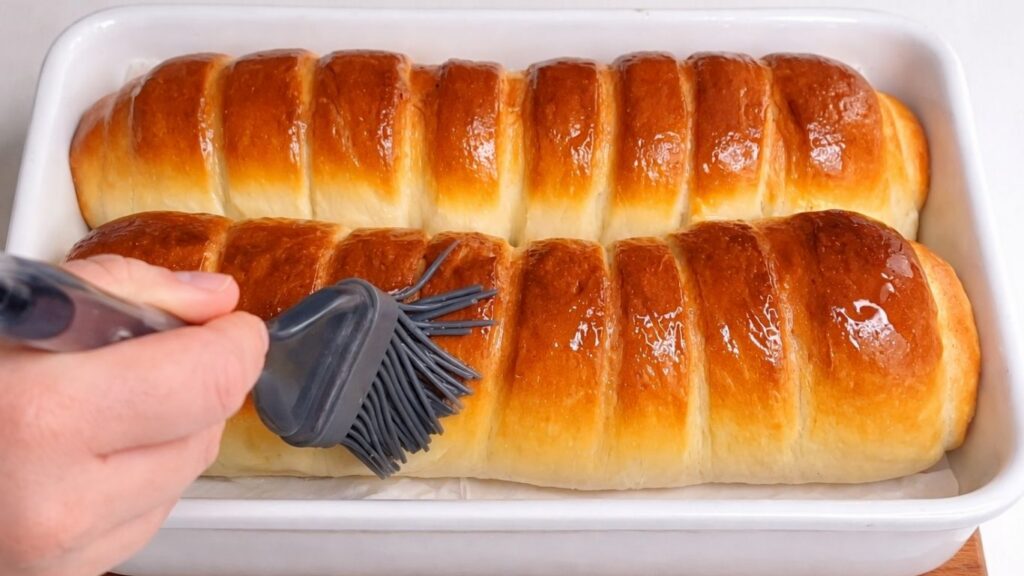
When the bread is fully baked, remove it from the oven and while it is still hot, gently brush the surface with the prepared mixture of water and oil. This simple step helps soften the crust and gives the loaf a light shine while keeping the exterior tender.

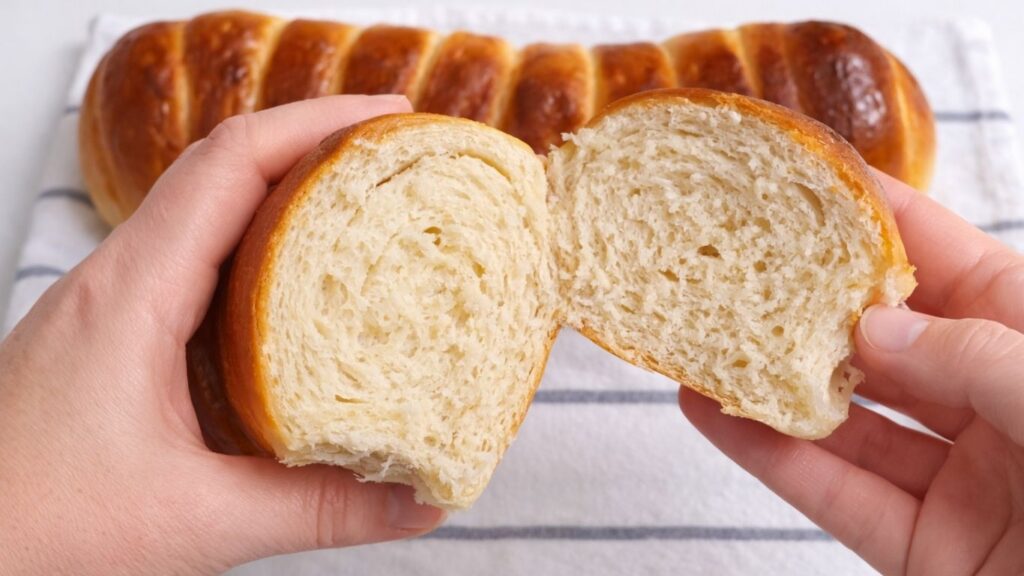
After brushing, allow the bread to cool slightly before slicing. Cutting the loaf while it is still very hot can make the crumb slightly sticky, so letting it rest for a short time helps the texture settle.
Once the bread has cooled a little, slice it and enjoy the soft, airy texture inside. Each slice reveals a light and tender crumb with a delicate flavor that makes this milk bread perfect for sandwiches, toast or simply served warm with butter.
Storing and Freezing Milk Bread
Storing
Milk bread stays soft and fresh for several days when stored properly. After baking, allow the bread to cool completely before storing it. Once cooled, place the loaf in an airtight container or wrap it well in plastic wrap to keep the crumb soft and prevent it from drying out. Stored this way, milk bread can stay fresh at room temperature for up to 3 days.
Freezing
Milk bread freezes very well and can be stored in the freezer for a longer period of time. Once the bread has completely cooled, it can be frozen either as individual slices or as a whole loaf.
If you prefer convenience, slice the bread before freezing. Place the slices in a freezer safe bag or airtight container so you can easily remove only the amount you need. This method works especially well for quick breakfasts or toast.
The bread can also be frozen as a whole loaf. Wrap the loaf tightly in plastic wrap and place it in a freezer safe bag to protect it from freezer burn. When ready to use, allow the bread to thaw at room temperature before serving.
Reheating
After the bread has thawed, it can be gently warmed again to bring back its soft texture and fresh flavor. Individual slices can be heated briefly in the microwave for a few seconds.
You can also warm the bread in the oven for a few minutes until it becomes soft and slightly warm. This helps restore the tender crumb and makes the bread taste almost like it was freshly baked.
Frequently Asked Questions About Milk Bread
Can I use active dry yeast instead of instant yeast?
Yes, active dry yeast can be used instead of instant yeast. If using active dry yeast, it is best to dissolve it in the warm milk with the sugar and allow it to sit for about 10 minutes until it becomes foamy before adding the flour.
Why is my milk bread dense instead of soft?
Dense bread usually happens if the dough has not risen long enough or if too much flour was added during mixing. Make sure the dough has enough time to rise and that it is kneaded well so the gluten can develop properly.
How do I know when the dough has risen enough?
The dough is ready when it has doubled in size. A simple way to check is to gently press the dough with your finger. If the indentation slowly springs back, the dough is ready for the next step.
Can I add butter to the dough?
Yes, butter can be added to make the bread even richer and softer. Softened butter can be mixed into the dough during kneading to give the bread a slightly richer flavor and a more tender crumb.
Can I make this milk bread without a ceramic baking dish?
Yes, the dough can also be baked in a regular loaf pan or another baking dish. The baking time may vary slightly depending on the size and material of the pan.
Watch the Full Milk Bread Loaf Video
Nutrition Information
Calories: 180
Carbohydrates: 32 g
Protein: 5 g
Fat: 3 g
Sugar: 3 g
Fiber: 1 g
Sodium: 220 mg
The nutritional values below are approximate and may vary depending on the ingredients used and the portion size.
Conclusion
This fluffy milk bread loaf is a simple and comforting homemade recipe that anyone can make. With basic ingredients and an easy step by step method, the result is a soft and tender bread with a beautiful golden crust.
The light texture and delicate flavor make this milk bread perfect for everyday use. It can be enjoyed for sandwiches, breakfast toast or simply served warm with butter and honey.
Once you try baking this milk bread at home, it may quickly become one of your favorite homemade bread recipes.
Leave a Reply