
📖 Table of Content:
If you are looking for an elegant and eye-catching 40th birthday cake, this two-tier red and gold fondant cake is the perfect showstopper for any celebration. This stunning cake features a 9.5-inch (24 cm) bottom tier and a 5.5-inch (14 cm) top tier, both covered in smooth red fondant with gold rope borders and a gorgeous golden crown topper, giving it a royal and timeless feel that works beautifully for any 40th birthday party.
Inside, the cake is a classic vanilla sponge filled with a creamy yogurt, wild berry, and vanilla cream, but we will be sharing those recipes separately so stay tuned. Today we are focusing on the fondant decorating process from start to finish. If you love working with fondant, make sure to check out my fondant baby shoes tutorial for another fun fondant decorating project, and for the gold rope border I used the Wilton Silicone Nature Designs Fondant Mold which made the whole process so much easier.
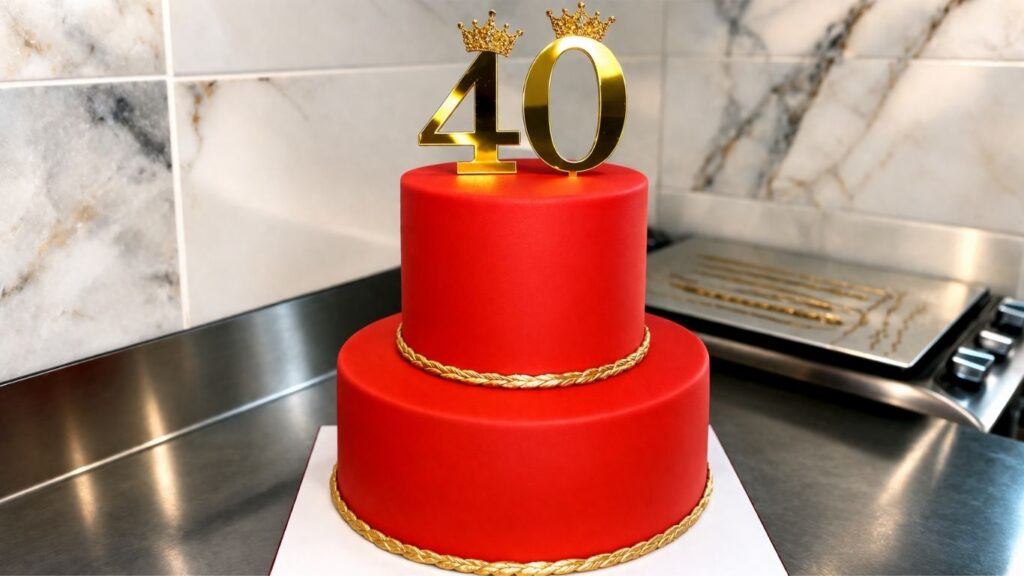
Turning 40 is a milestone worth celebrating in style, and nothing makes a statement quite like a beautifully decorated fondant cake. This two-tier red and gold 40th birthday cake combines bold color with elegant gold details, creating a cake that looks like it came straight out of a luxury bakery.
The deep red fondant paired with the gold rope border and golden crown topper makes this 40th birthday cake truly unforgettable. Whether you are making it for a client, a friend, or a family member, this 40th birthday cake decorating design is guaranteed to impress everyone at the party.
MY LATEST VIDEOS
Quick Recipe Info
Prep Time: 30 minutes
Decorating Time: 55 minutes
Total Time: 1 hour 25 minutes
Servings: 40 people
Difficulty: Easy
What You’ll Need for This 40th Birthday Cake
For the Buttercream:
- 4 cups (1 kg) powdered sugar
- 2 cups (500 g) unsalted butter, softened
- 3.5 fl oz (100 ml) whole milk
- 1 tablespoon vanilla extract
If your buttercream is still too thick, add a little more milk one tablespoon at a time until you reach a consistency that works for you.
For the Fondant:
- 2 lbs 4 oz (1 kg) homemade fondant (recipe coming soon)
- Wilton red gel food coloring
Tools:
- Cake smoother
- Wilton rolling pin
- Turntable
- Pizza cutter
- Wilton Silicone Nature Designs Fondant Mold
- Brush for painting the border (included with the Wilton mold)
- Edible gold dust
- Gold number 40 topper with crown (purchased on Amazon)
- Red ribbon for decorating the cake board
A Note on the Rolling Pin
I highly recommend using the Wilton rolling pin with guide rings for this project. The guide rings ensure that your fondant is rolled out to an even thickness every single time, which is especially helpful for beginners. Even thickness means no thin spots or tears when you place the fondant over the cake, and it gives you that smooth, professional finish that makes all the difference on a fondant cake decorating project
A Note on the Turntable
A turntable is one of the best investments you can make if you are serious about cake decorating. It allows you to rotate the cake smoothly while you apply buttercream and fondant, giving you full control and an even finish on all sides. Instead of awkwardly moving around the cake, you simply spin the turntable and let the cake come to you. It makes the whole fondant cake decorating process faster, cleaner, and much more enjoyable, especially for beginners.
A Note on the Cake Smoother
A cake smoother is an absolute must-have tool for fondant cake decorating. Without it, getting that perfectly flat and polished fondant surface is nearly impossible, no matter how experienced you are. Once you place the fondant over the cake, the smoother helps you gently press and glide across the surface, removing any air bubbles, bumps, or uneven spots. The result is that clean, sharp, professional finish that makes a fondant cake look like it came from a high-end bakery. If you are serious about fondant decorating, do not skip this tool.
Why You Will Love This 40th Birthday Cake Decorating
This red and gold fondant cake decorating tutorial is simple, elegant, and perfect for beginners. With the right tools and a little patience, you can create a stunning two-tier 40th birthday cake that looks like it came straight from a professional bakery.
The deep red fondant paired with gold details makes this birthday cake design completely timeless and customizable. Simply swap the colors to match any party theme or milestone birthday celebration.
Best of all, this step-by-step fondant decorating tutorial walks you through every detail so you can achieve a smooth, professional finish with confidence, even if it is your very first fondant cake.
How to Decorate a 40th Birthday Cake
Before You Start
One of the most important tips for any fondant cake decorating project is to always let your filled cake rest in the refrigerator overnight before you start decorating. This applies not only to fondant cakes but to any 40th birthday cake or any cake with more detailed decoration.
When a filled cake spends the night in the fridge, the cream firms up completely and holds its shape much better. This is especially important for fondant cakes because fondant is heavier than it looks, and if the cream underneath is too soft, it will not be able to support the weight of the fondant. The result can be a cake that loses its shape, bulges on the sides, or worse, causes the fondant to crack and slide.
A cold, well-set cake is also much easier to work with when applying buttercream coats and smoothing the surface. The firmer the base, the cleaner and more professional your final fondant finish will be.
So no matter what kind of cake you are decorating, whether it is a simple everyday cake or an elegant two-tier 40th birthday cake like this one, do yourself a favor and let it rest overnight in the refrigerator. Your decorating process will be smoother, faster, and much more enjoyable.
Step 1: Applying the First Buttercream Coat to the Top Tier
Start with the top tier of your 40th birthday cake. Place the cake on your turntable and make sure it is cold and firm from the refrigerator before you begin. This first coat of buttercream is called a crumb coat and its main job is to seal in all the crumbs so they do not show through your final fondant layer.
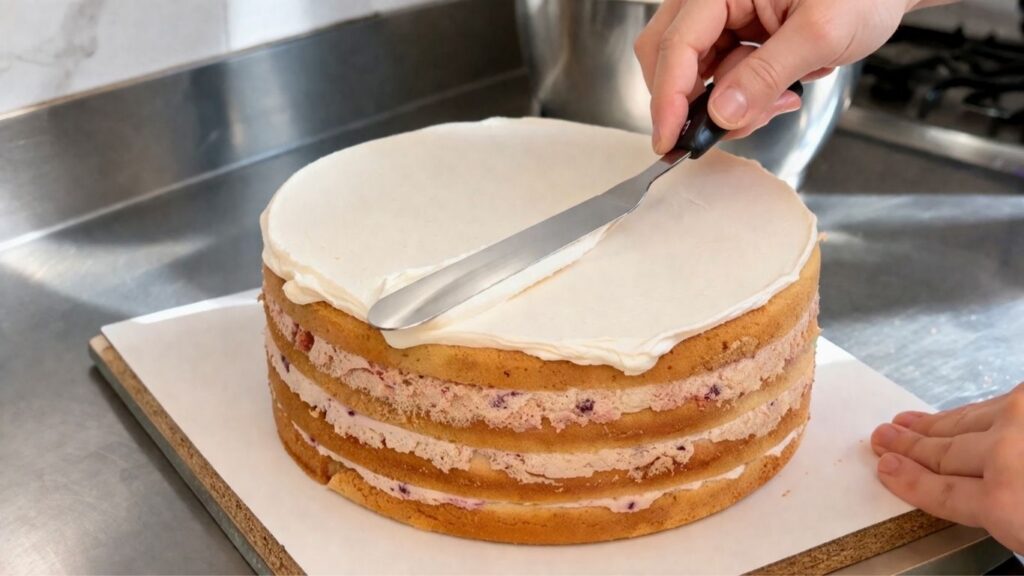
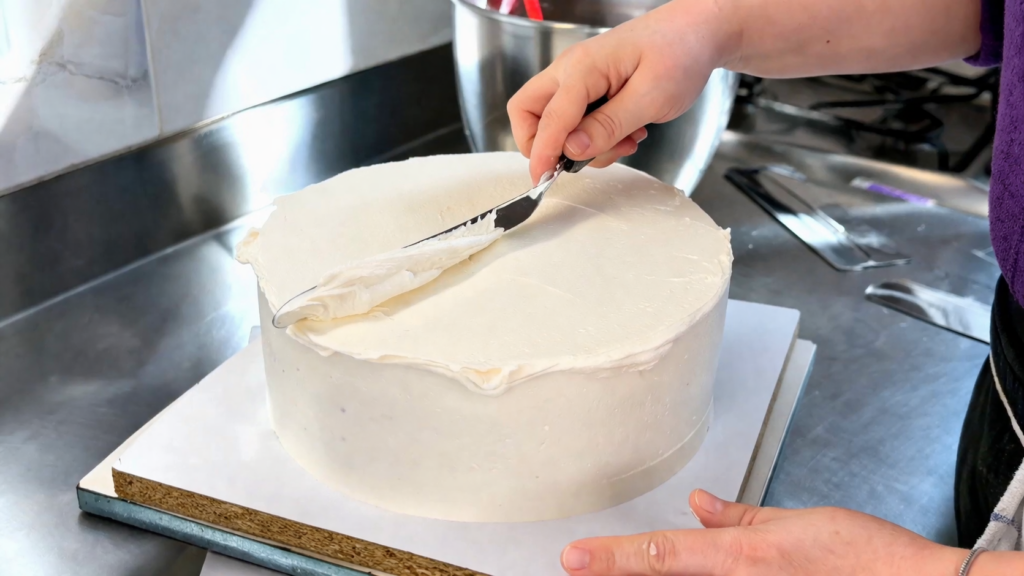
Start by adding a generous amount of buttercream on top of the cake and spread it evenly using your spatula, working from the center outward.
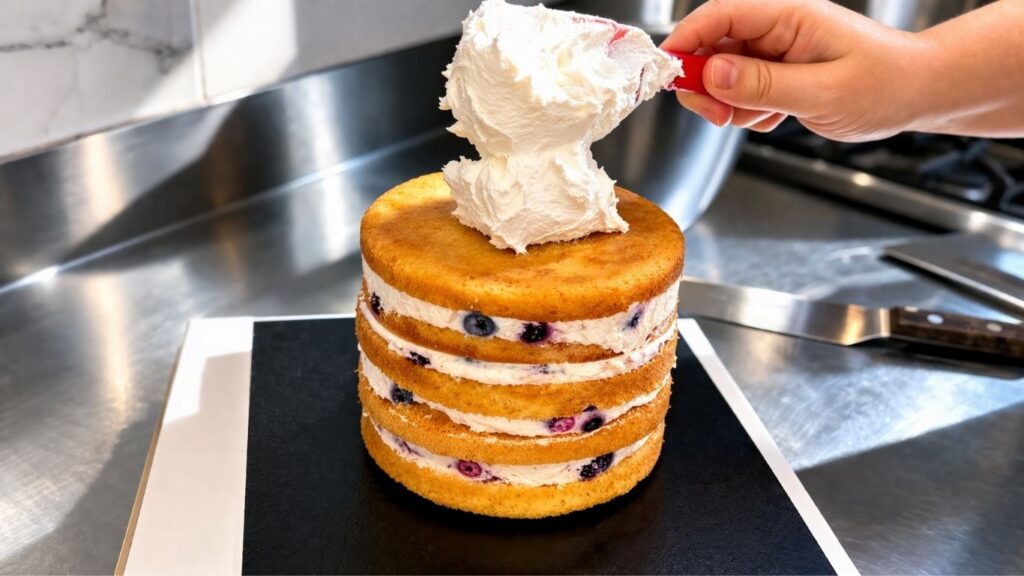
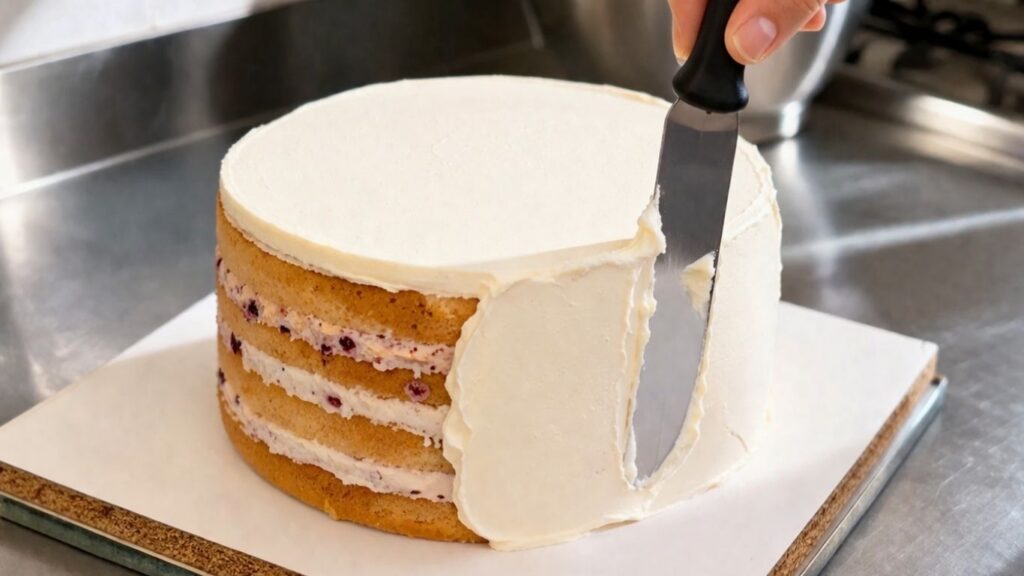
Then move to the sides of the cake, applying buttercream all the way around. Use your turntable to rotate the cake as you work so you can cover every inch evenly without moving around the cake.
Once the entire cake is covered, use your cake smoother to smooth out the sides, applying gentle and even pressure as you spin the turntable.
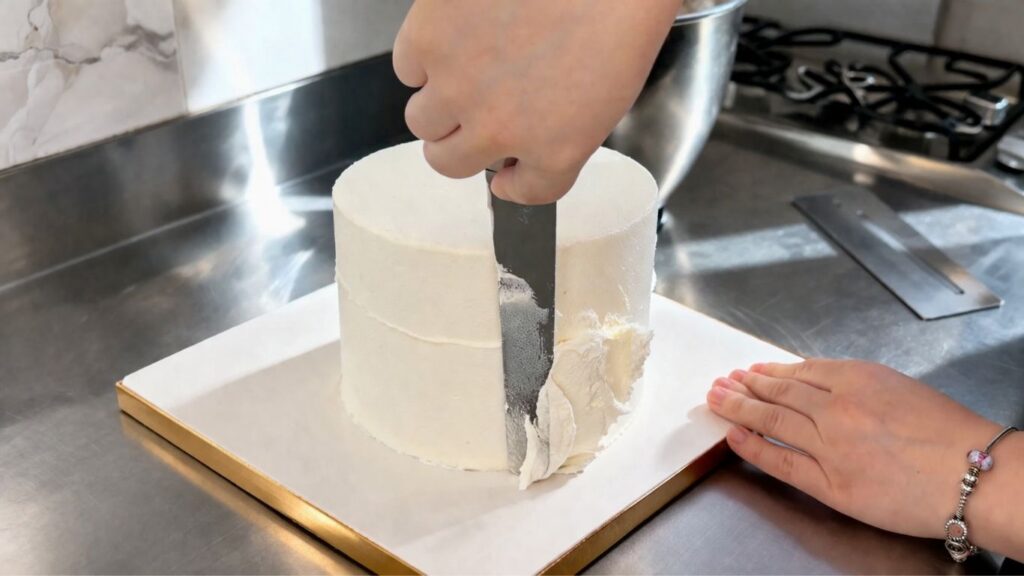
Use a straight edge or spatula to smooth the top of the cake, pulling any excess buttercream toward the center.
Once you are happy with the surface, place the cake back in the refrigerator for 15 minutes to allow the first buttercream coat to firm up before applying the second coat.
Step 2: Applying the First Buttercream Coat to the Bottom Tier
Repeat the exact same process with the bottom tier. Place it on your turntable and make sure it is cold and firm before you begin.
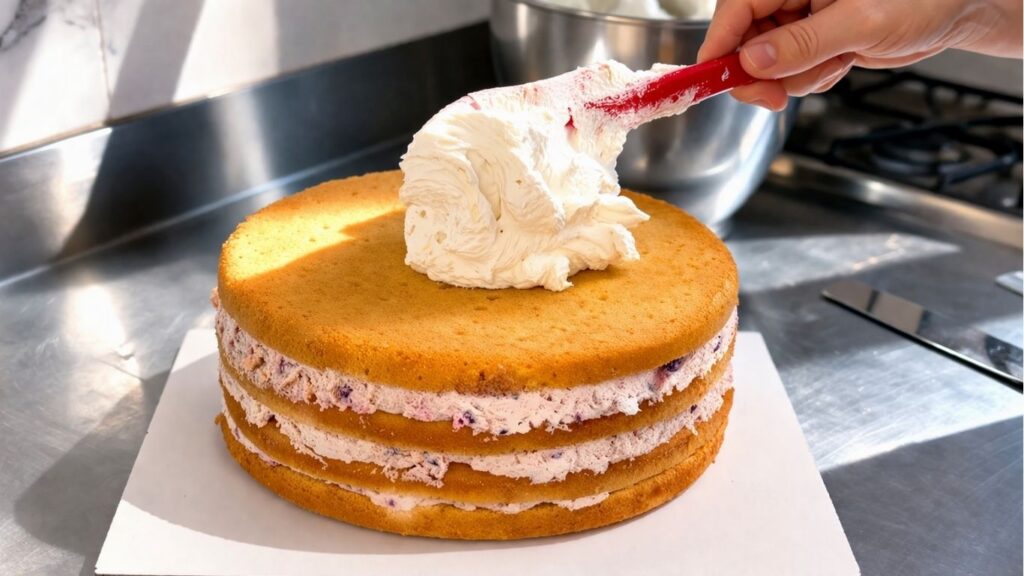
Add a generous amount of buttercream on top and spread it evenly from the center outward, then smooth it with a straight edge.
Step 3: Applying the Second Buttercream Coat and Final Smoothing
Apply buttercream to the sides and use your cake smoother to smooth them out, rotating the turntable as you work. Once done, place the cake in the refrigerator for 15 minutes before moving on to the second buttercream coat.
Once both tiers have been in the refrigerator for 15 minutes and the first buttercream coat is firm, it is time to apply the second and final buttercream coat. This coat is all about achieving that perfectly smooth surface that will make your fondant sit beautifully on your 40th birthday cake.
Apply a thin, even layer of buttercream all over both tiers, starting with the top tier first. Take your time with this step because the smoother your buttercream base, the easier it will be to get a flawless fondant finish on your 40th birthday cake decorating project.

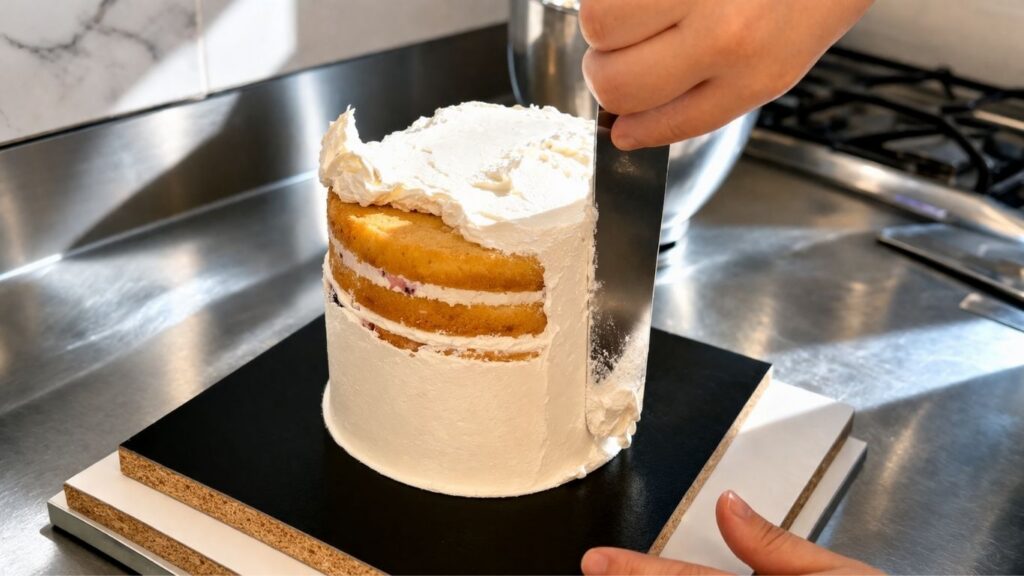
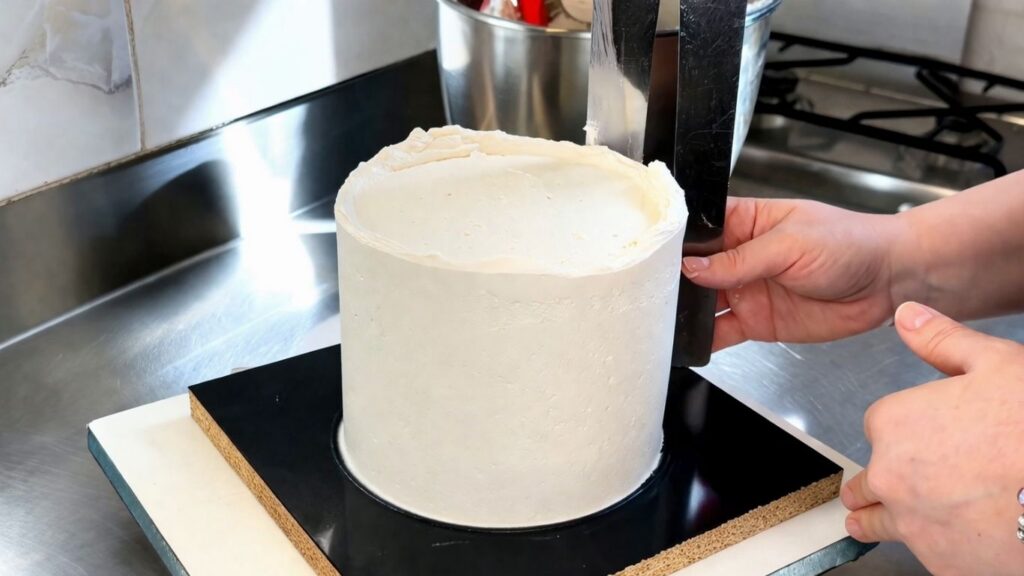
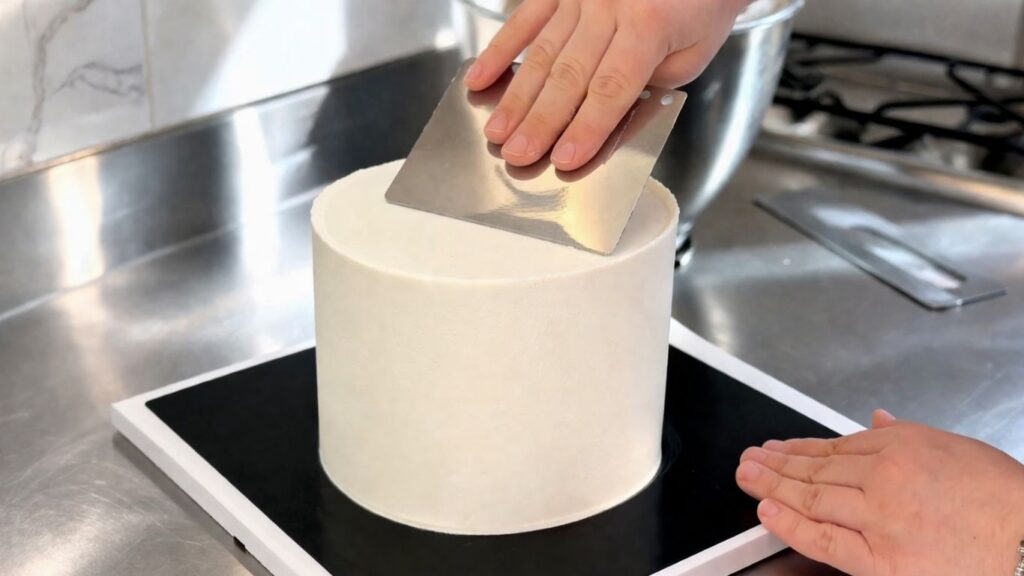
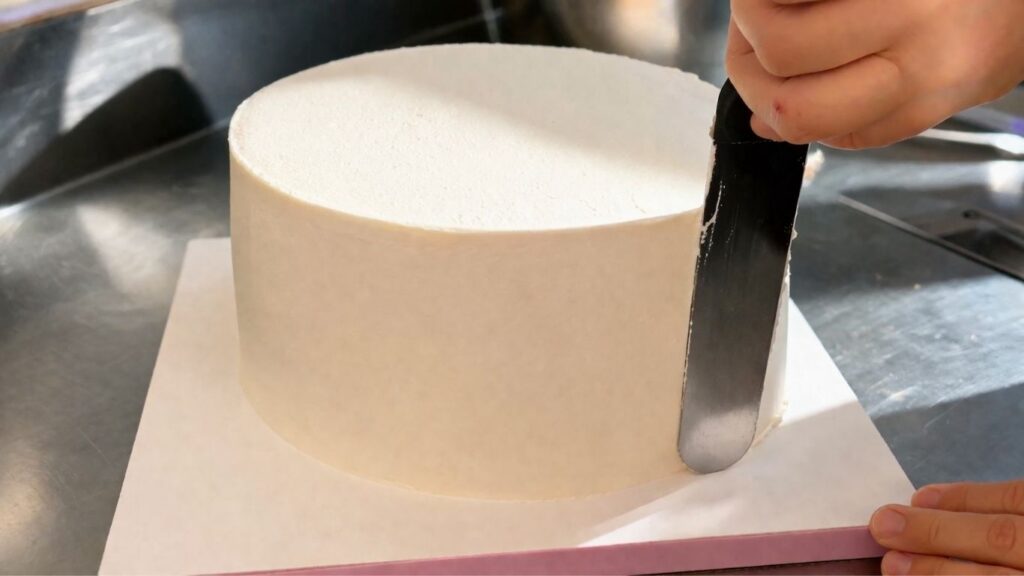
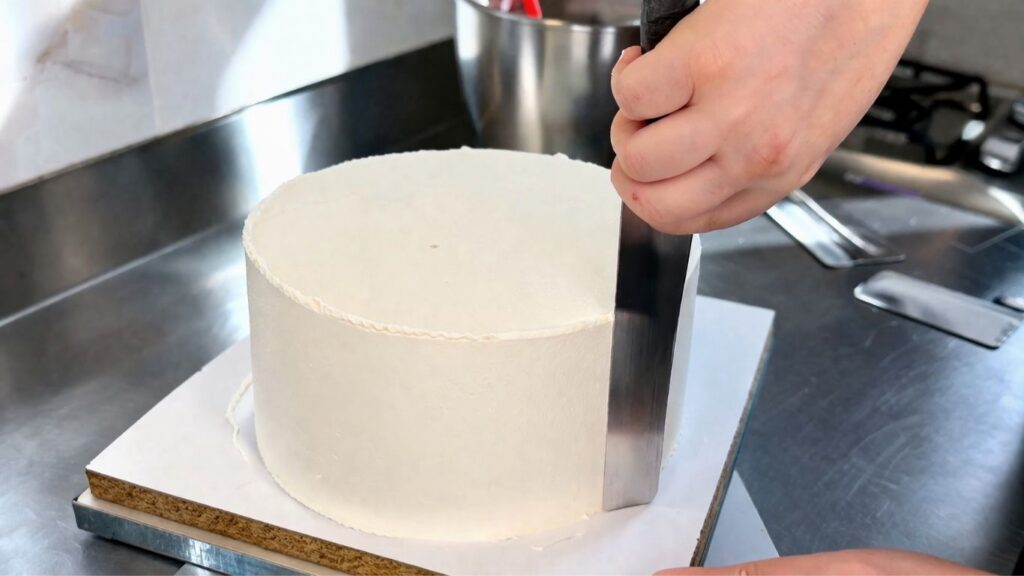
Use your cake smoother to smooth the sides, applying gentle and even pressure while rotating the turntable slowly. The goal is a perfectly straight and smooth surface with no bumps or ridges.
Finish by smoothing the top of the cake with a straight edge or spatula. Once you are happy with the surface, place both tiers back in the refrigerator for another 15 minutes before you start covering your 40th birthday cake with red fondant.
Repeat the same process with the bottom tier. Apply a thin, even layer of buttercream and take your time to get the smoothest finish possible before moving on to the fondant cake decorating step.
Apply buttercream to the top and sides, using your cake smoother to work out any bumps or uneven spots as you rotate the turntable.
For the final smoothing, I use the Wilton cake scraper and I absolutely love it. It is large enough to cover the entire side of the cake in one smooth motion, which means no lines, no ridges, and no uneven spots. It is honestly one of the best tools for getting that perfect fondant-ready surface, and it works beautifully even if you are a complete beginner.
Once both tiers are perfectly smooth, place them back in the refrigerator for 15 minutes before you start covering them with red fondant.
Step 4: Preparing the Fondant for Covering the Cake
Before you start covering your cake with fondant, you need to color and roll out your fondant to the right thickness. This step is key to achieving that smooth, professional finish that makes this 40th birthday cake so stunning. Start by kneading Wilton red gel food coloring into your fondant. There is no exact amount here, just keep kneading and adding more color until you reach that deep, rich red that you are happy with. The more you knead, the more even and vibrant the color will be.
Once your red fondant is evenly colored, lightly dust your work surface with powdered sugar. You only need a small amount, just enough to prevent the fondant from sticking to the surface as you roll it out.
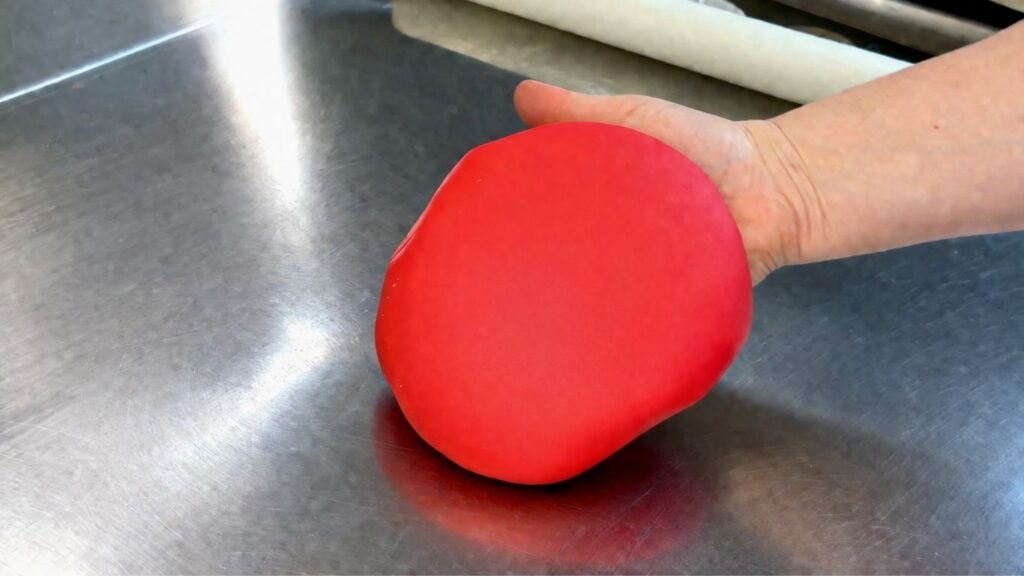
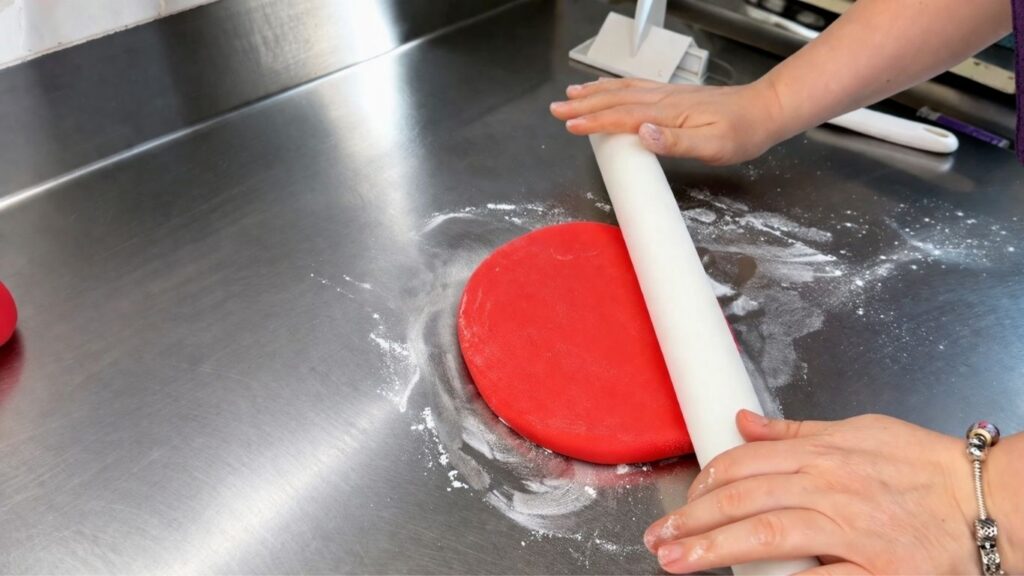
Start rolling out the fondant using your Wilton rolling pin with guide rings. The ideal thickness for fondant is between 1/8 inch and 1/4 inch (0.2 cm to 0.5 cm). I personally prefer to roll it as thin as possible while still being easy to work with, but the Wilton rolling pin with guide rings takes all the guesswork out of it and ensures an even thickness every single time. This is especially helpful for beginners.
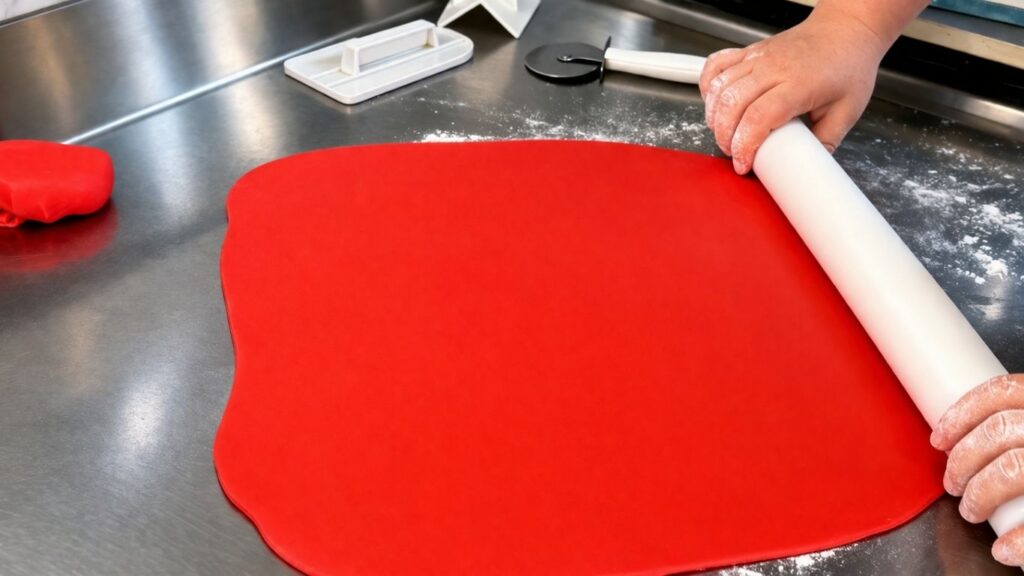
Once your fondant is rolled out evenly, it is ready to be placed over the cake. Work quickly at this point as fondant can dry out if left too long before covering the cake.
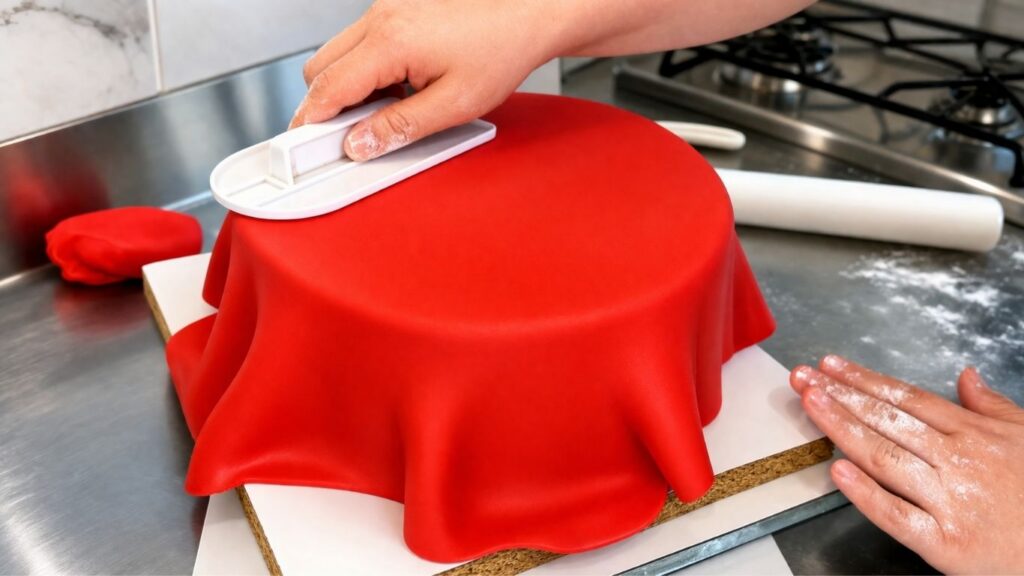
Step 5: Covering the Cake with Fondant
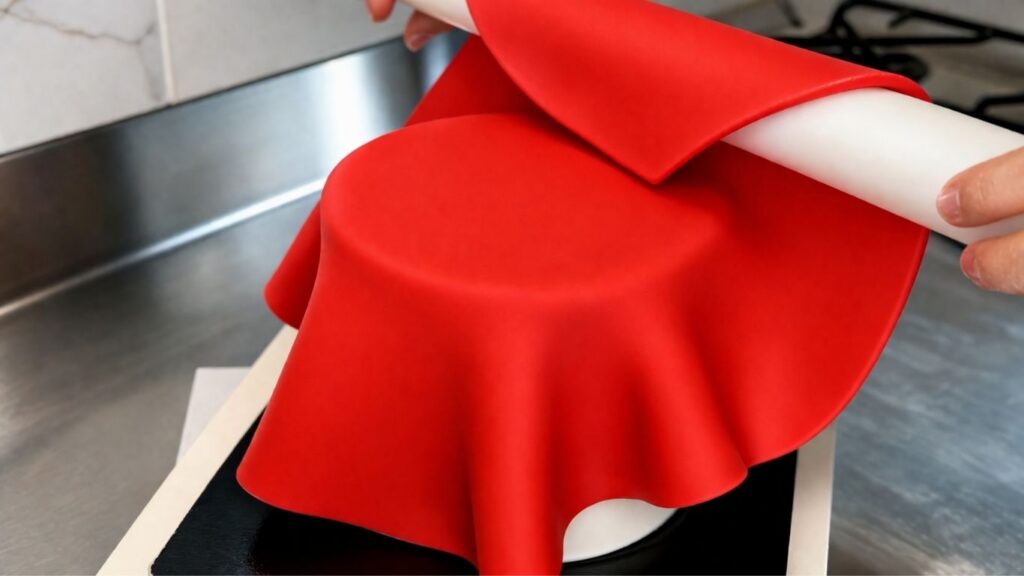
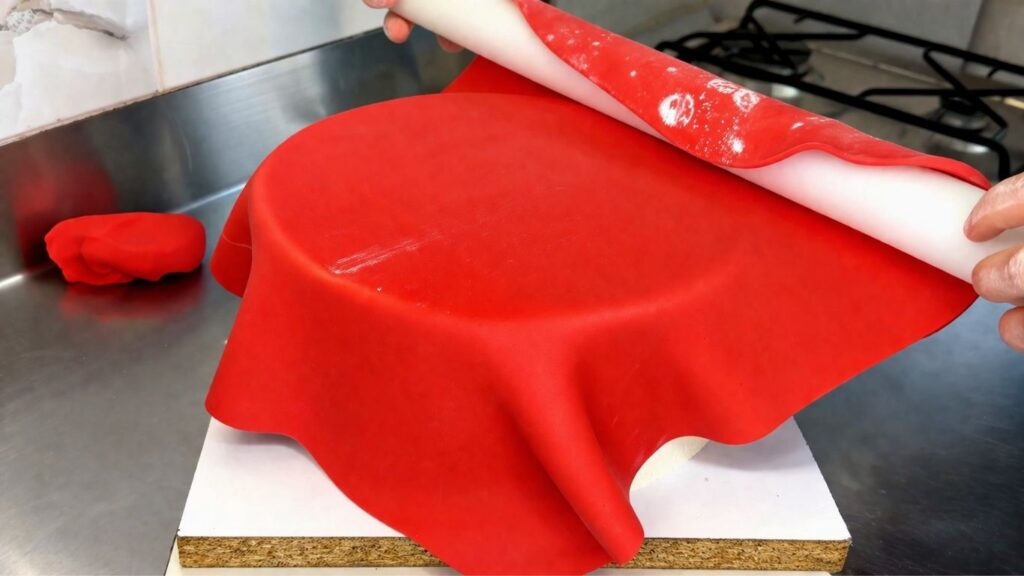
Now comes the most exciting part of the 40th birthday cake decorating process. Once your fondant is rolled out and ready, carefully lift it using your rolling pin and drape it over the top tier of the cake. Work quickly and gently to avoid any tears or creases.
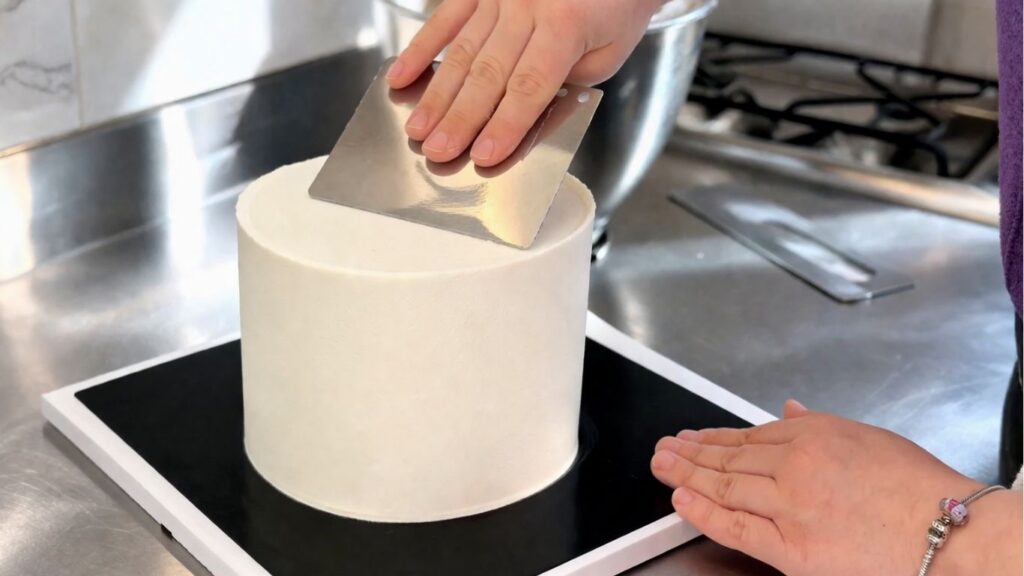
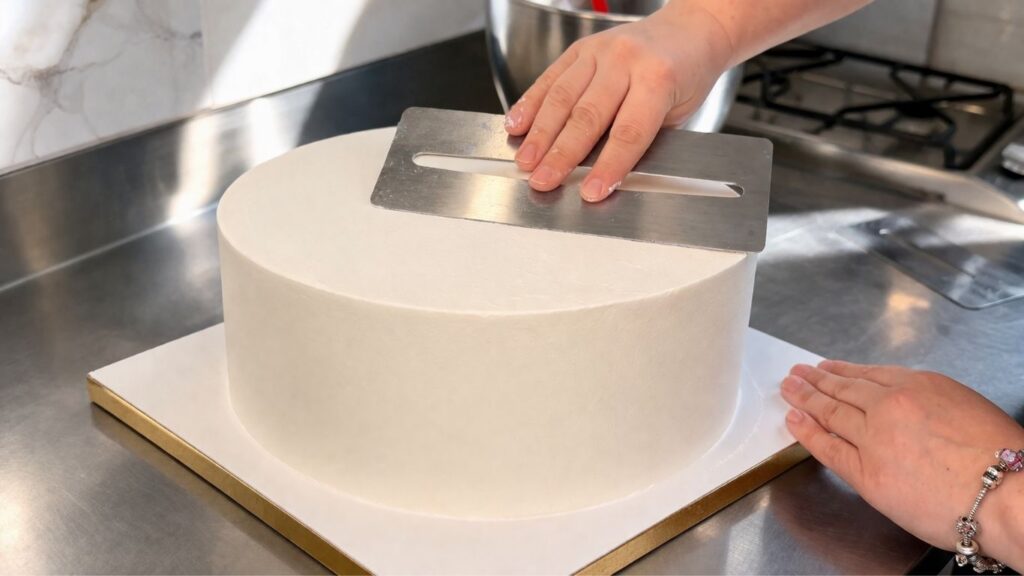
Start smoothing the top of the cake first using your Wilton scraper, working from the center outward to push out any air bubbles.
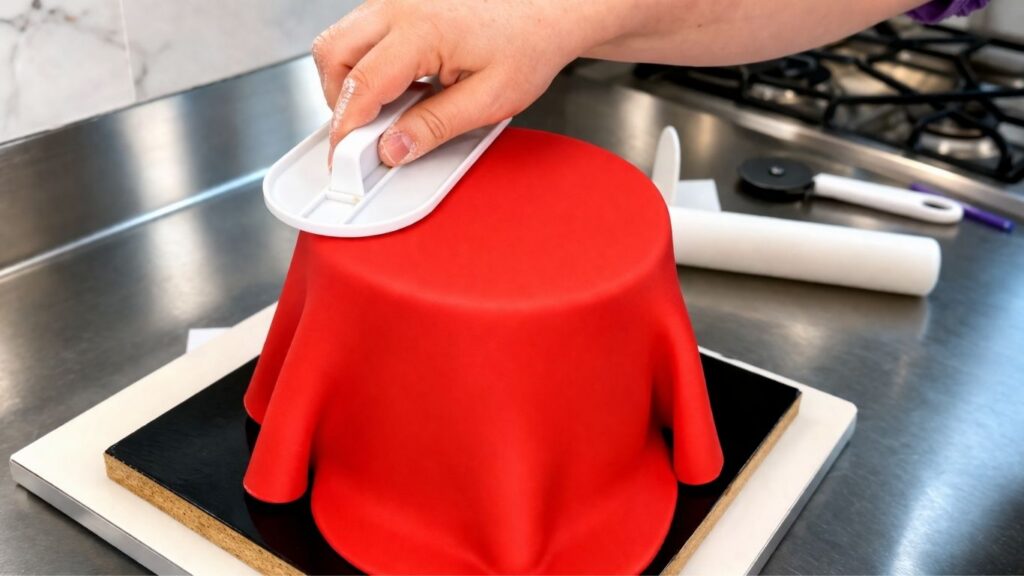
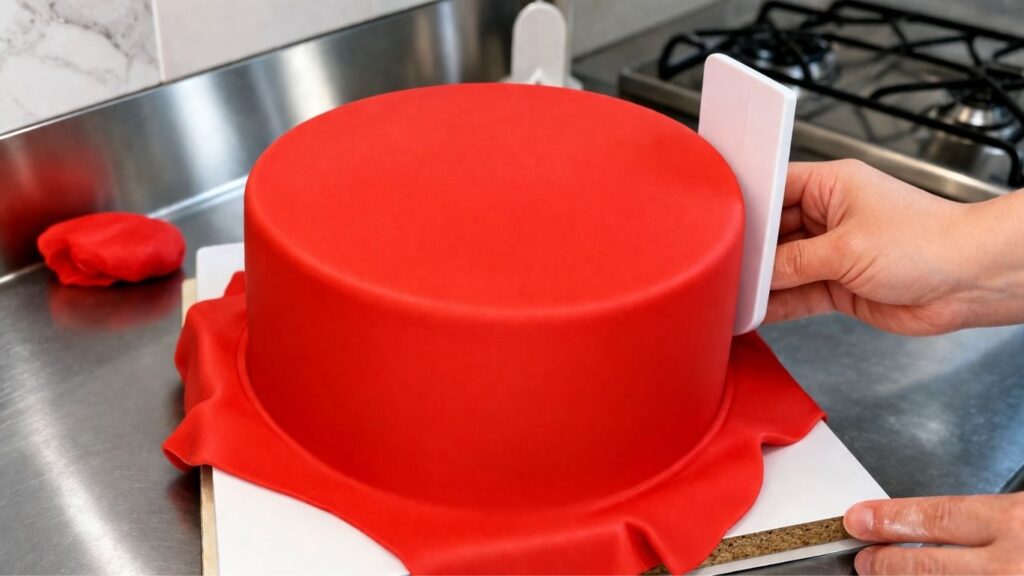
Then move to the sides, gently smoothing the fondant downward and outward, working your way around the entire cake. Take your time here and use your cake smoother to get that perfectly flat and polished finish on all sides.
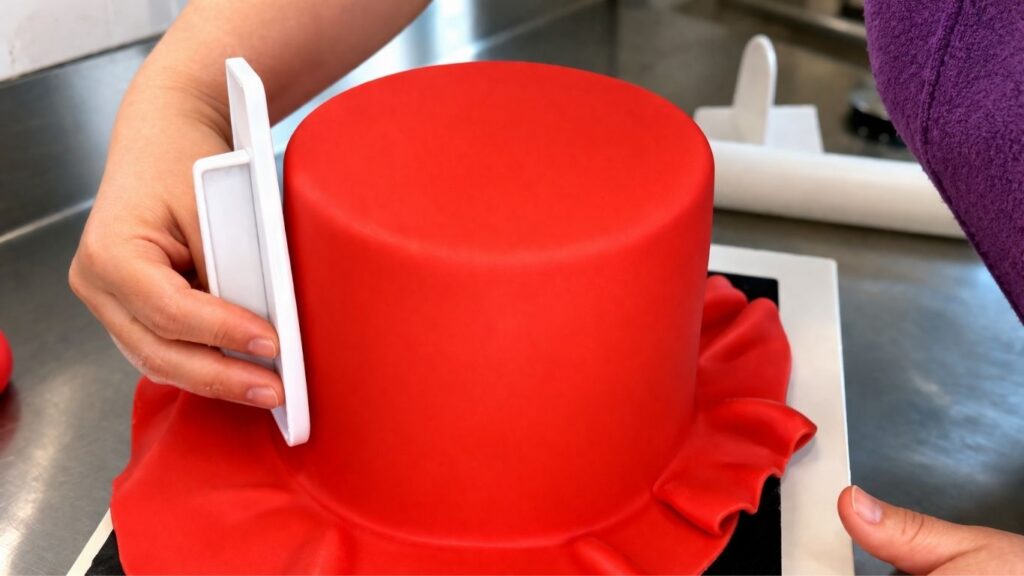
Once you have trimmed the excess fondant with the pizza cutter, do one final smoothing pass with your Wilton scraper all around the sides of the cake to make sure everything is perfectly even.
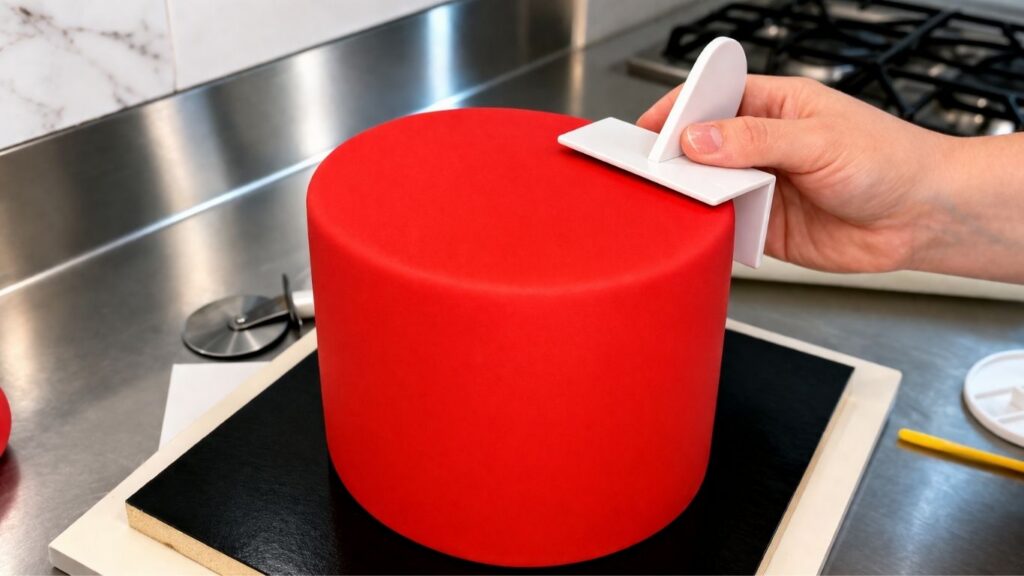
For the sharpest and cleanest edge at the base and top of the cake, I use an edge smoother tool and it makes a huge difference. It gives you that perfectly straight, professional edge that is really hard to achieve by hand alone. Whether you are a beginner or an experienced cake decorator, this tool is absolutely worth having in your kit.
Step 6: Covering the Bottom Tier with Fondant
Repeat the exact same process with the bottom tier of your 40th birthday cake. Roll out your red fondant on a lightly powdered sugar dusted surface, making sure it is large enough to cover the entire bottom tier including the sides.


Carefully lift the fondant using your rolling pin and drape it over the bottom tier, working quickly and gently to avoid any tears or creases.
Smooth the top of the cake first, working from the center outward to push out any air bubbles.
Then move to the sides, using your cake smoother to smooth the fondant downward and outward all the way around the cake.
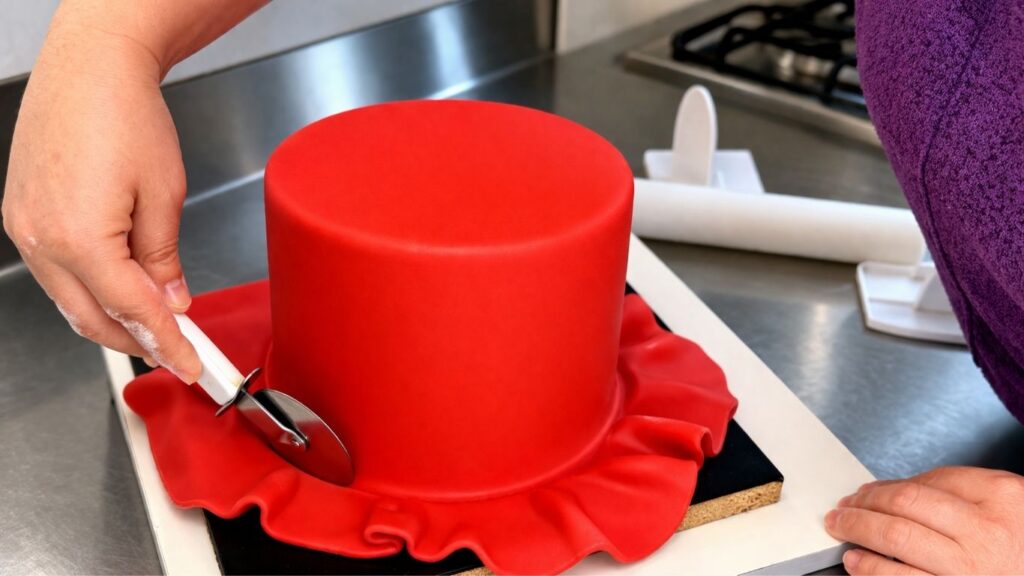
Once the fondant is smooth all around, use your pizza cutter to trim away the excess fondant at the base of the cake with a clean, straight cut.
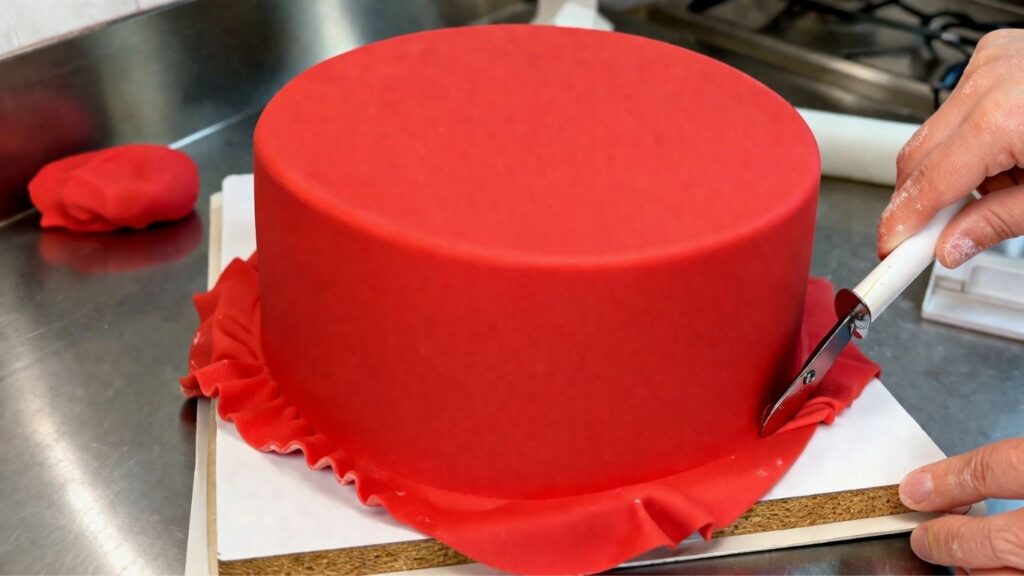
Finish by using your edge smoother tool to perfect the top edge of the cake for that sharp, clean, professional finish.
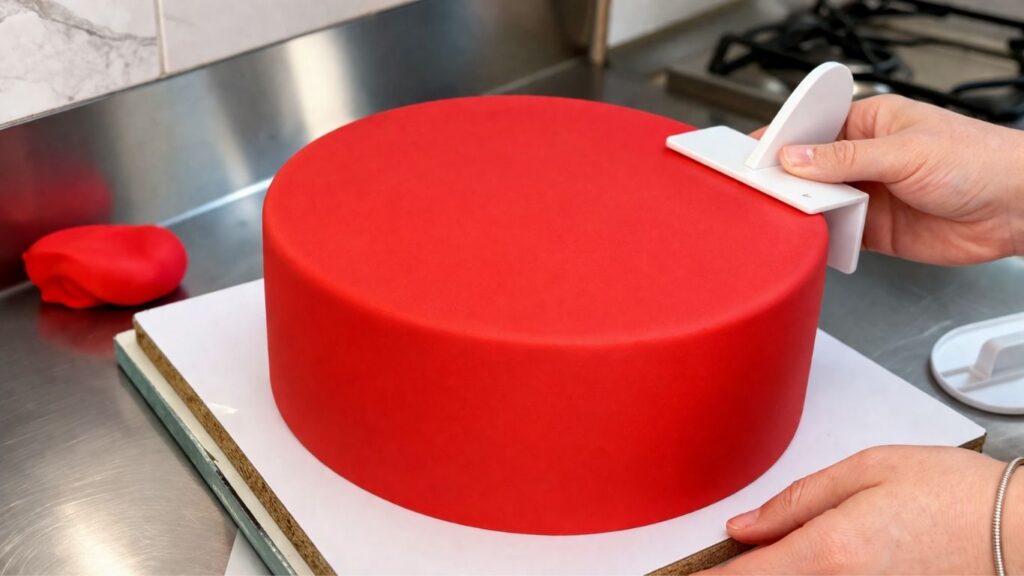
Once both tiers are fully covered and smooth, place them back in the refrigerator for 15 minutes before moving on to the decoration.
Step 7: Assembling the Cake and Adding the Final Decorations
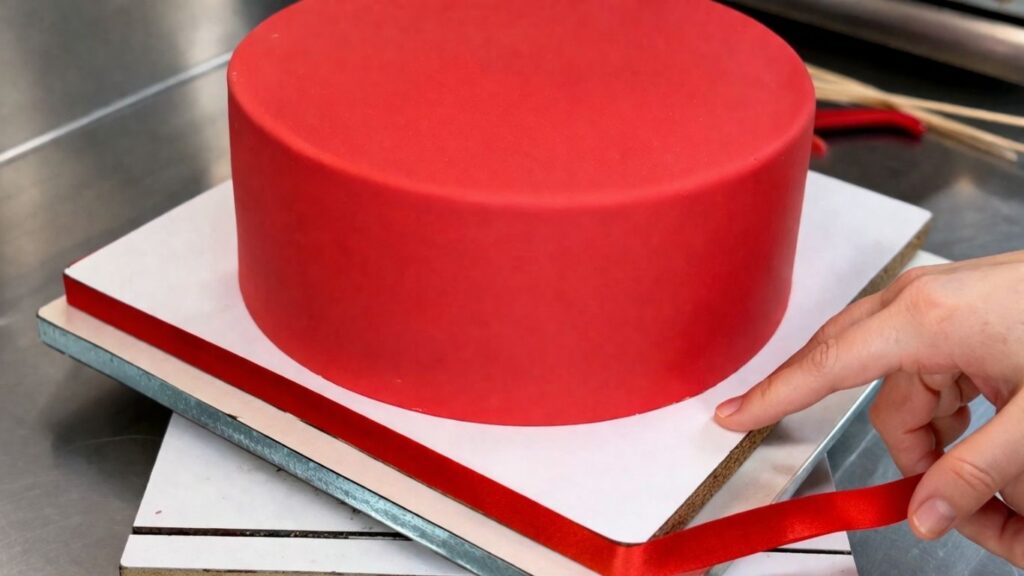
Before assembling your two-tier 40th birthday cake, start by decorating the cake board. Take your red satin ribbon and glue it around the edge of the cake board for a clean and polished finish that ties the whole design together.
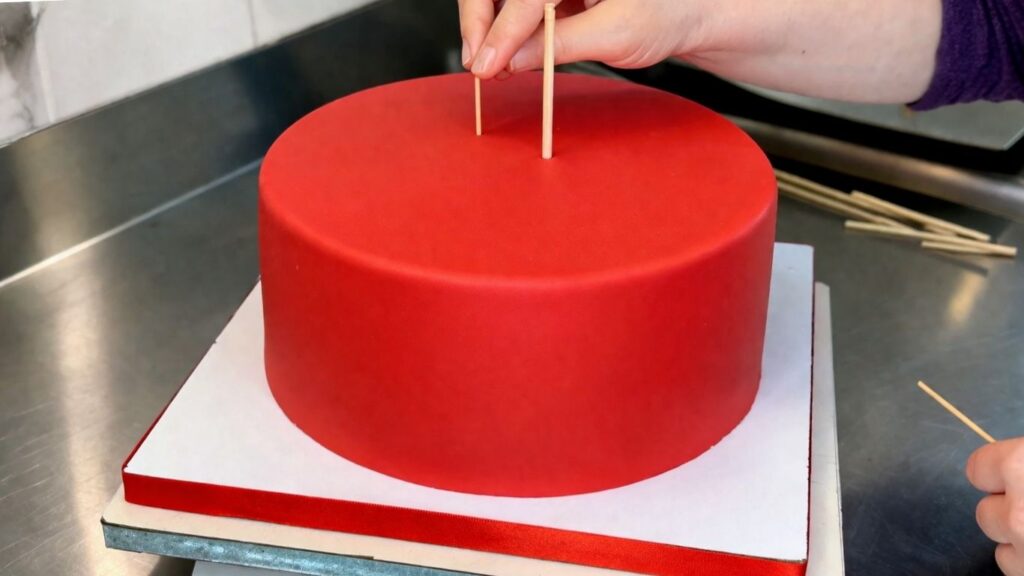
Now it is time to insert the support dowels into the bottom tier. Insert one main dowel through the center of the cake all the way down to the board, then add 4 more dowels evenly spaced around the center one. These dowels are what keep your top tier secure and prevent it from sinking or tipping under its own weight.
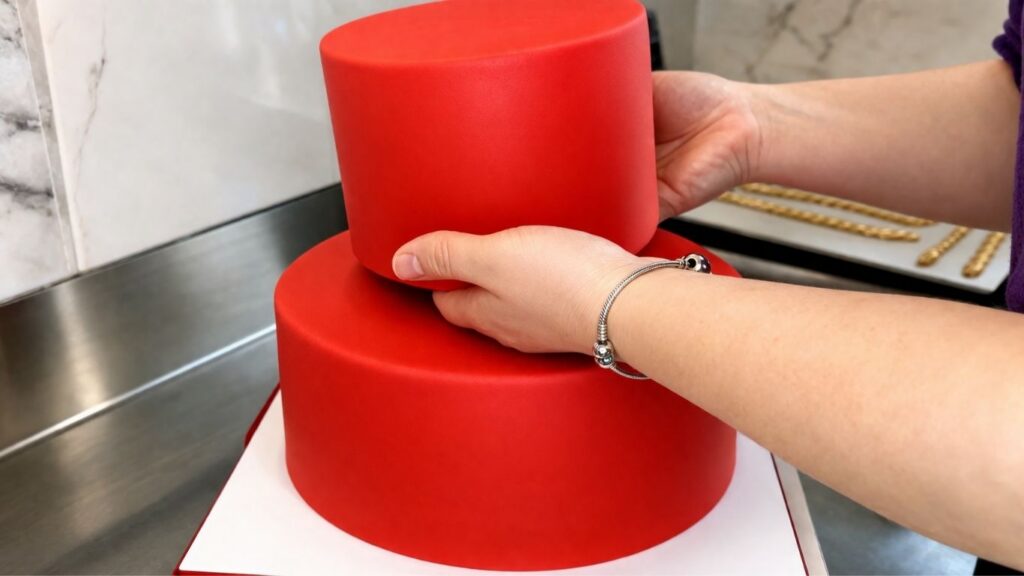
Before placing the top tier, make sure you have a thin cake board underneath it that is the same size as the top tier. This board should have a hole in the center so the main dowel can go through it and into the top tier, while the 4 surrounding dowels support the board and hold the weight of the upper tier.
Once your dowels are in place, carefully position the top tier on top of the bottom tier, centering it as precisely as possible.
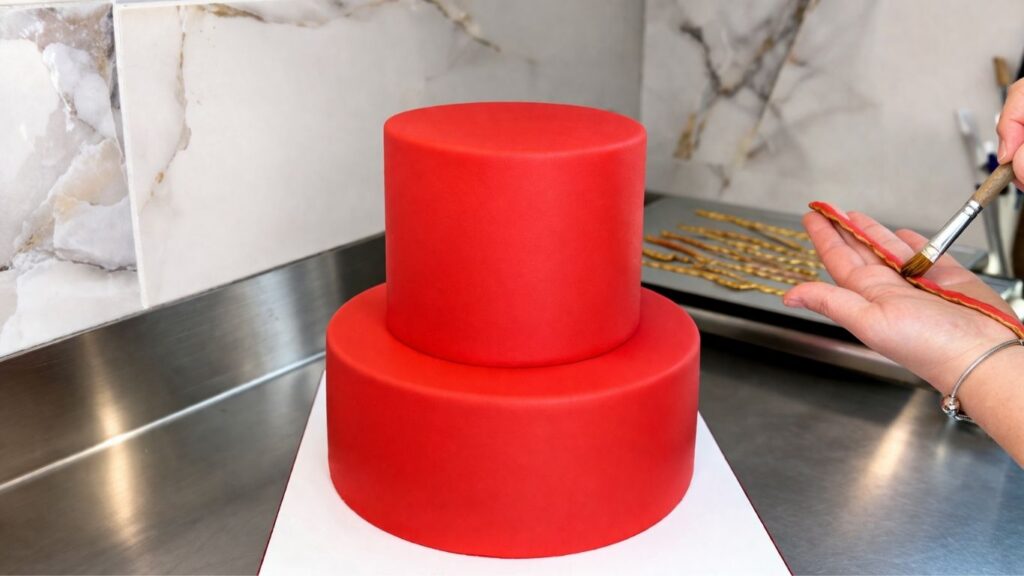
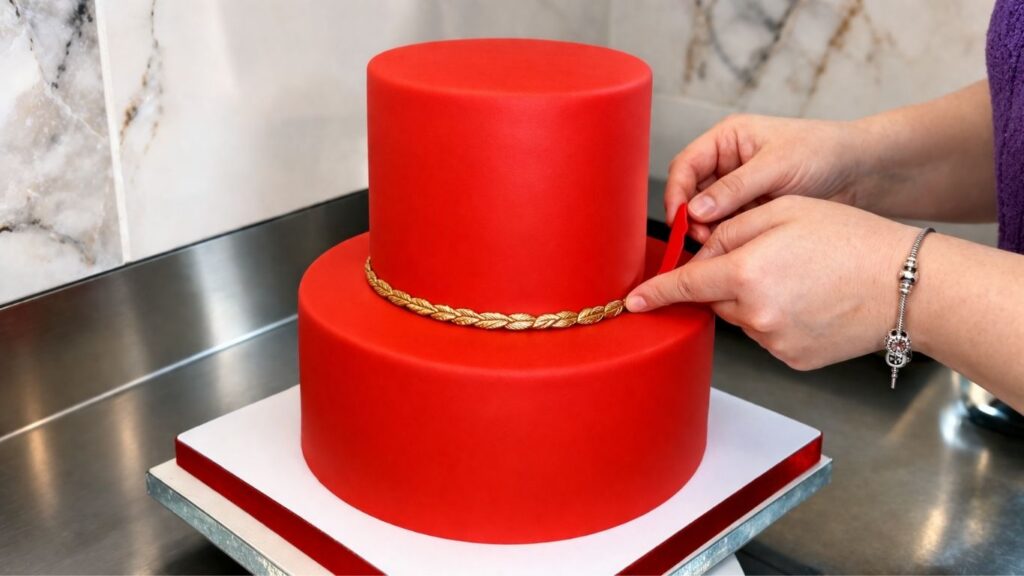
Now it is time to add the gold rope border. Using the Wilton Silicone Nature Designs Fondant Mold, lightly grease the mold with a tiny amount of butter before pressing the red fondant in. The butter helps the fondant release cleanly and easily from the mold every single time. Once the border is out of the mold, simply brush it with edible gold dust directly, no mixing needed. The gold color comes out perfectly rich and vibrant this way. Carefully attach the border around the join between the two tiers and around the base of the bottom tier using a little water or edible glue.
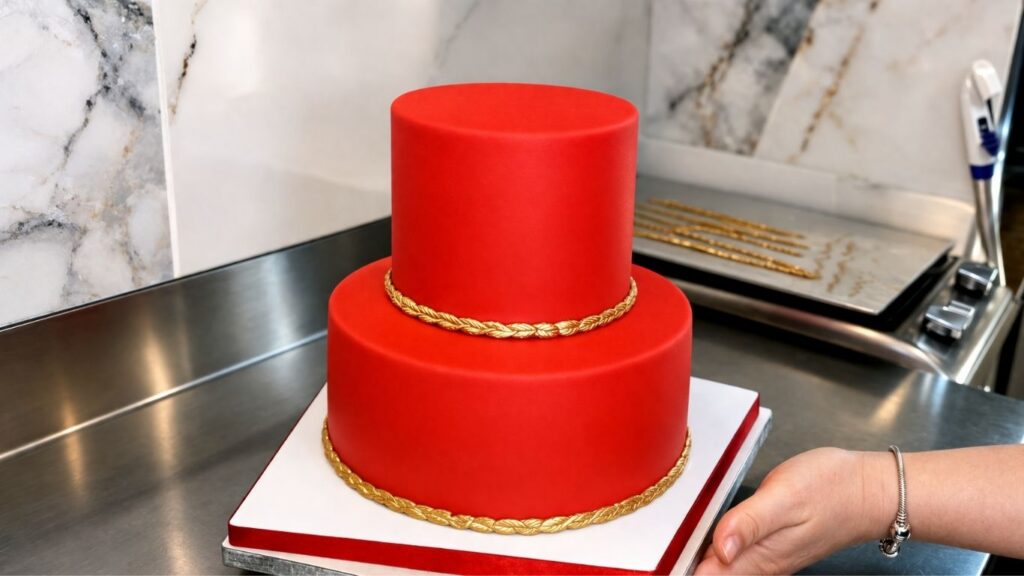
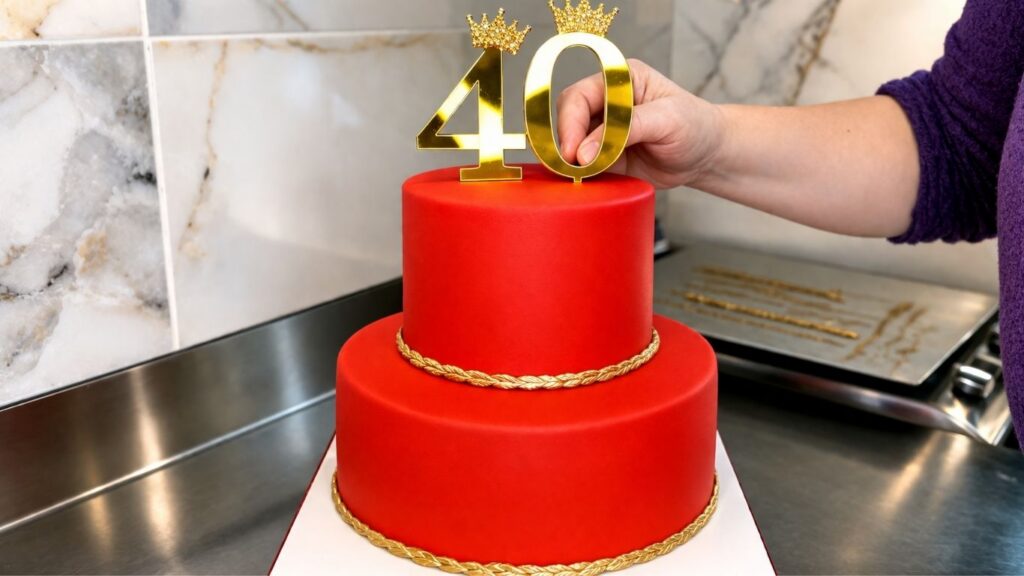
Finally, insert the gold crown number 40 topper into the top of the cake and your stunning 40th birthday cake is complete.

And just like that, your stunning two-tier red and gold fondant 40th birthday cake is complete and ready to impress!

Tips and Tricks for a Perfect Fondant Cake
Warm up your fondant before you start. If your fondant feels stiff or hard, pop it in the microwave for just a few seconds to soften it slightly. This makes it much easier to knead and roll out without cracking.
Butter is your best friend. Fondant loves butter. Always rub a little butter on your hands before kneading and working with fondant, or knead a small amount directly into the fondant itself. It makes the fondant smoother, more pliable, and so much easier to work with. This is especially useful when using deep molds like the Wilton fondant mold. Simply rub a very thin layer of butter inside the mold before pressing in your fondant and your shape will release cleanly and perfectly every single time.
Work quickly. Fondant dries out faster than you think, so once you start rolling it out, work at a steady pace. Avoid stretching or pulling the fondant too much with your hands when placing it over the cake as this is one of the main causes of cracking and tearing.
Getting the perfect red color takes patience. When coloring fondant red, add your Wilton red gel food coloring gradually and knead thoroughly after each addition. The first time you add color and knead it, it will almost always look like it needs more. Keep adding and kneading until you reach that deep, rich red you are happy with. It can take a few rounds but the result is worth it.
Frequently Asked Questions
Can you eat fondant? Yes, fondant is completely edible. It is made from sugar, so it is sweet by nature. If you find the taste too sweet, you can add a little flavoring like vanilla or almond extract when making your homemade fondant to balance the sweetness.
How do I stop my fondant from cracking on a 40th birthday cake? The most common reason fondant cracks is because it is too dry. Always warm it up slightly in the microwave for just a few seconds before kneading, and work a small amount of butter into it to keep it soft and pliable. Work quickly once you start rolling it out and avoid stretching it too much with your hands when placing it over the cake.
Can I refrigerate a fondant cake? It is best to avoid the refrigerator once the cake is covered in fondant. The moisture from the fridge can cause the fondant to become sticky or develop condensation when it comes back to room temperature. Store your finished fondant cake at room temperature in a cool, dry place.
How far in advance can I make fondant decorations? Fondant decorations can be made weeks or even months in advance as long as they are stored in a cool, dry place in an airtight container. This is actually a great time-saving tip, especially for more detailed decorations on a 40th birthday cake.
How much fondant do I need to cover a cake? For this two-tier 40th birthday cake with a 9.5 inch (24 cm) bottom tier and a 5.5 inch (14 cm) top tier, I used approximately 2 lbs 4 oz (1 kg) of fondant in total. A good rule of thumb is to always make a little more than you think you need so you are not caught short in the middle of decorating.
How do I store leftover fondant? Roll any unused fondant into a ball, rub a thin layer of butter over the surface, wrap it tightly in plastic wrap, and store it in an airtight container at room temperature. Stored this way, your fondant will stay fresh for up to one month.
Watch the Full 40th Birthday Cake Video
If you prefer to follow along visually, I have put together a complete step-by-step video tutorial for this red and gold fondant 40th birthday cake decorating process. Watch the full video on my YouTube channel and do not forget to subscribe so you never miss a new cake decorating tutorial!
Conclusion
This red and gold fondant 40th birthday cake is proof that elegant and professional cake decorating does not have to be complicated. With the right tools, a little patience, and this step-by-step fondant cake decorating tutorial, you can create a stunning two-tier birthday cake that will impress everyone at the celebration.
Whether you are making this 40th birthday cake for a client, a friend, or a family member, the combination of deep red fondant and gold details makes it a truly show-stopping centerpiece for any birthday party. The key to a perfect fondant cake is always in the preparation, so remember to let your filled cake rest overnight in the refrigerator before you start decorating, use the right tools, and take your time with each step.
If you try this red and gold fondant cake decorating tutorial, I would love to see your results! Leave a comment below and share your experience, or tag me on Instagram so I can see your beautiful 40th birthday cake creations.
Looking for more fondant decorating ideas? Check out my fondant baby shoes tutorial for another fun fondant project, or if you are in the mood for something quick and delicious, try my no bake pistachio cake.
Happy decorating! 🎂
Leave a Reply