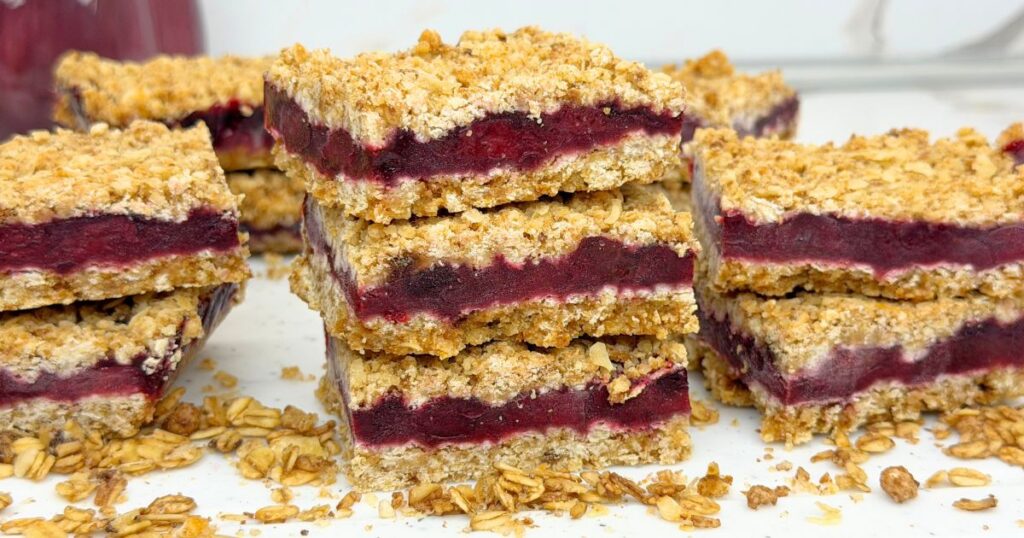
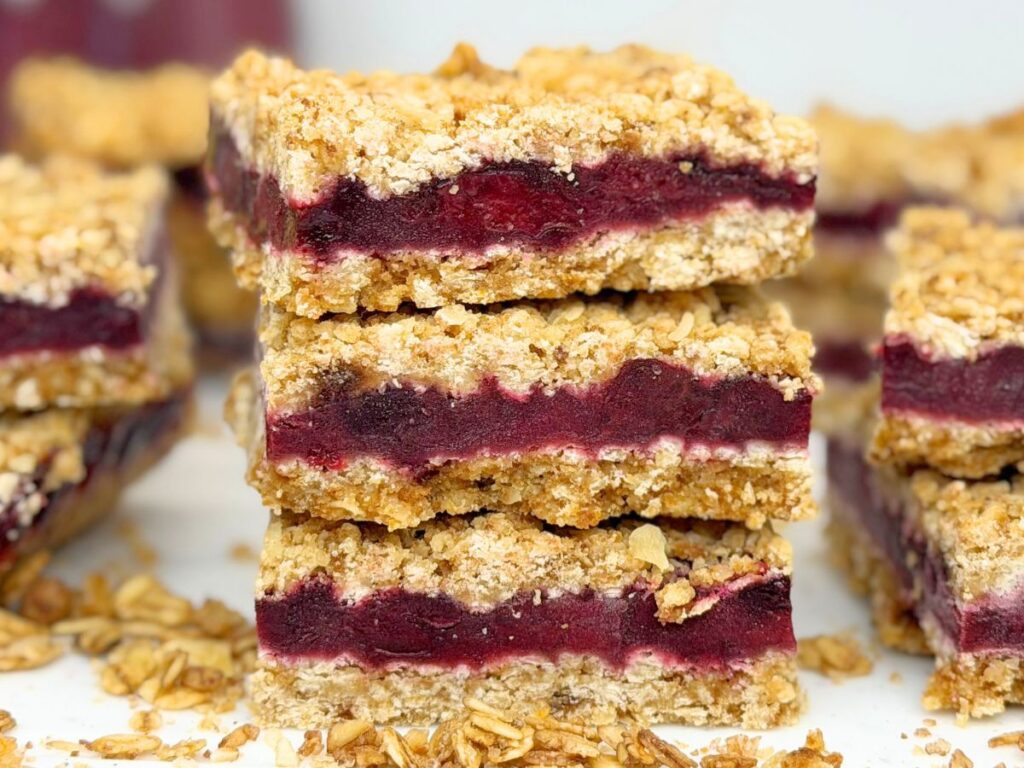
These Cherry Crumb Bars combine a buttery oat crust, a thick and juicy cherry filling, and a golden crumble topping in every single bite. The sweet-tart cherries pair beautifully with the rich brown sugar crumble, while a touch of lemon zest brightens the flavor and keeps the bars from tasting overly sweet.
Made with frozen cherries and simple pantry staples, this recipe is perfect when you want an easy homemade dessert that looks impressive without requiring complicated preparation. The best part? The exact same crumb mixture is used for both the base and the topping, making these fruity bars wonderfully simple to assemble.
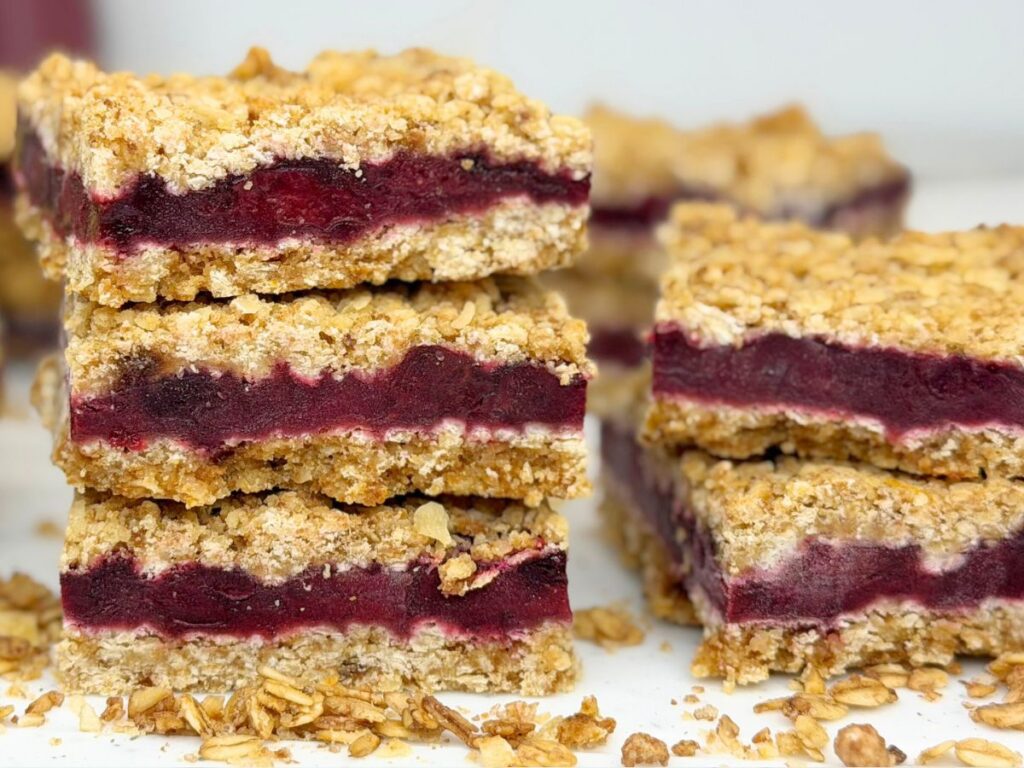
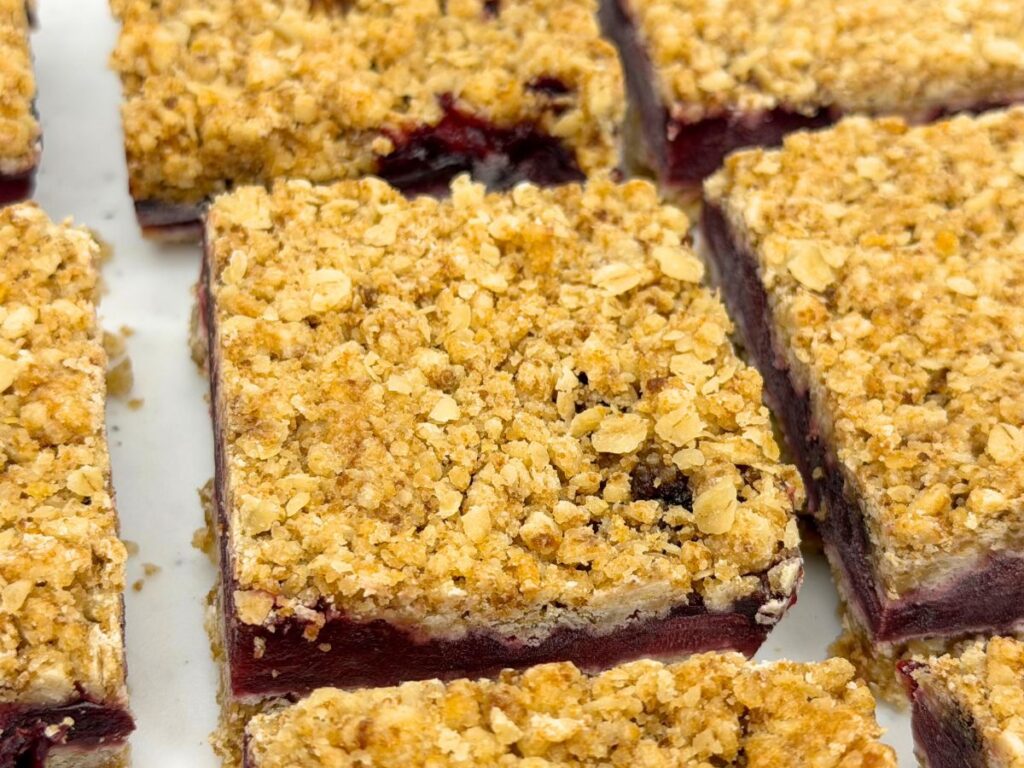
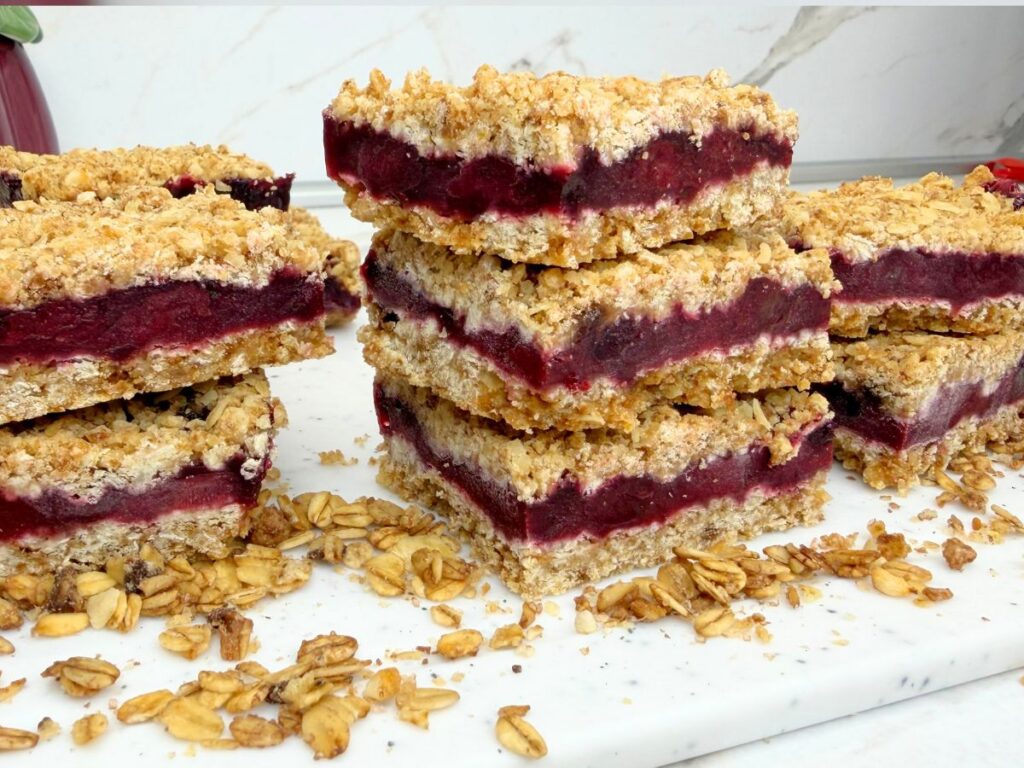
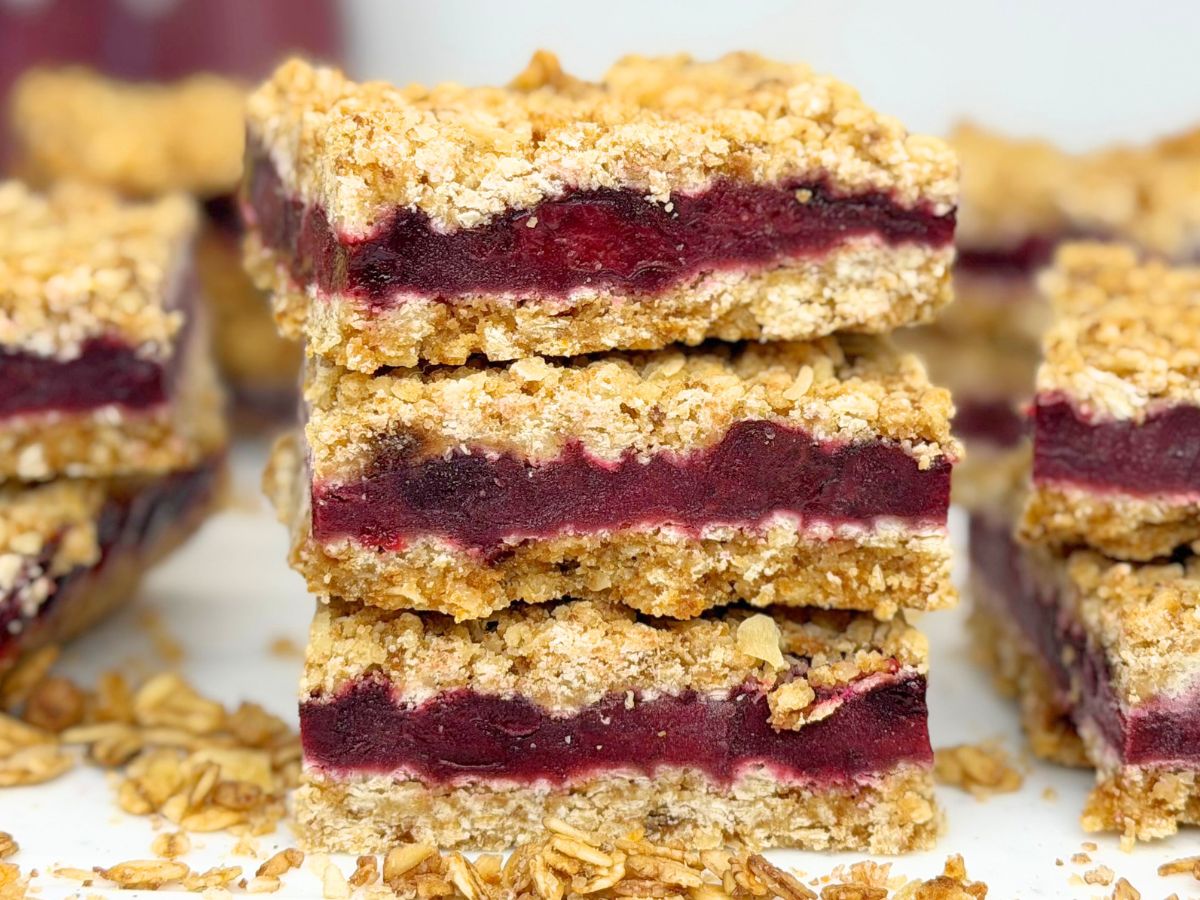
Once baked and cooled, they slice into neat, beautiful squares featuring distinct layers and an irresistible combination of a soft, jammy cherry filling and a crisp, buttery oat crumble.
If you enjoy easy fruit-filled desserts with a rich, buttery topping, you may also love my Peach Cobbler, made with juicy peaches and a beautifully golden homemade crust. Since these Cherry Crumb Bars are made with frozen cherries, this helpful guide from King Arthur Baking explains more about using frozen fruit successfully in baked desserts.
Quick Recipe Info
- Prep Time: 20 minutes
- Cherry Filling Cook Time: 10 minutes
- Crust Pre-Bake Time: 10 minutes
- Final Bake Time: 40 minutes
- Total Oven Time: 50 minutes
- Total Time: About 1 hour 20 minutes, plus cooling
- Oven Temperature: 340°F (170°C)
- Pan Size: 9-inch square baking pan
- Yield: 12 cherry crumb bars
- Difficulty: Easy
- Cooling: Cool completely before slicing for clean, firm bars.
Why You’ll Love This Cherry Crumb Bars Recipe
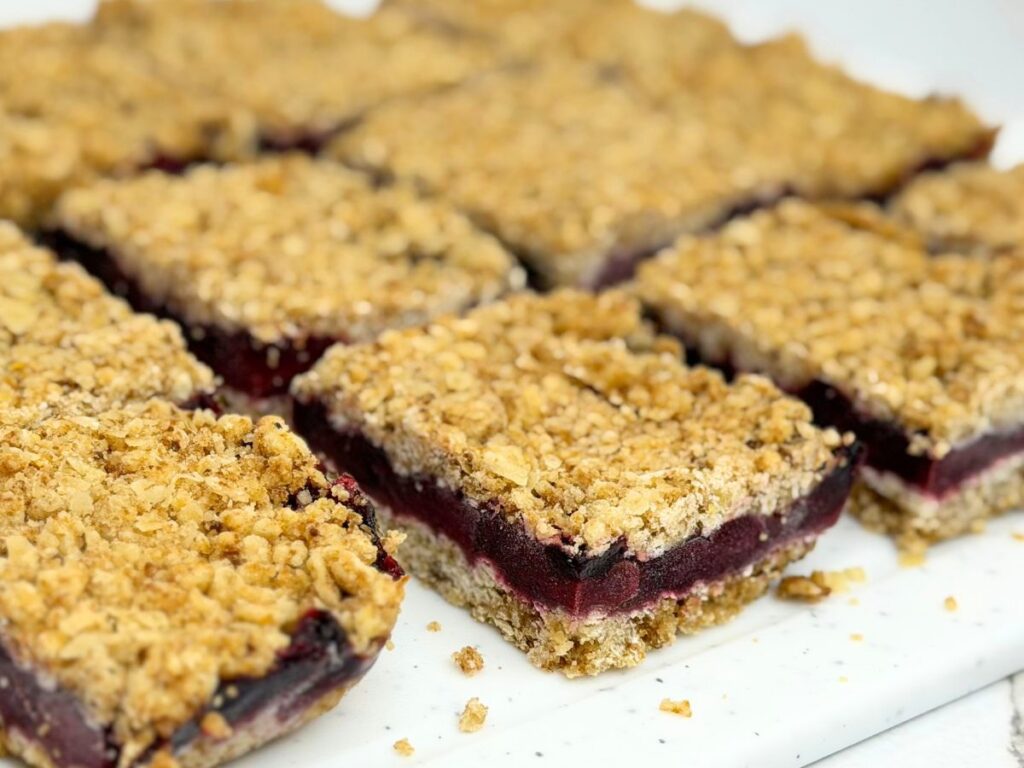
- Buttery and Crisp: The oat crumble creates a rich, golden crust and an irresistible crunchy topping.
- Juicy Cherry Center: The sweet-tart cherry filling is thick, fruity, and packed with bright flavor.
- Easy to Prepare: The exact same simple crumb mixture is used for both the base and the topping, saving you time in the kitchen.
- Perfect with Frozen Cherries: You can make these delicious bars any time of the year without waiting for fresh cherry season.
- Great for Sharing: They slice into 12 neat squares, making them ideal for parties, potlucks, holidays, or a cozy family dessert.
Ingredients You’ll Need
These Cherry Crumb Bars are made with simple baking ingredients and frozen tart cherries. The best part? The exact same buttery oat mixture is used for both the crust and the crumble topping, keeping the recipe wonderfully easy and straightforward.
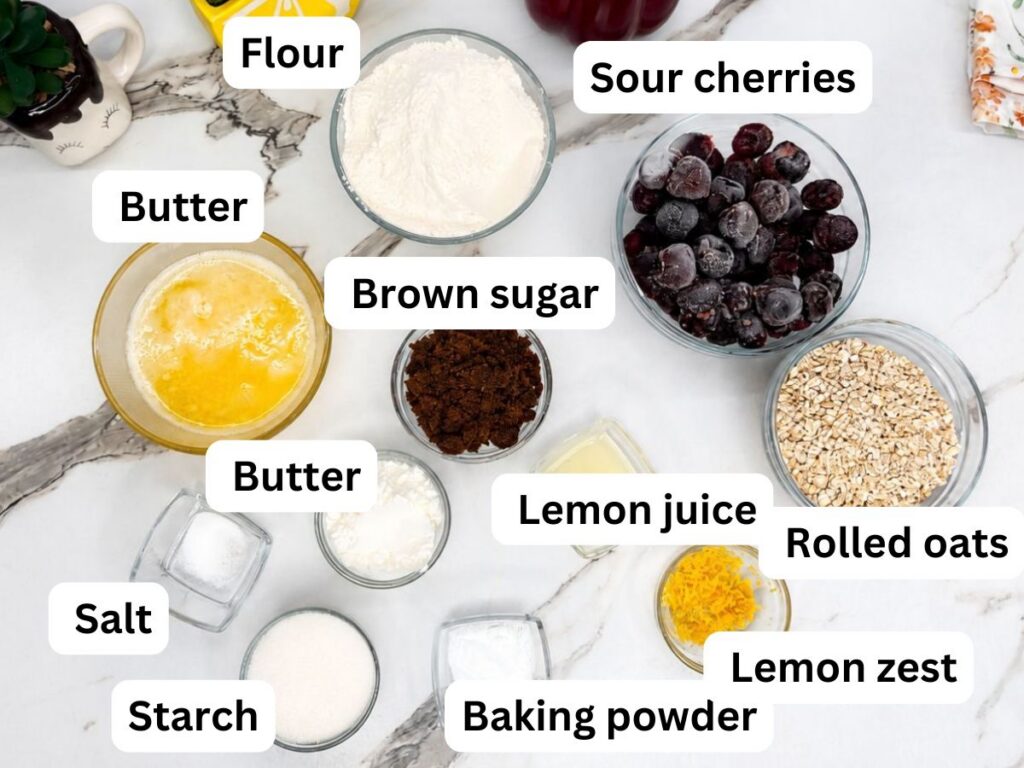
- All-purpose flour: Gives the crust and topping their structure while keeping the crumb tender.
- Oats: Add a hearty texture and help create a crisp, golden crumble.
- Brown sugar: Sweetens the crumb mixture and adds a warm, caramel-like flavor.
- Baking powder: Gives the crust and topping a slightly lighter, more tender texture.
- Lemon zest: Brightens the buttery crumble and perfectly complements the cherry filling.
- Salt: Balances the sweetness and brings out the full flavor of the other ingredients.
- Unsalted butter: Creates a rich, buttery crust and a deliciously crisp crumble topping.
- Vanilla extract: Adds warmth and enhances both the buttery crumbs and the fruity filling.
- Frozen tart cherries: Provide the juicy, sweet-tart center of the bars and make this dessert easy to bake year-round.
- Granulated sugar: Sweetens the cherries while allowing their natural, refreshing tart flavor to shine.
- Cornstarch: Thickens the cherry juices so the filling sets properly and the bars slice into neat squares.
- Lemon juice: Freshens the cherry flavor and balances the sweetness of the filling.
How to Make Cherry Crumb Bars
Prepare the Pan and Oven
Preheat the oven to 340°F (170°C). Line a 9-inch square baking pan with parchment paper, leaving a little overhang on the sides so the baked bars are easier to lift out later.
Make the Crumb Mixture
In a large mixing bowl, combine the flour, oats, brown sugar, baking powder, lemon zest, and salt. Melt the butter, then pour it into the dry ingredients along with the vanilla extract.
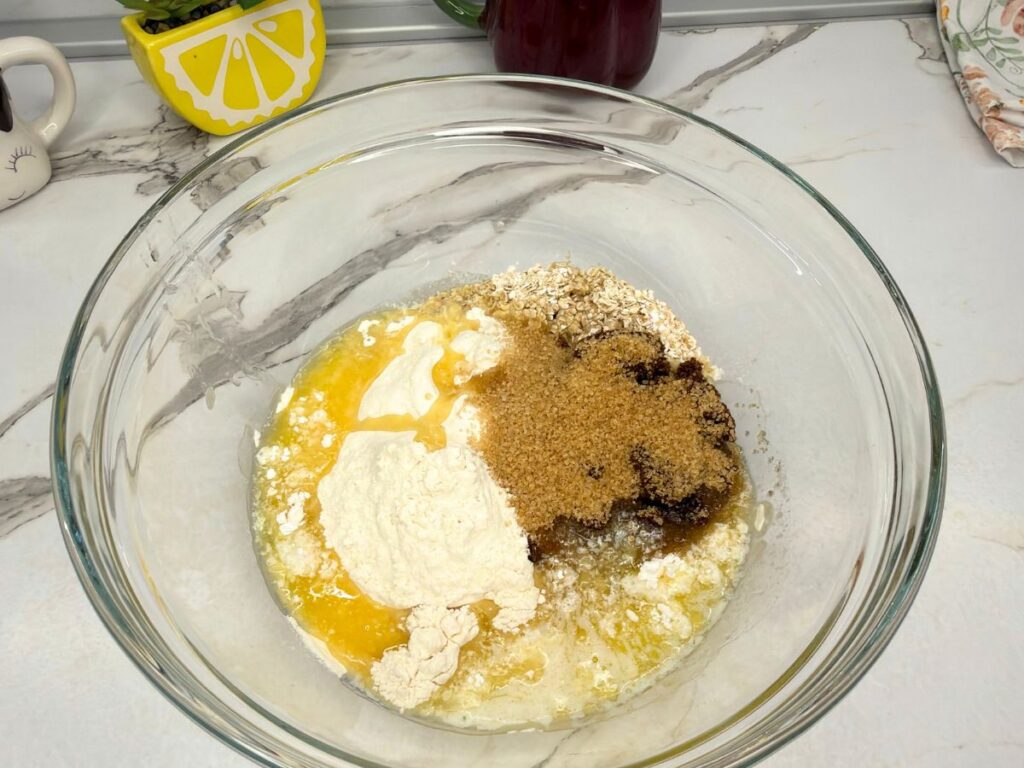
- Mix until all the ingredients are evenly combined and the mixture forms moist, buttery crumbs.
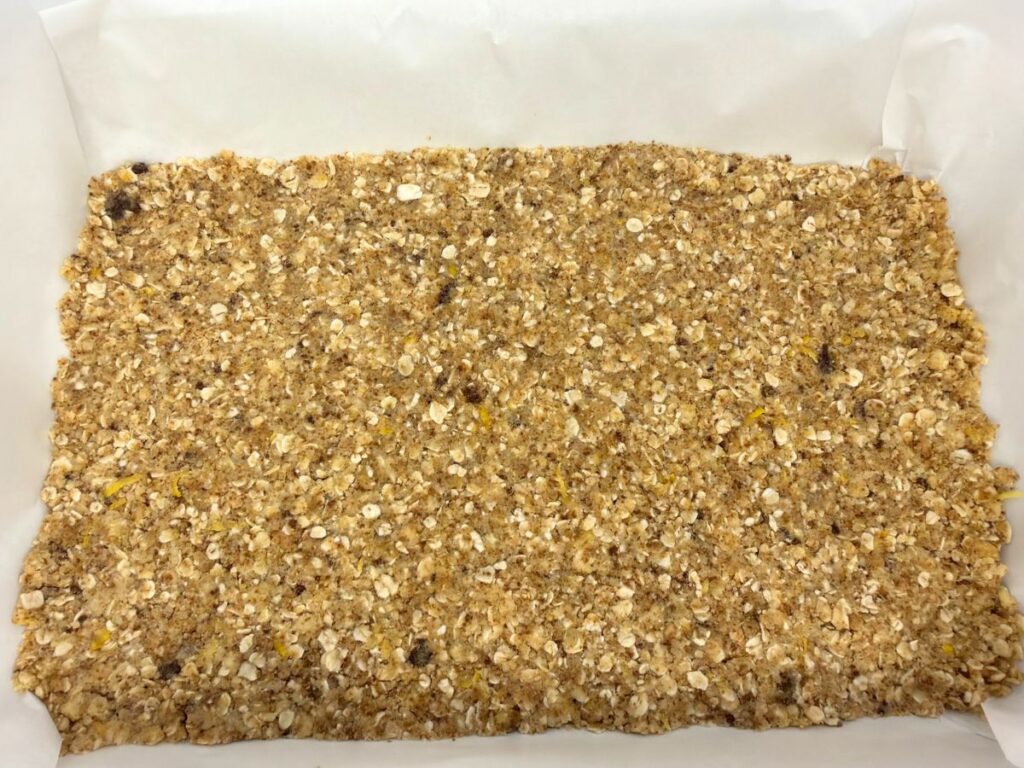
- Set aside about one-third of the crumb mixture for the topping. Transfer the remaining two-thirds to the prepared pan, spread it evenly, and gently press it into a compact layer.
- Bake the crust for 10 minutes while you prepare the cherry filling.
Prepare the Cherry Filling
Place the frozen cherries, granulated sugar, and lemon juice in a saucepan. Cook over low to medium heat until the cherries release their juices and the mixture begins to simmer.
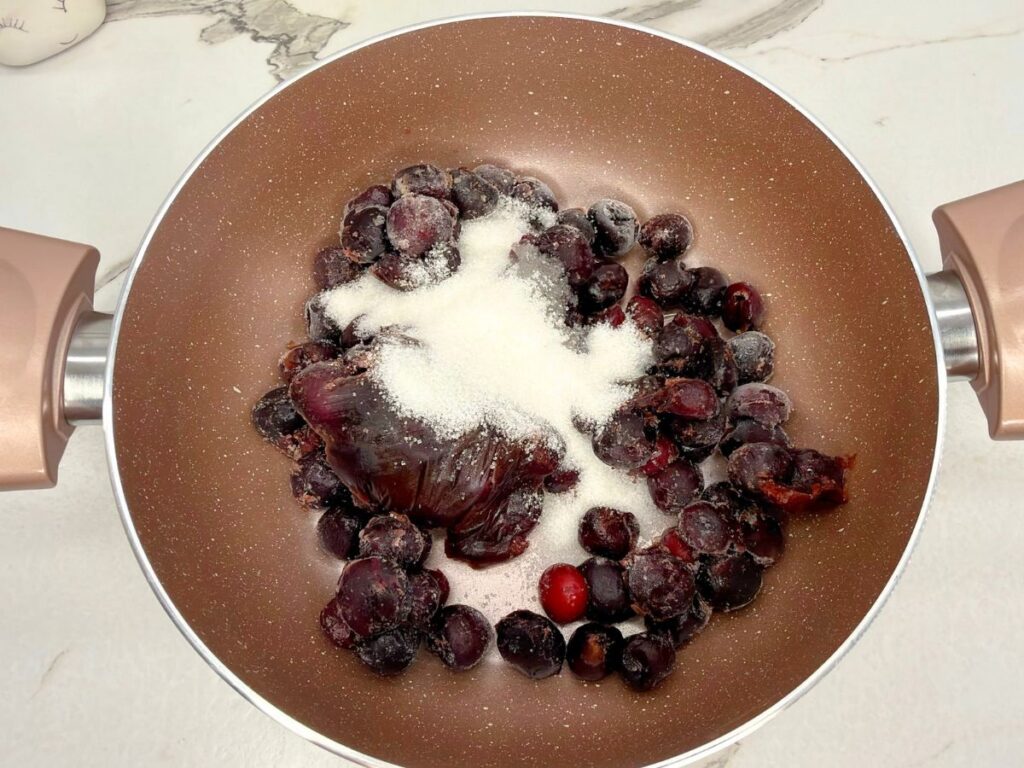
- Spoon a small amount of the warm cherry juice into a separate small bowl and whisk it together with the cornstarch until completely smooth. Pour this cornstarch slurry back into the saucepan while stirring continuously.
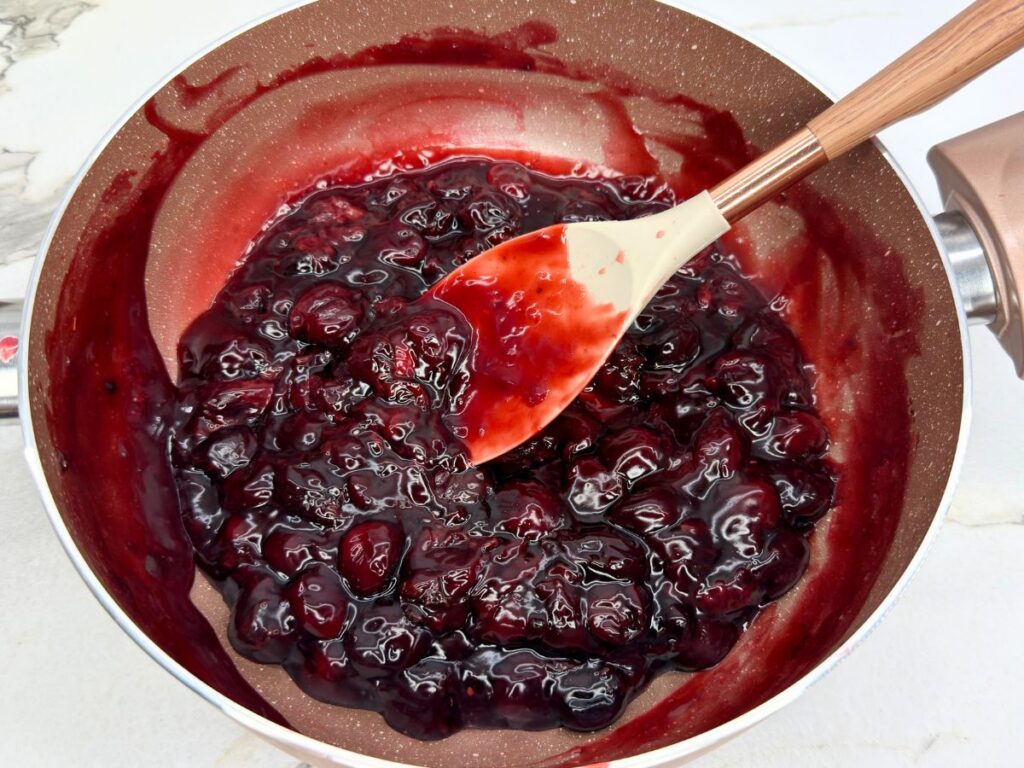
- Cook for a few more minutes, stirring frequently, until the cherry filling becomes glossy and noticeably thicker. Remove it from the heat and allow it to cool slightly.
Assemble the Bars
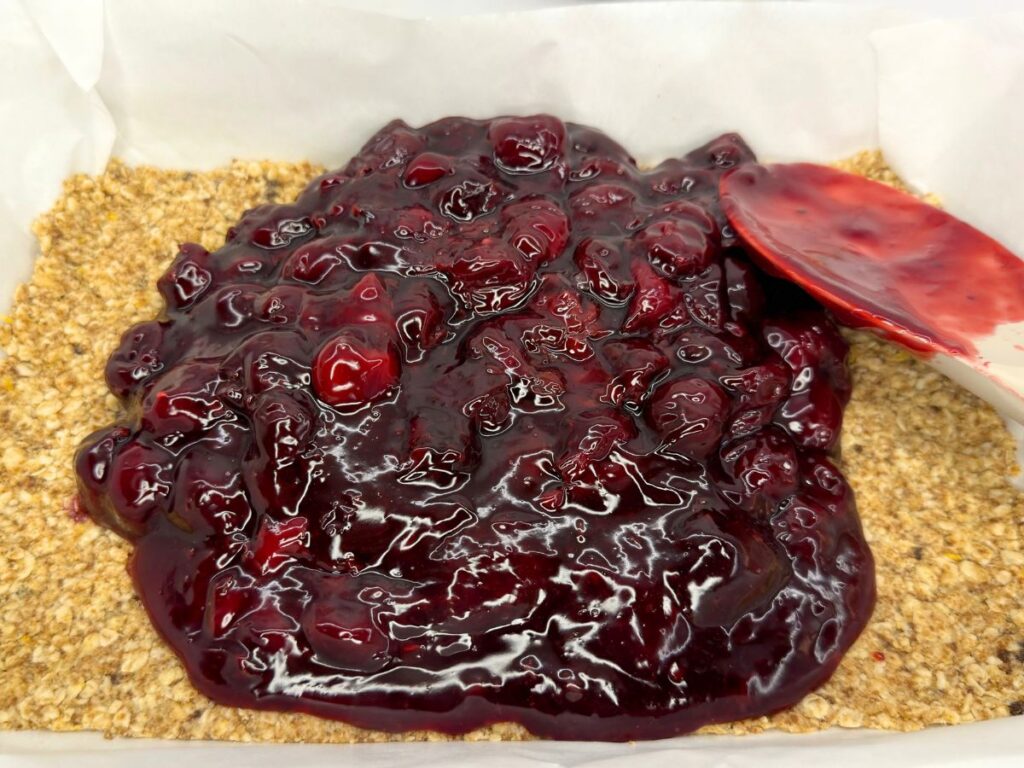
Carefully spread the slightly cooled cherry filling evenly over the partially baked crust.
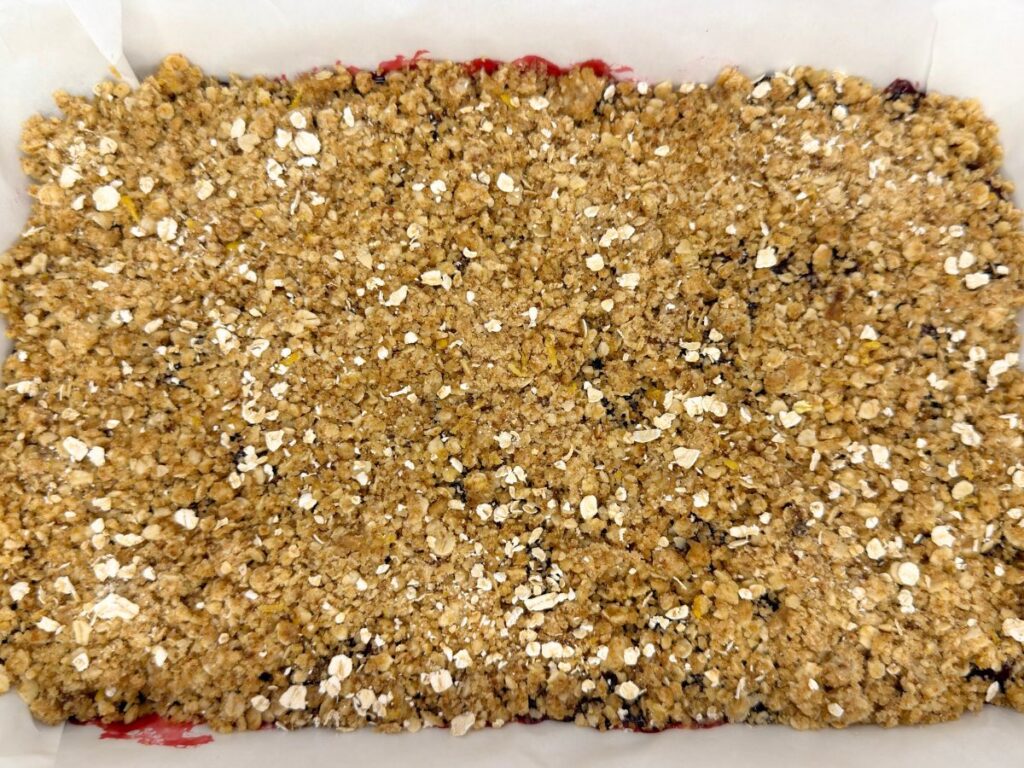
- Sprinkle the reserved crumb mixture over the cherry layer, distributing it evenly so that most of the filling is covered. There is no need to press the top crumbs down.
Bake and Cool
Return the pan to the oven and bake for about 40 minutes, or until the crumb topping is lightly golden and the cherry filling is bubbling around the edges.
- Remove the pan from the oven and let the bars cool completely at room temperature. The filling will continue to set as it cools, so avoid cutting them while they are still warm.
- For especially clean and even slices, place the completely cooled pan in the refrigerator (or freezer for a shorter time) until firm. Once chilled, lift the dessert out of the pan using the parchment paper overhang and cut it into 12 neat bars.
How to Serve
Serve these Cherry Crumb Bars completely cooled so the cherry filling stays firm and the layers hold their shape. They are delicious chilled straight from the refrigerator or brought to room temperature for a slightly softer, more buttery texture.
- Dust with Powdered Sugar: For a simple, elegant finish, dust the bars lightly with powdered sugar right before serving.
- Make It A La Mode: Pair them with a scoop of vanilla ice cream or a generous dollop of whipped cream to turn them into an extra-special dessert.
- Serving Tip: After chilling the bars for clean slicing, let them stand at room temperature for a few minutes before serving to take the chill off.
How to Store and Freeze
Proper storage ensures your Cherry Crumb Bars stay fresh, flavorful, and maintain that wonderful contrast between the buttery crumble and the jammy cherry filling.
- Refrigerator Storage: Store the completely cooled bars in an airtight container in the refrigerator for up to 5 days. If stacking them, place a sheet of parchment paper between the layers to prevent the bars from sticking together. For the best texture and flavor, let chilled bars sit at room temperature for about 10 to 15 minutes before serving.
- Freezer Storage: To freeze, arrange the fully cooled and sliced bars in a single layer on a tray until firm. Wrap each individual bar tightly in plastic wrap, then place them inside a freezer-safe container or heavy-duty freezer bag. They can be frozen for up to 3 months.
- Thawing: When you are ready to enjoy a frozen bar, thaw it overnight in the refrigerator, then let it come to room temperature before serving.
- Important Note: Never freeze the bars while they are still warm, as trapped moisture will ruin the crisp texture of the crumble topping.
Frequently Asked Questions
Can I use fresh cherries instead of frozen cherries?
Yes! Fresh pitted cherries work wonderfully in this recipe. Because fresh cherries may release slightly less liquid, keep a close eye on the filling as it cooks and remove it from the heat once it becomes thick and glossy.
Do I need to thaw the frozen cherries first?
No. You can cook the cherries directly from frozen. They will release plenty of juice as they heat up, which creates the liquid needed to dissolve the cornstarch and thicken the filling.
What type of oats should I use?
Old-fashioned rolled oats are the best choice because they give the crust and topping a pleasantly chewy, crumbly texture. Quick oats can be used in a pinch, but the crumble will turn out slightly softer. Avoid steel-cut oats entirely, as they will not soften properly during baking.
How do I know when the bars are fully baked?
The crumb topping should look lightly golden, and the cherry filling should be bubbling gently around the edges. Keep in mind that the filling will still look quite soft while hot and will set and thicken significantly as the bars cool.
Why did my cherry filling turn runny?
A runny filling usually happens if it wasn’t cooked long enough after adding the cornstarch slurry, or if the bars were sliced while still warm. Make sure to let the filling simmer until thickened, and always cool and chill the bars completely before cutting.
How can I cut the bars neatly?
Let the bars cool completely to room temperature, then chill them until firm. For especially crisp, clean slices, place the cooled pan in the freezer for about 1 hour. Lift the dessert out using the parchment paper overhang and use a sharp knife, wiping the blade clean between cuts.
Can I make Cherry Crumb Bars ahead of time?
Yes, these bars are an excellent make-ahead dessert! You can bake and cool them a day in advance, cover the pan tightly, and refrigerate them overnight. Slice them up just before serving for the cleanest presentation and freshest taste.
Nutrition Per Serving
Each Cherry Crumb Bar contains approximately:
- Calories: 264 kcal
- Carbohydrates: 40 g
- Protein: 3 g
- Fat: 10 g
- Saturated Fat: 6 g
- Fiber: 2 g
- Sugar: 21 g
- Sodium: 66 mg
- Cholesterol: 25 mg
Nutrition values are estimates based on 12 bars and may vary depending on the ingredients and brands used.
Conclusion
These Cherry Crumb Bars are the ultimate combination of a buttery oat crust, a juicy cherry filling, and a golden crumble topping. They are wonderfully easy to prepare, beautiful to serve, and delicious enough for everything from a casual family dessert to holidays, parties, and special gatherings.
Using frozen cherries means you can enjoy this fruity dessert at any time of the year without waiting for fresh cherry season. Just remember to let the bars cool and chill completely before slicing so the filling has time to set and your squares stay neat and professional-looking.
I hope you enjoy every sweet, buttery, cherry-filled bite!
Happy baking!

Cherry Crumb Bars
Ingredients
Equipment
Method
- Preheat the oven to 340°F (170°C). Line a 9-inch square baking pan with parchment paper, leaving some overhang on the sides for easy removal.
- In a large bowl, combine the flour, rolled oats, brown sugar, baking powder, lemon zest, and salt.Add the melted butter and vanilla extract. Mix until all the dry ingredients are coated and a moist, crumbly mixture forms.Reserve one-third of the crumb mixture for the topping. Transfer the remaining two-thirds to the prepared pan.Spread the mixture evenly and gently press it into the bottom of the pan. Bake for 10 minutes.
Prepare the Cherry Filling
- While the crust is baking, place the frozen cherries, granulated sugar, and lemon juice in a medium saucepan.Cook over low to medium heat until the cherries release their juices and the mixture begins to simmer.Transfer a small amount of the warm cherry juice to a separate bowl. Add the cornstarch and whisk until completely smooth.Pour the cornstarch mixture back into the saucepan while stirring. Continue cooking for a few minutes, stirring frequently, until the filling becomes thick and glossy.Remove the cherry filling from the heat and allow it to cool slightly.
- Spread the slightly cooled cherry filling evenly over the pre-baked crust.Sprinkle the reserved crumb mixture evenly over the cherry filling. Do not press the topping down.Return the pan to the oven and bake for approximately 40 minutes, or until the topping is lightly golden and the cherry filling bubbles around the edges.
- Remove the pan from the oven and allow the bars to cool completely at room temperature.For cleaner slices, place the completely cooled bars in the freezer for about 1 hour.Lift the bars from the pan using the parchment paper. Cut into 12 bars with a sharp knife, wiping the blade between cuts.
Notes
- Frozen cherries do not need to be thawed before cooking.
- Use old-fashioned rolled oats for the best crumbly texture. Avoid steel-cut oats.
- Do not slice the bars while warm because the cherry filling needs time to set.
- The one-hour freezer chill is only for easier slicing. For longer storage, keep the bars refrigerated or freeze them as directed.
- Store the bars in an airtight container in the refrigerator for up to 5 days.
- Freeze individually wrapped bars in a freezer-safe container for up to 3 months.